Creating and securing your first AWS account
Oct 16, 2021
Signing up for AWS is straightforward, and with a few extra steps you can keep your account secure from the start. This guide will show you how to create and secure your first AWS account.
Step 1.0: Create an AWS account
Follow these instructions and create an AWS account. The AWS account is free, but you’ll need to add a payment method for any resources you create that are not covered under the AWS free tier. Although the free tier is generous, you’ll want to keep an eye on your billing statements just in case.
Step 2.0: Log in as the root user & secure your AWS account
Log in to the console here: https://console.aws.amazon.com/ - select “Root user” and log in with the email and password you used to create your AWS account.
After logging in, familiarize yourself with the top navigation bar:

Step 2.1: Securing the root user account
The account you just created is the root account, which in general should be used for initial setup and recovery in case you get locked out. For day-to-day work, you’ll create and use an administrator account instead of using the root account.
First, navigate to the Identity and Access Management (IAM) section and activate Multi-Factor Authentication (MFA) for the root account. Using MFA adds an extra layer of security in case someone tries to access your account. There are many MFA apps available, and my preference is Authy since they provide both desktop and mobile apps that are easy to use.
Step 2.2: Creating a user account
In order to create resources in AWS, you’ll need to create a user account to log in with that is different from the root account you just created.
Navigate to the IAM users section and click “Add users” in the upper right corner. Enter your desired username and tick both boxes under “Access type”: programmatic access and AWS Management Console access. For the “Console Password” field, select “Custom Password” and enter the password you want to use to log in, like this:
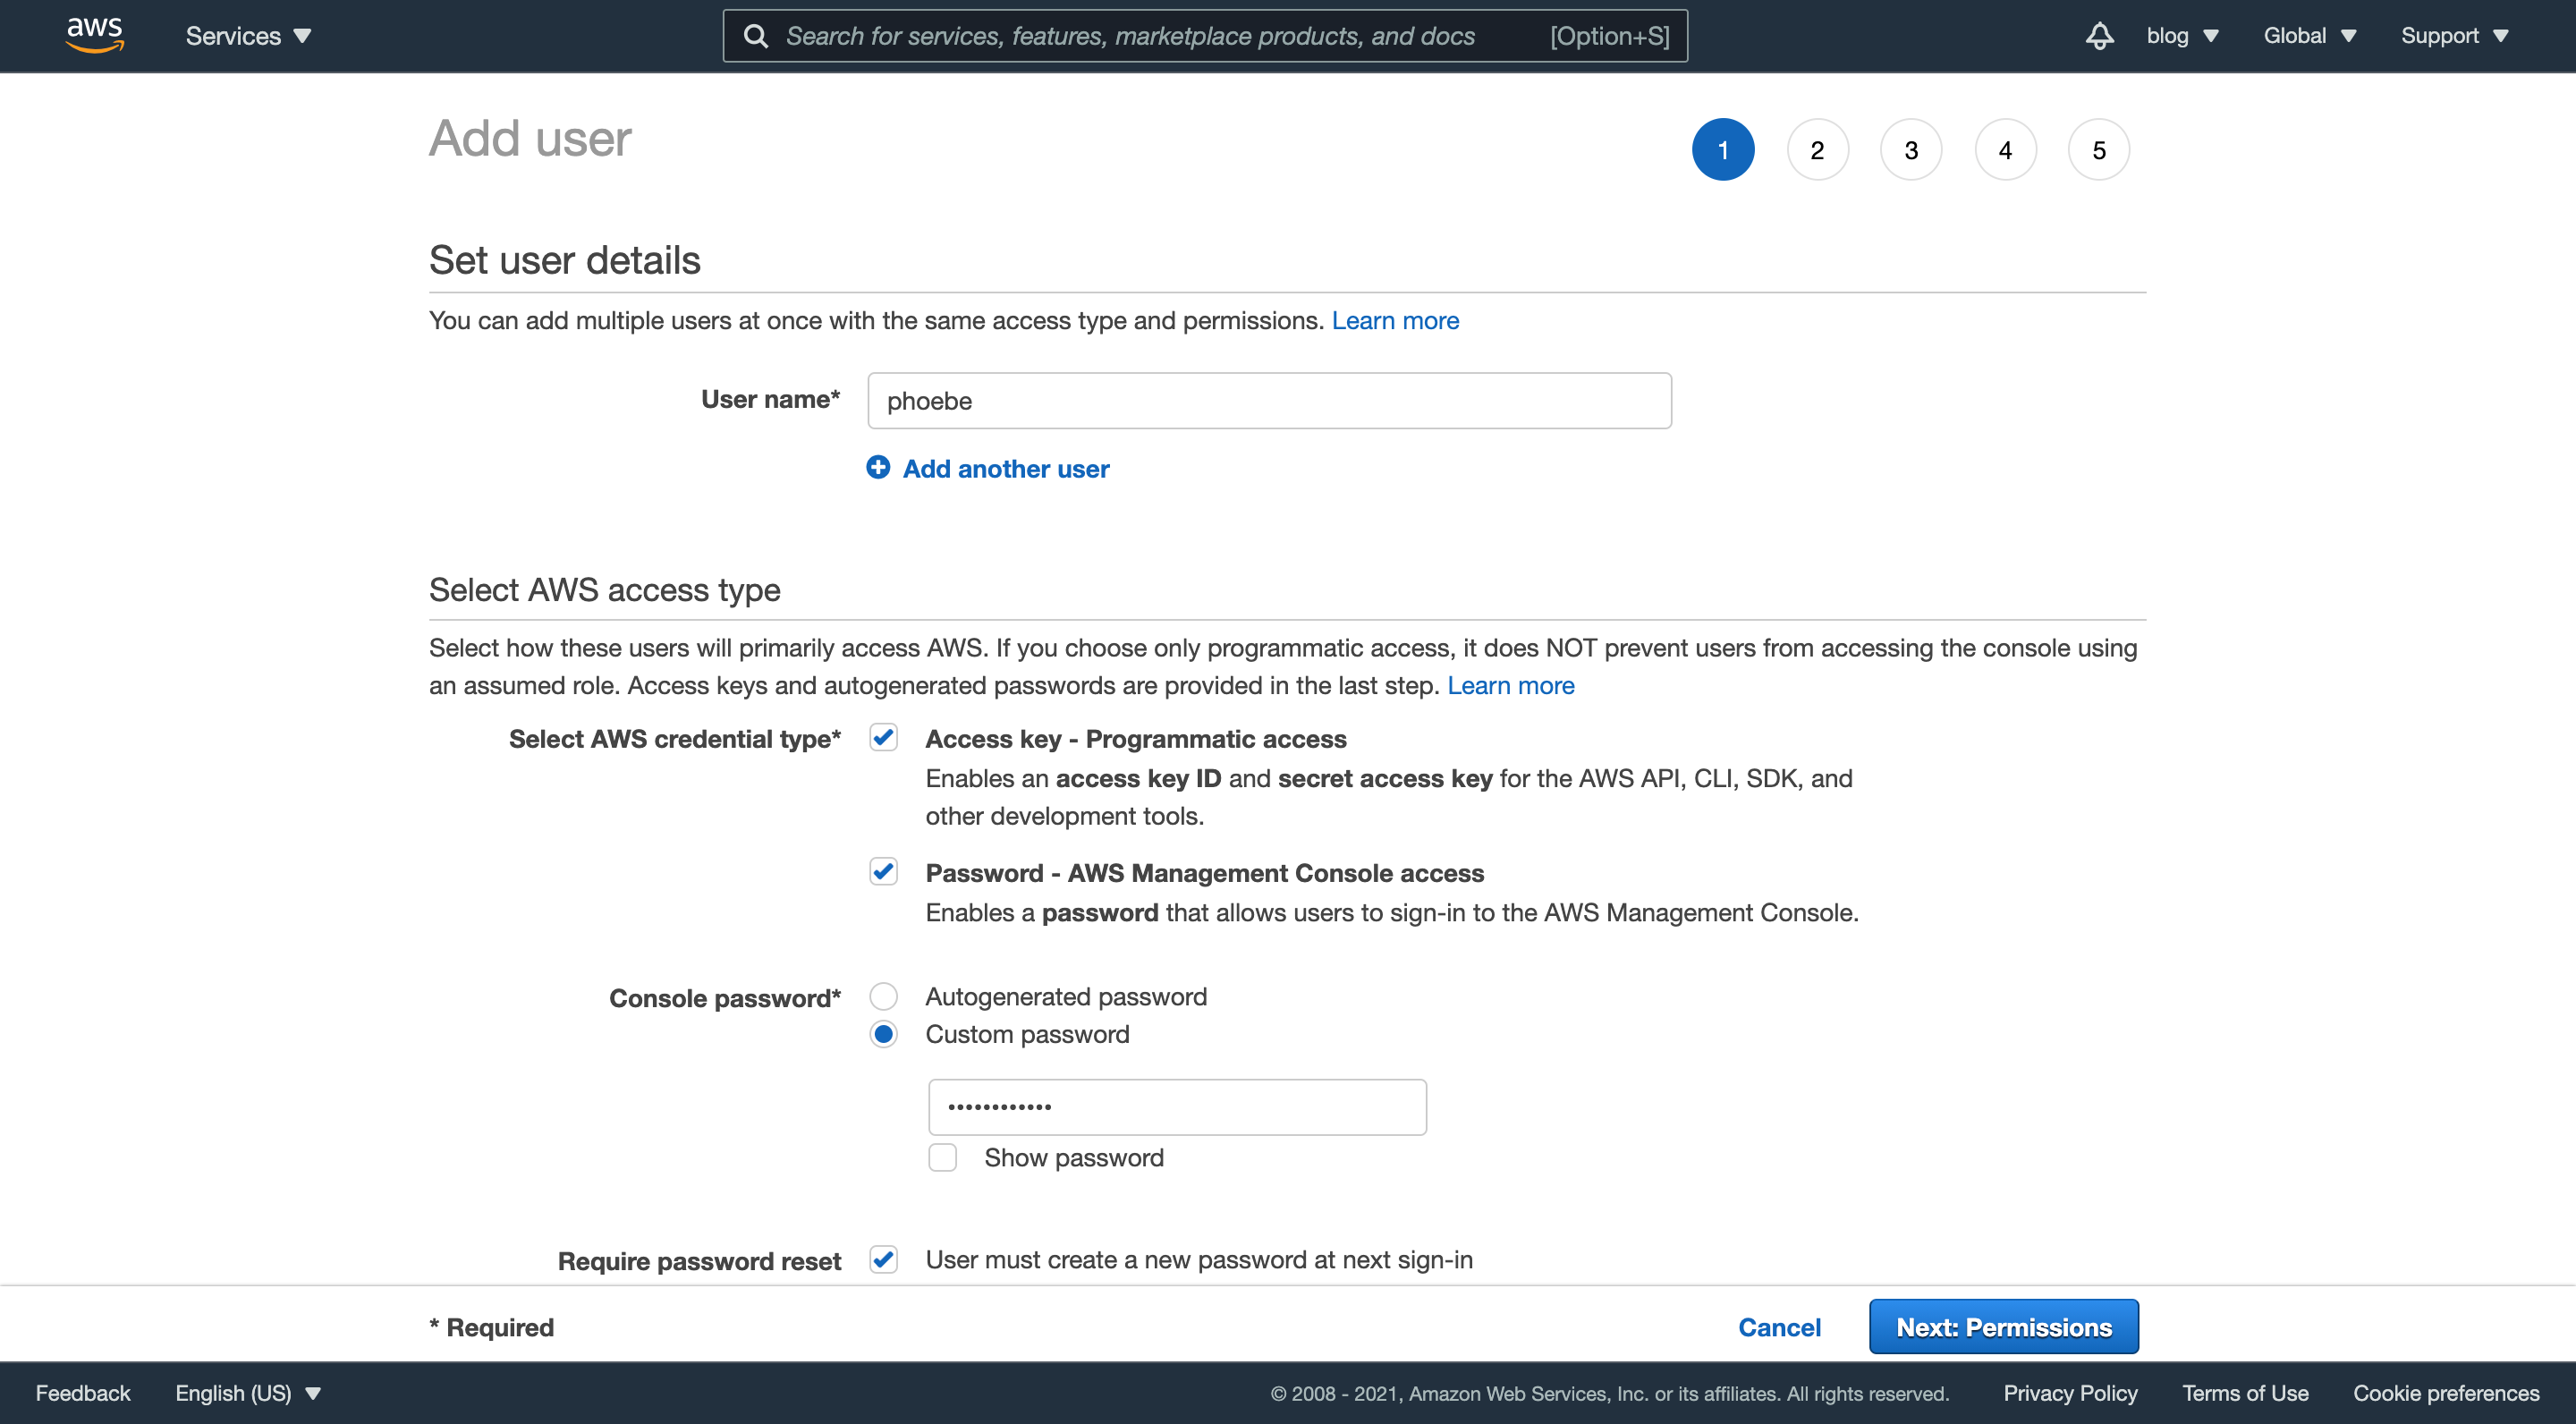
Click “Next: Permissions” and you’ll grant yourself administrator permissions.
Step 2.3: Creating the administrators user group
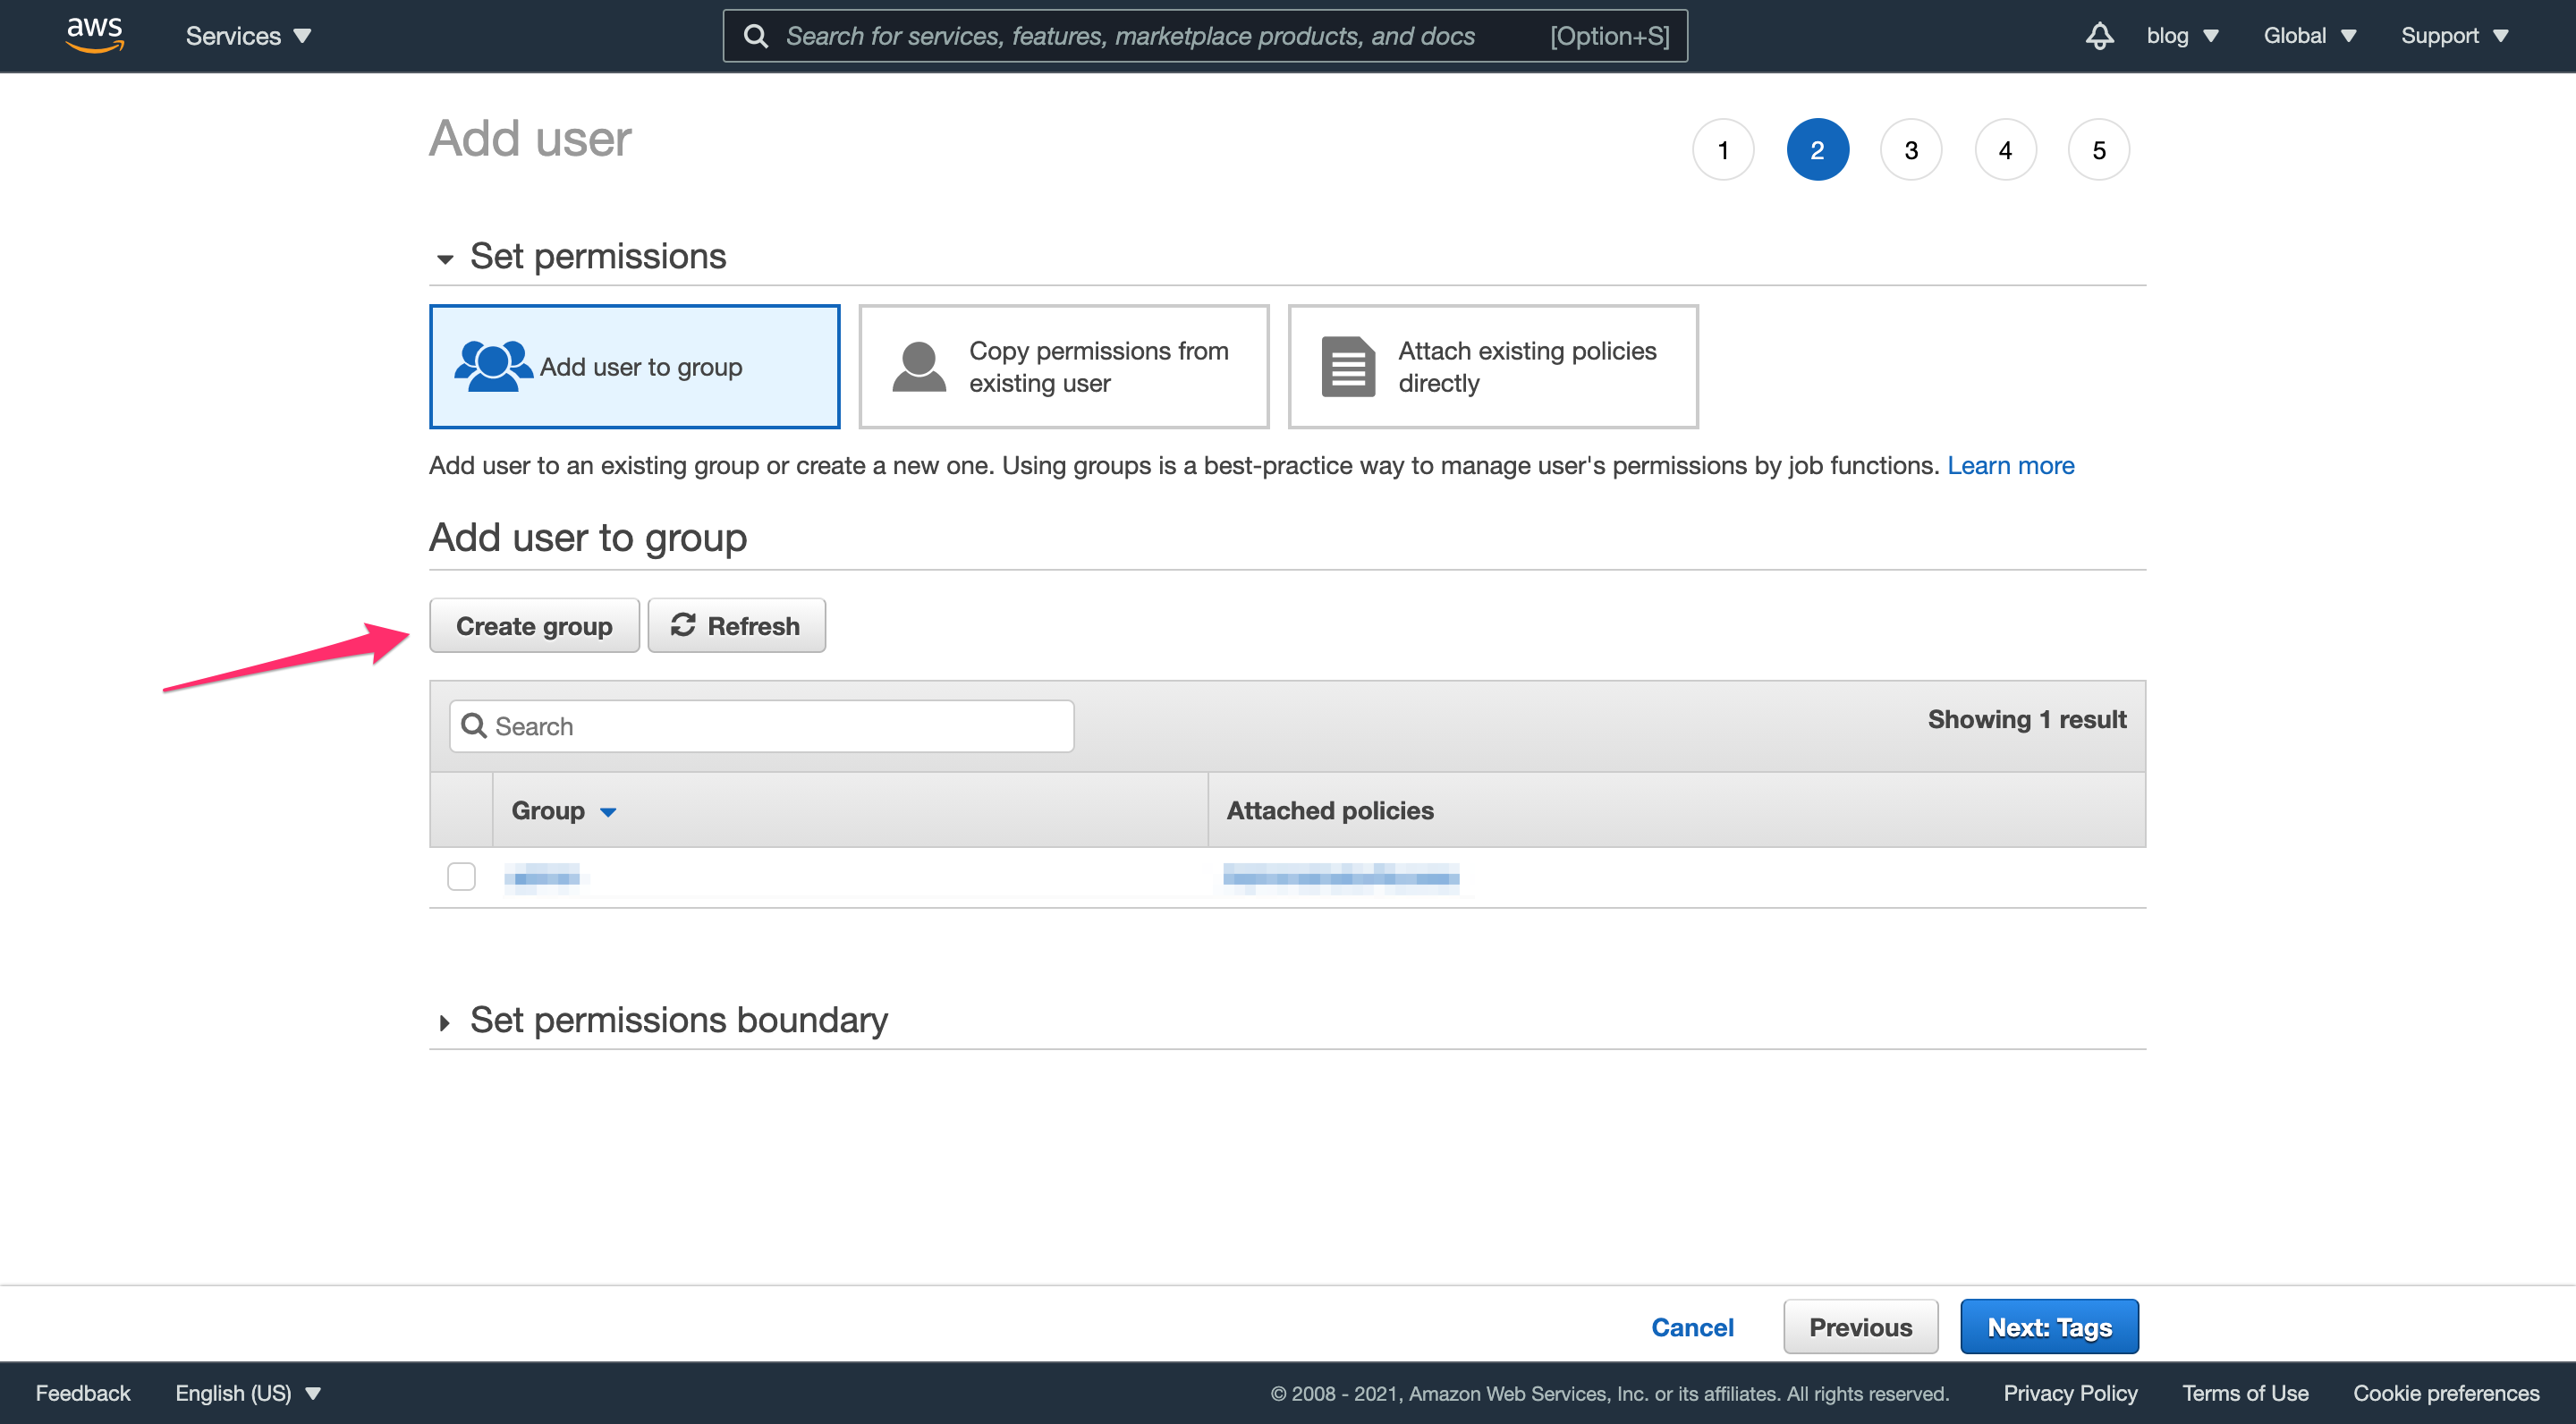
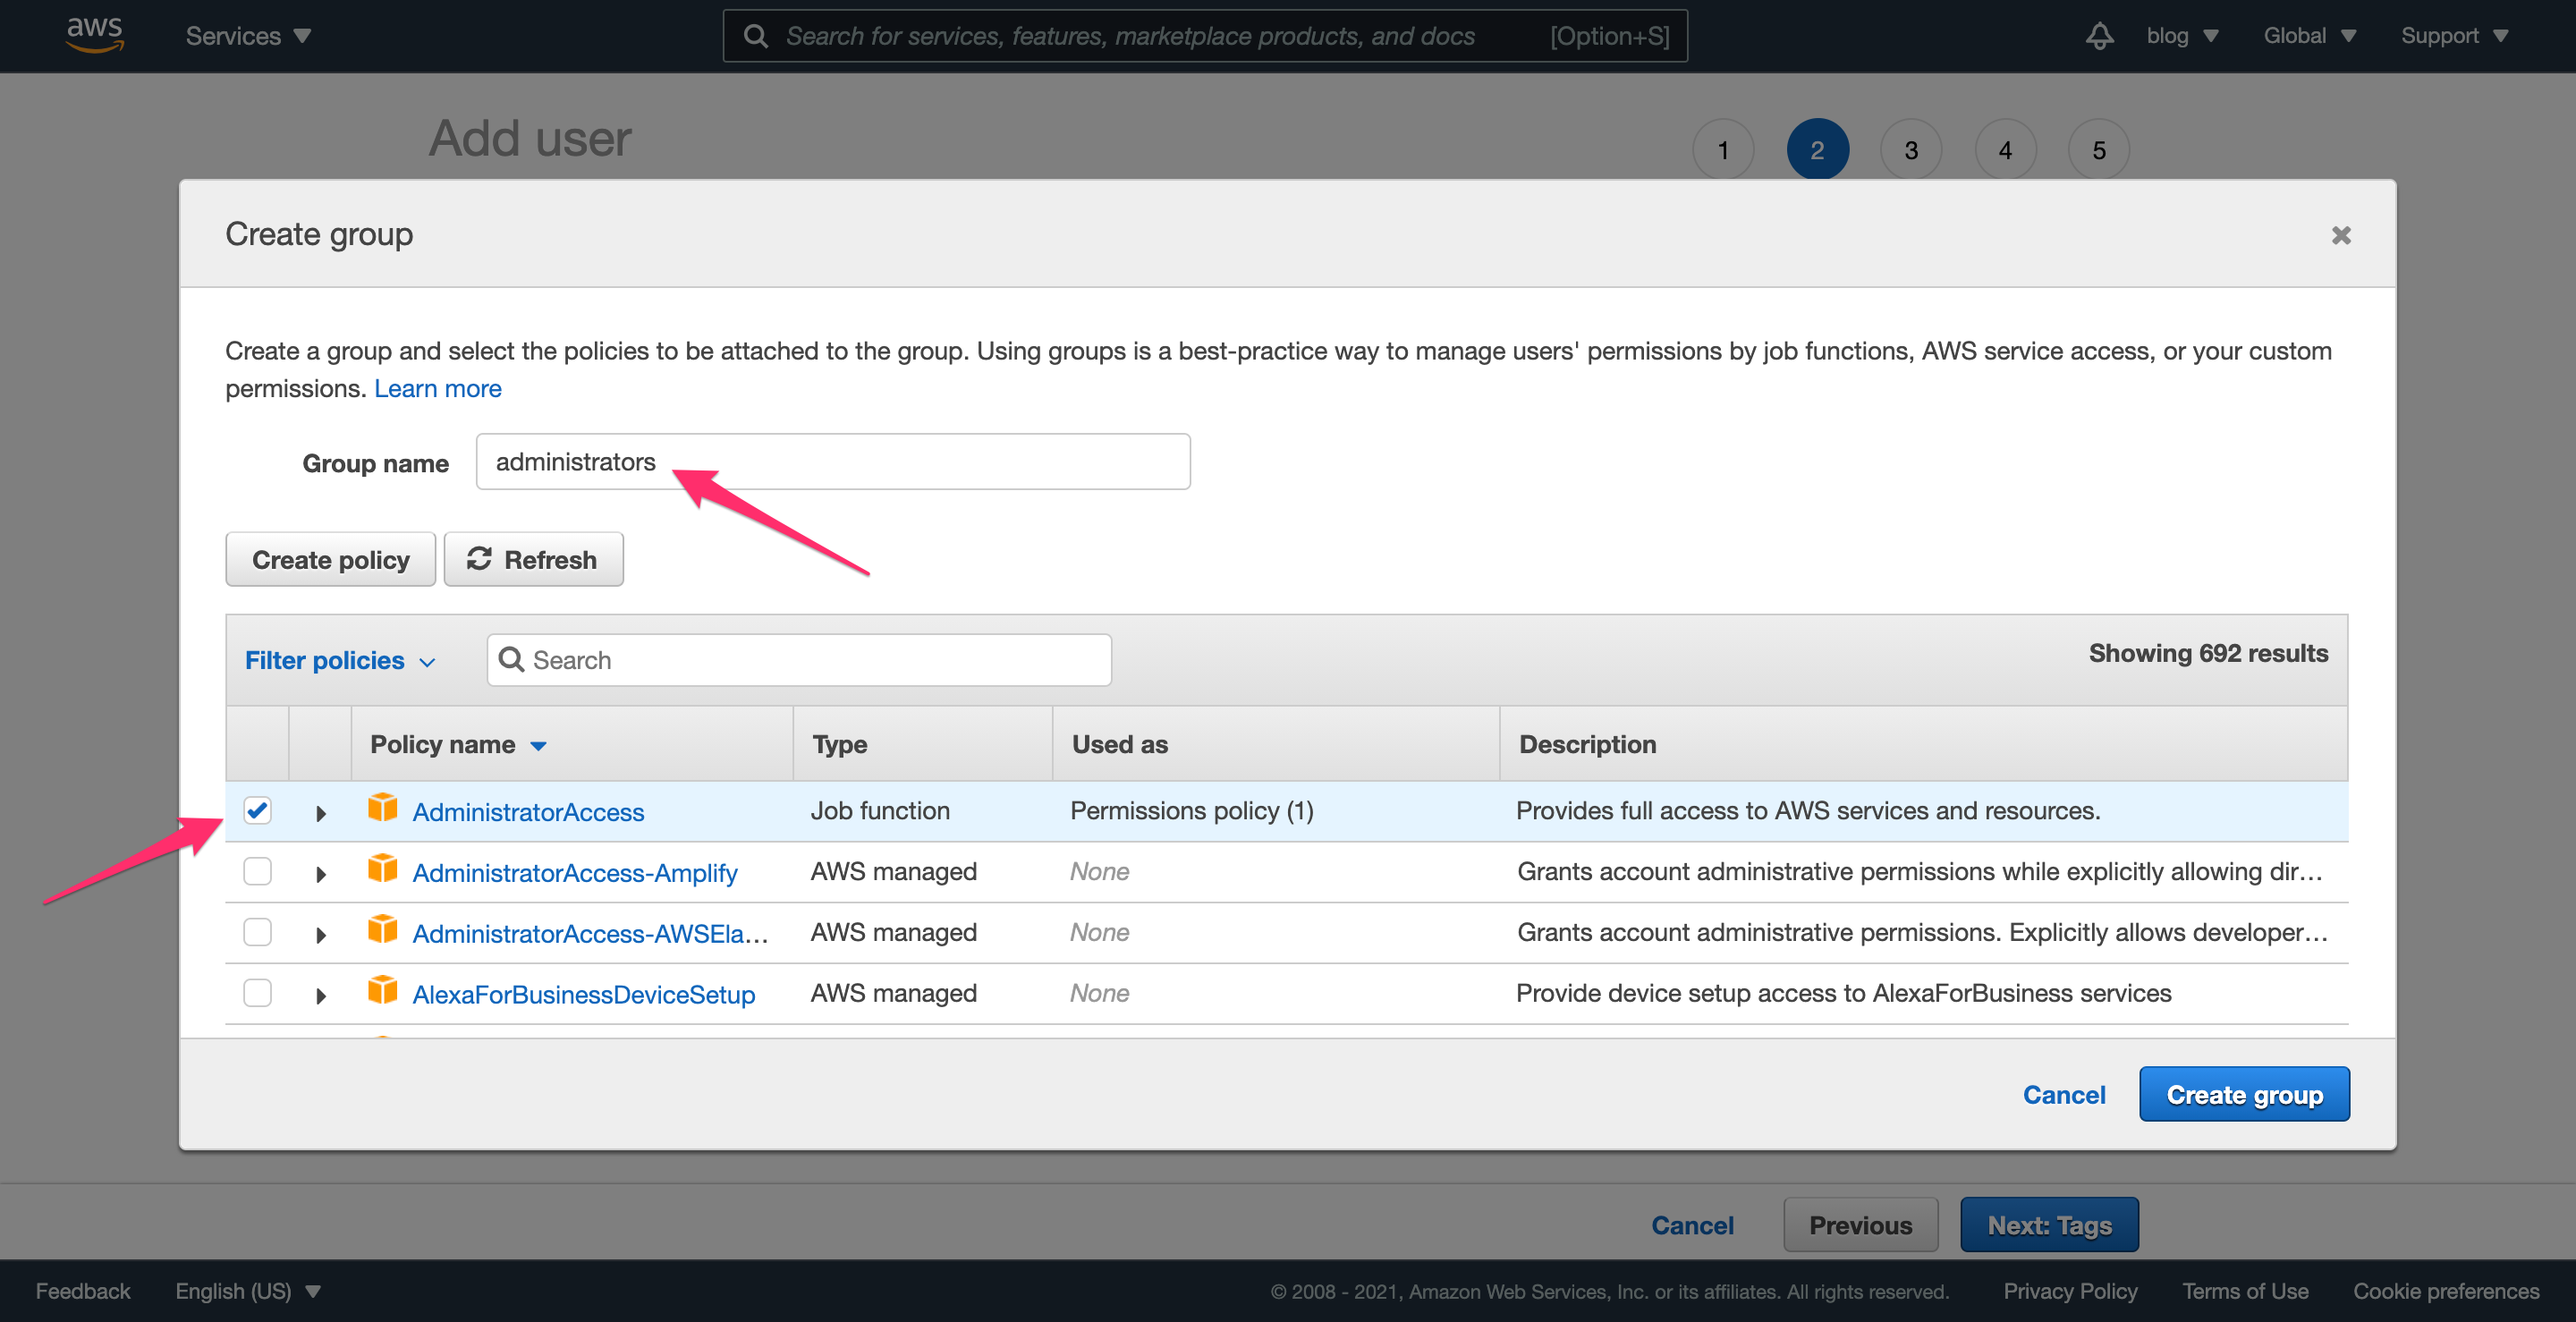
On this page, click “Create group” and do the following:
- provide a name for the group (“administrators” in this example)
- check the box next to “Administrator Access”
- click “Create Group”
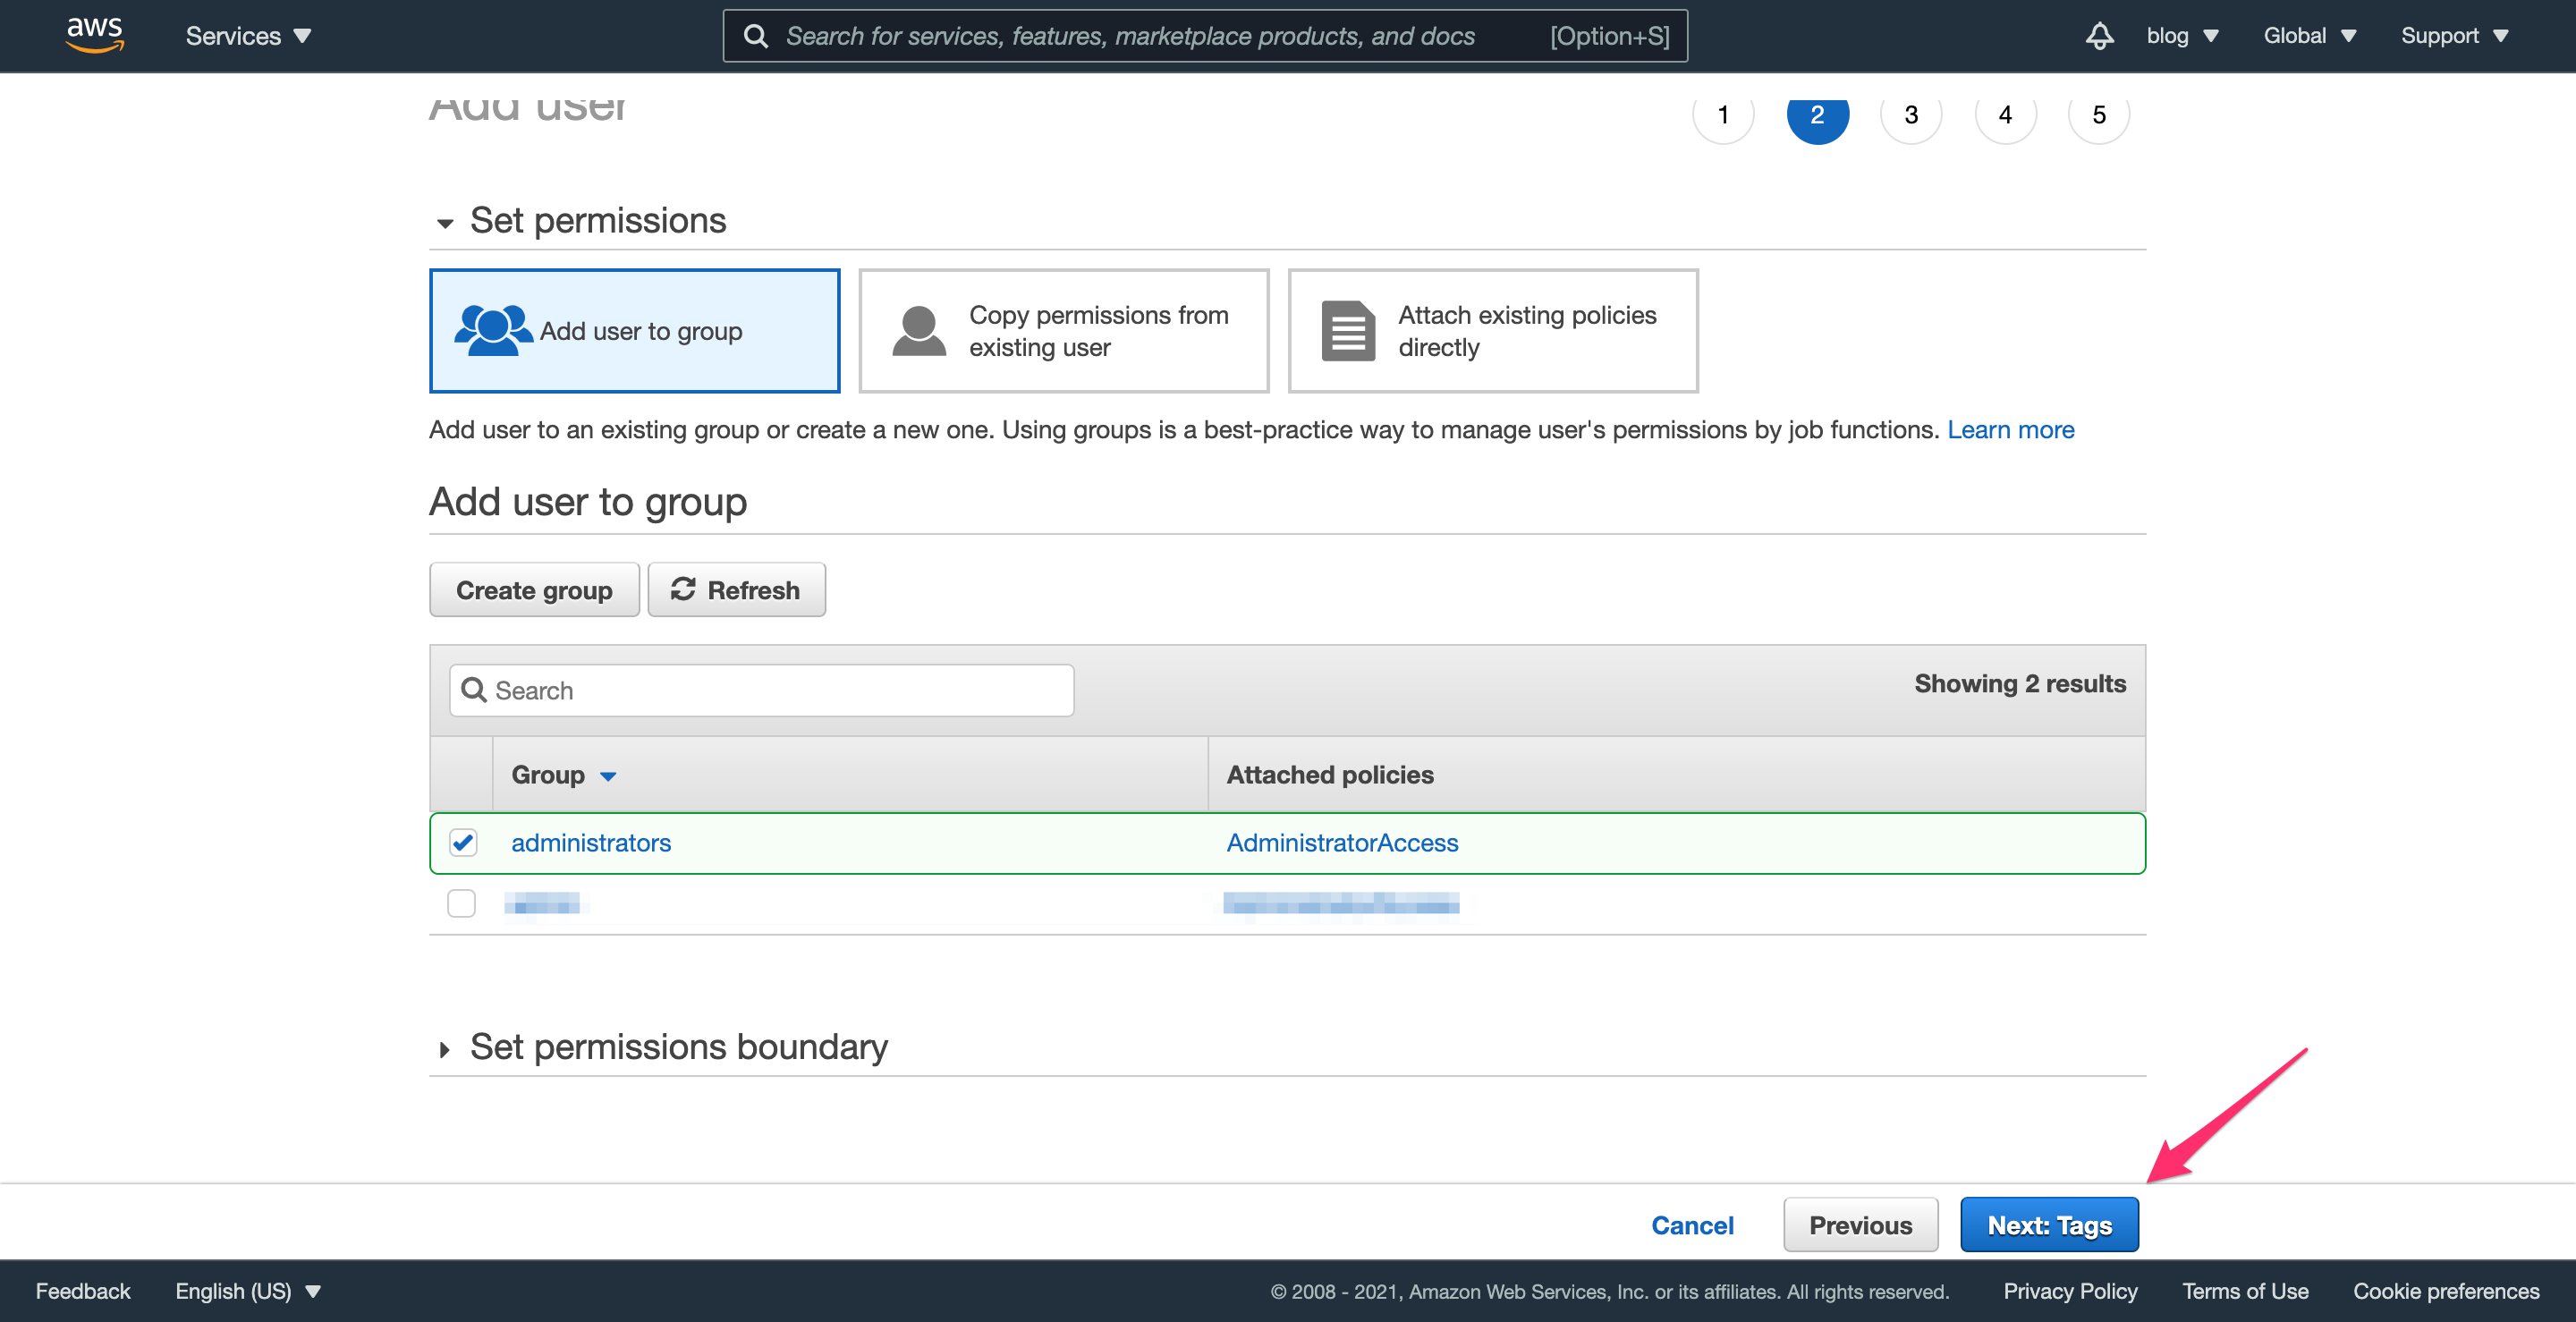
After creation, the group will be selected automatically, so click “Next: Tags” to continue. You don’t need to add any tags, so click “Next: Review” to finish creating the admin user.
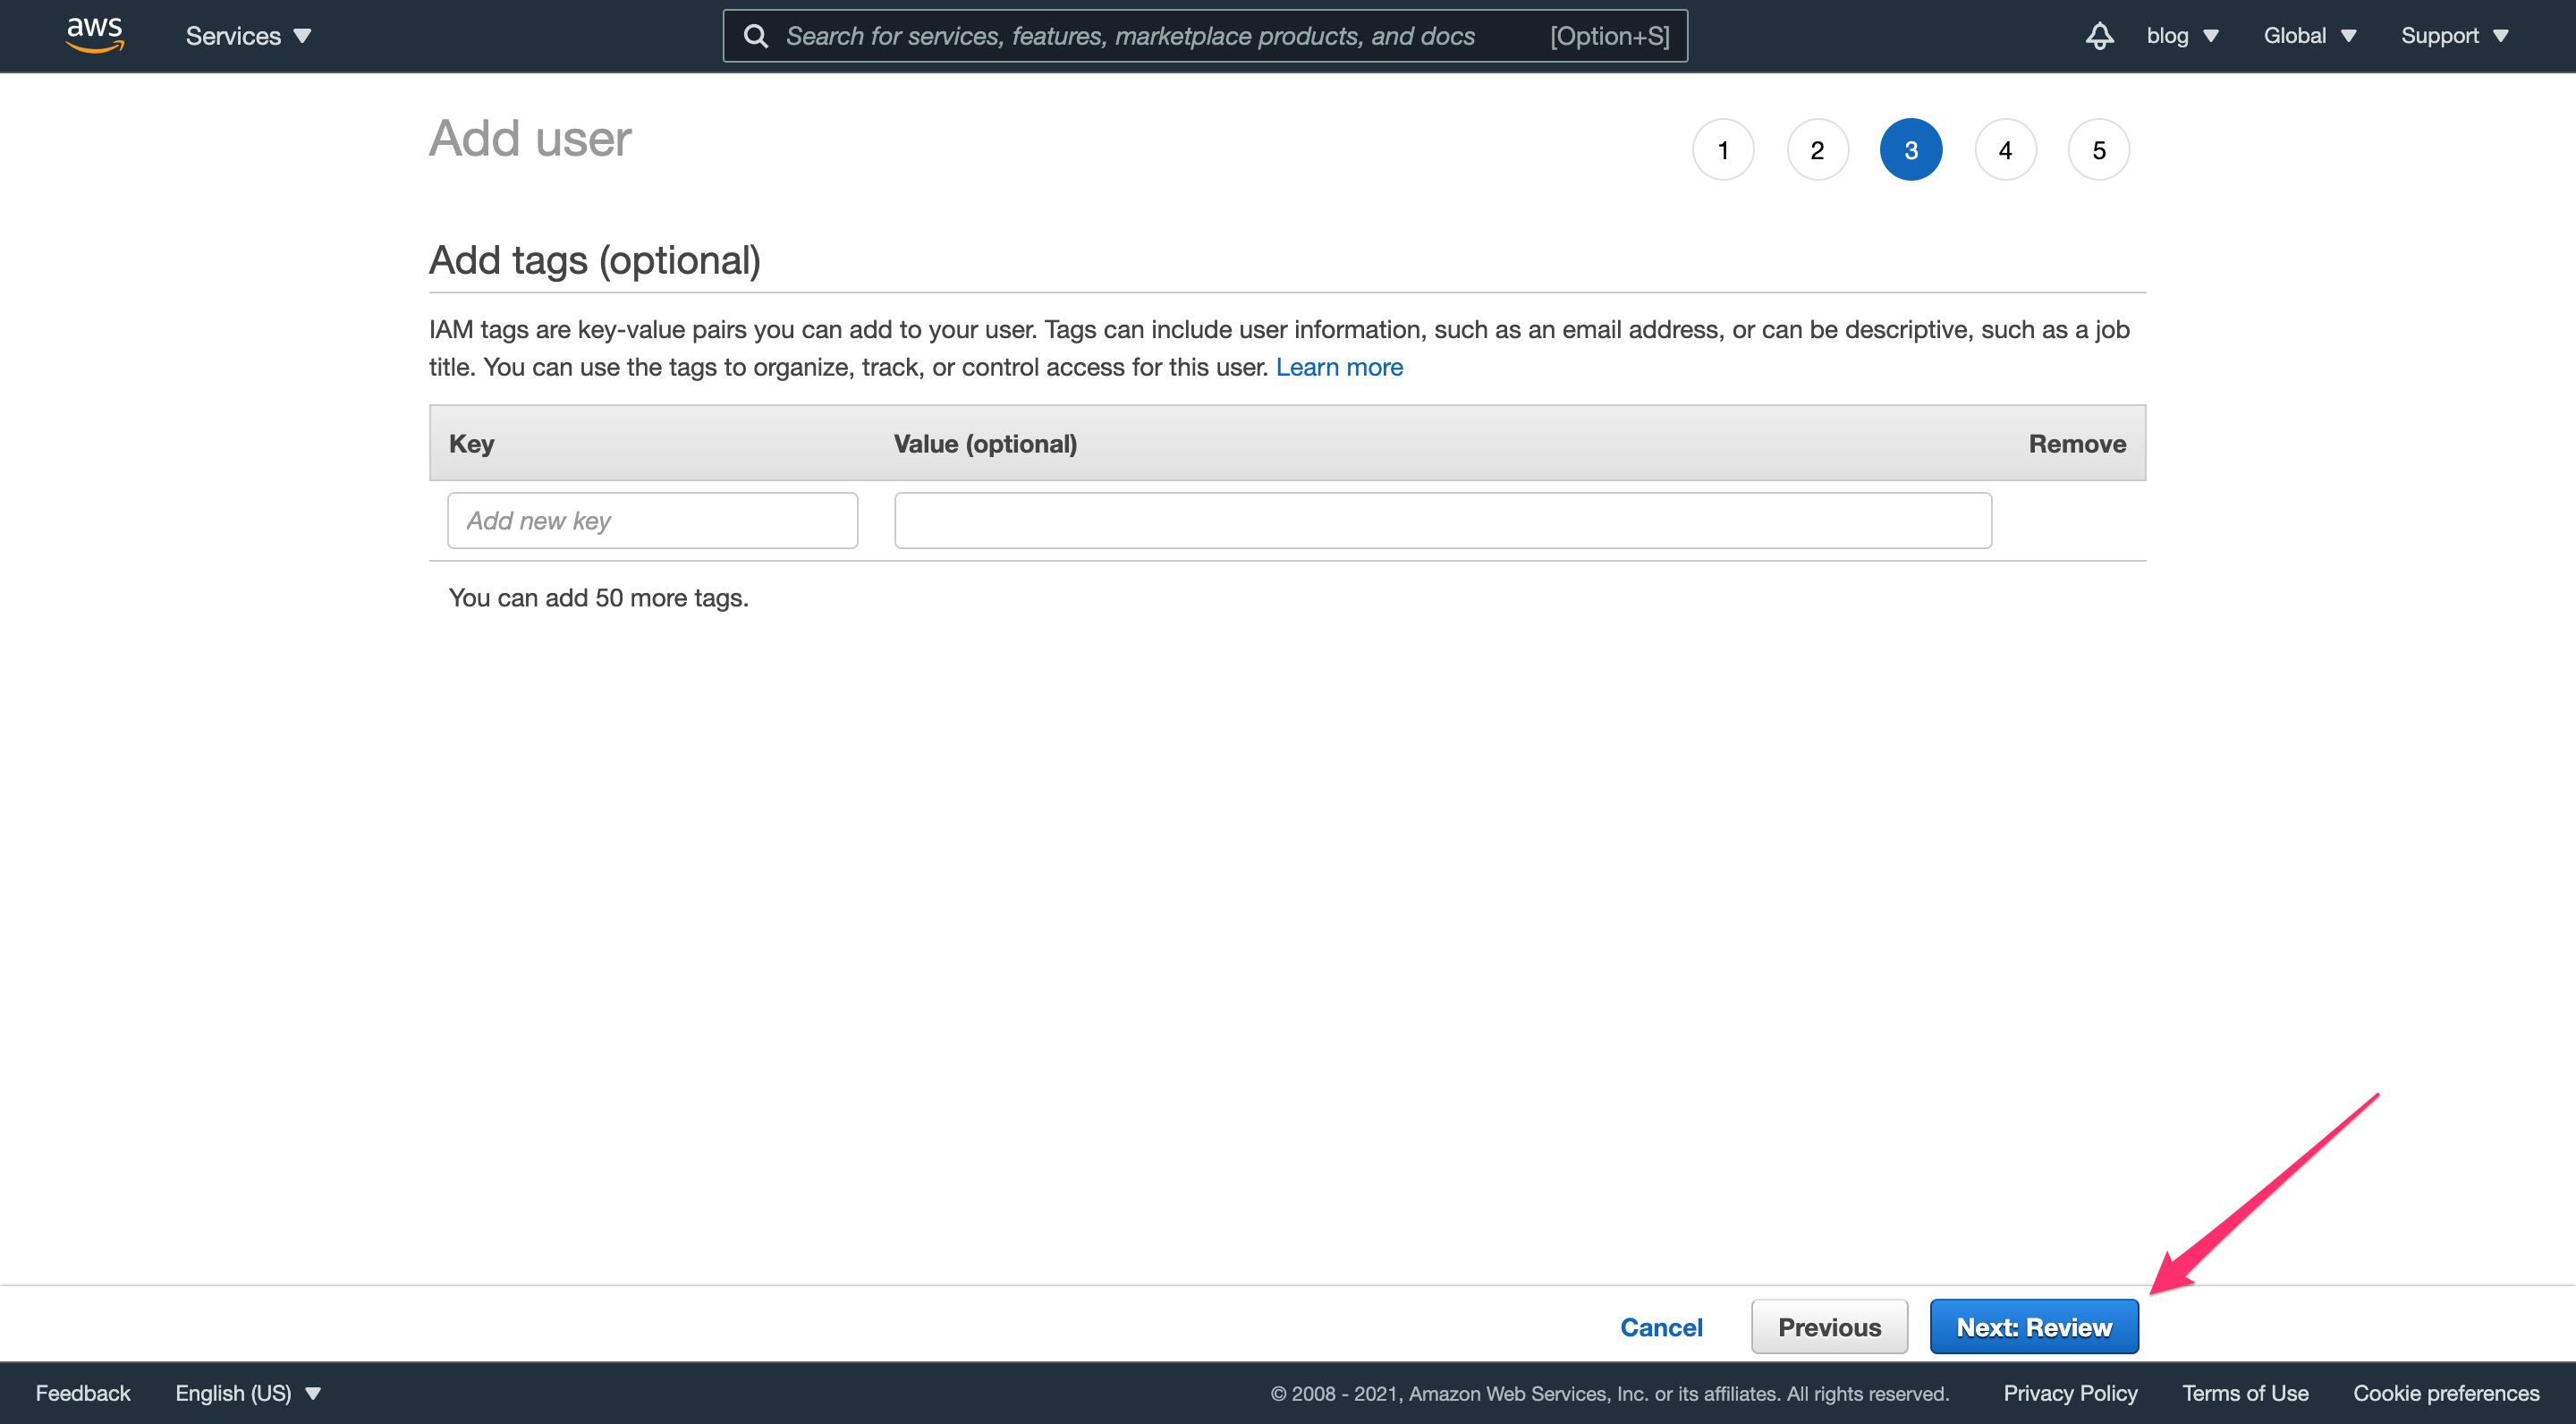
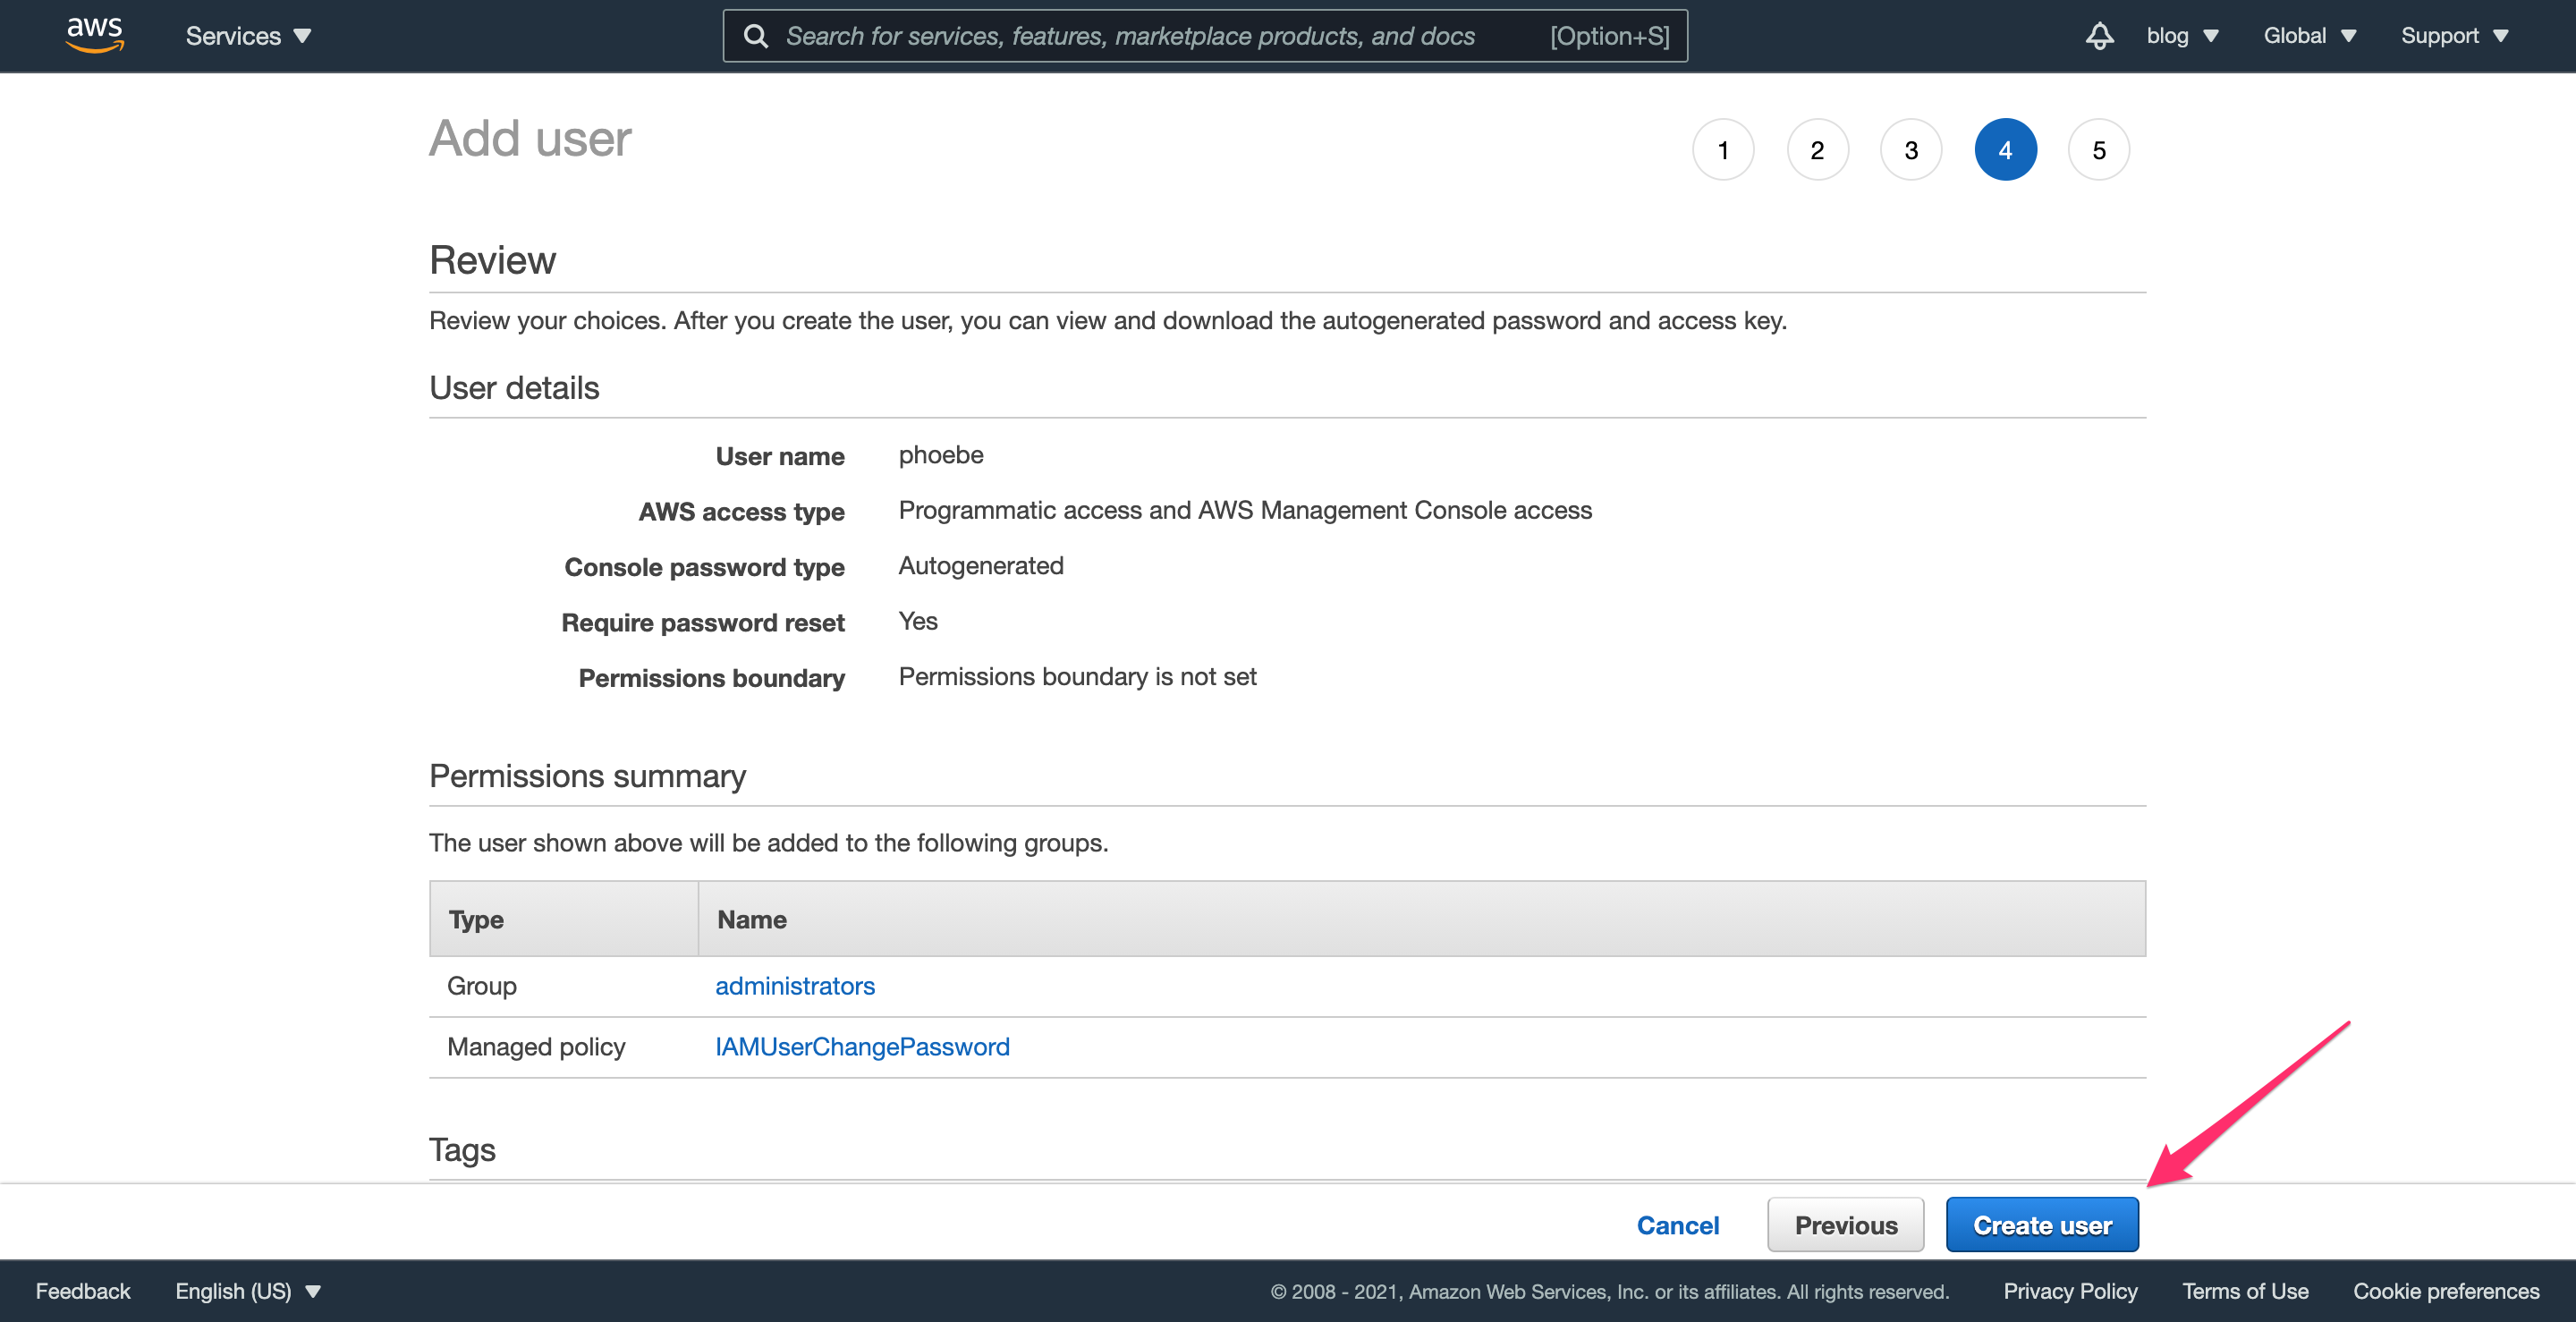
Step 2.4: Finish creating the user
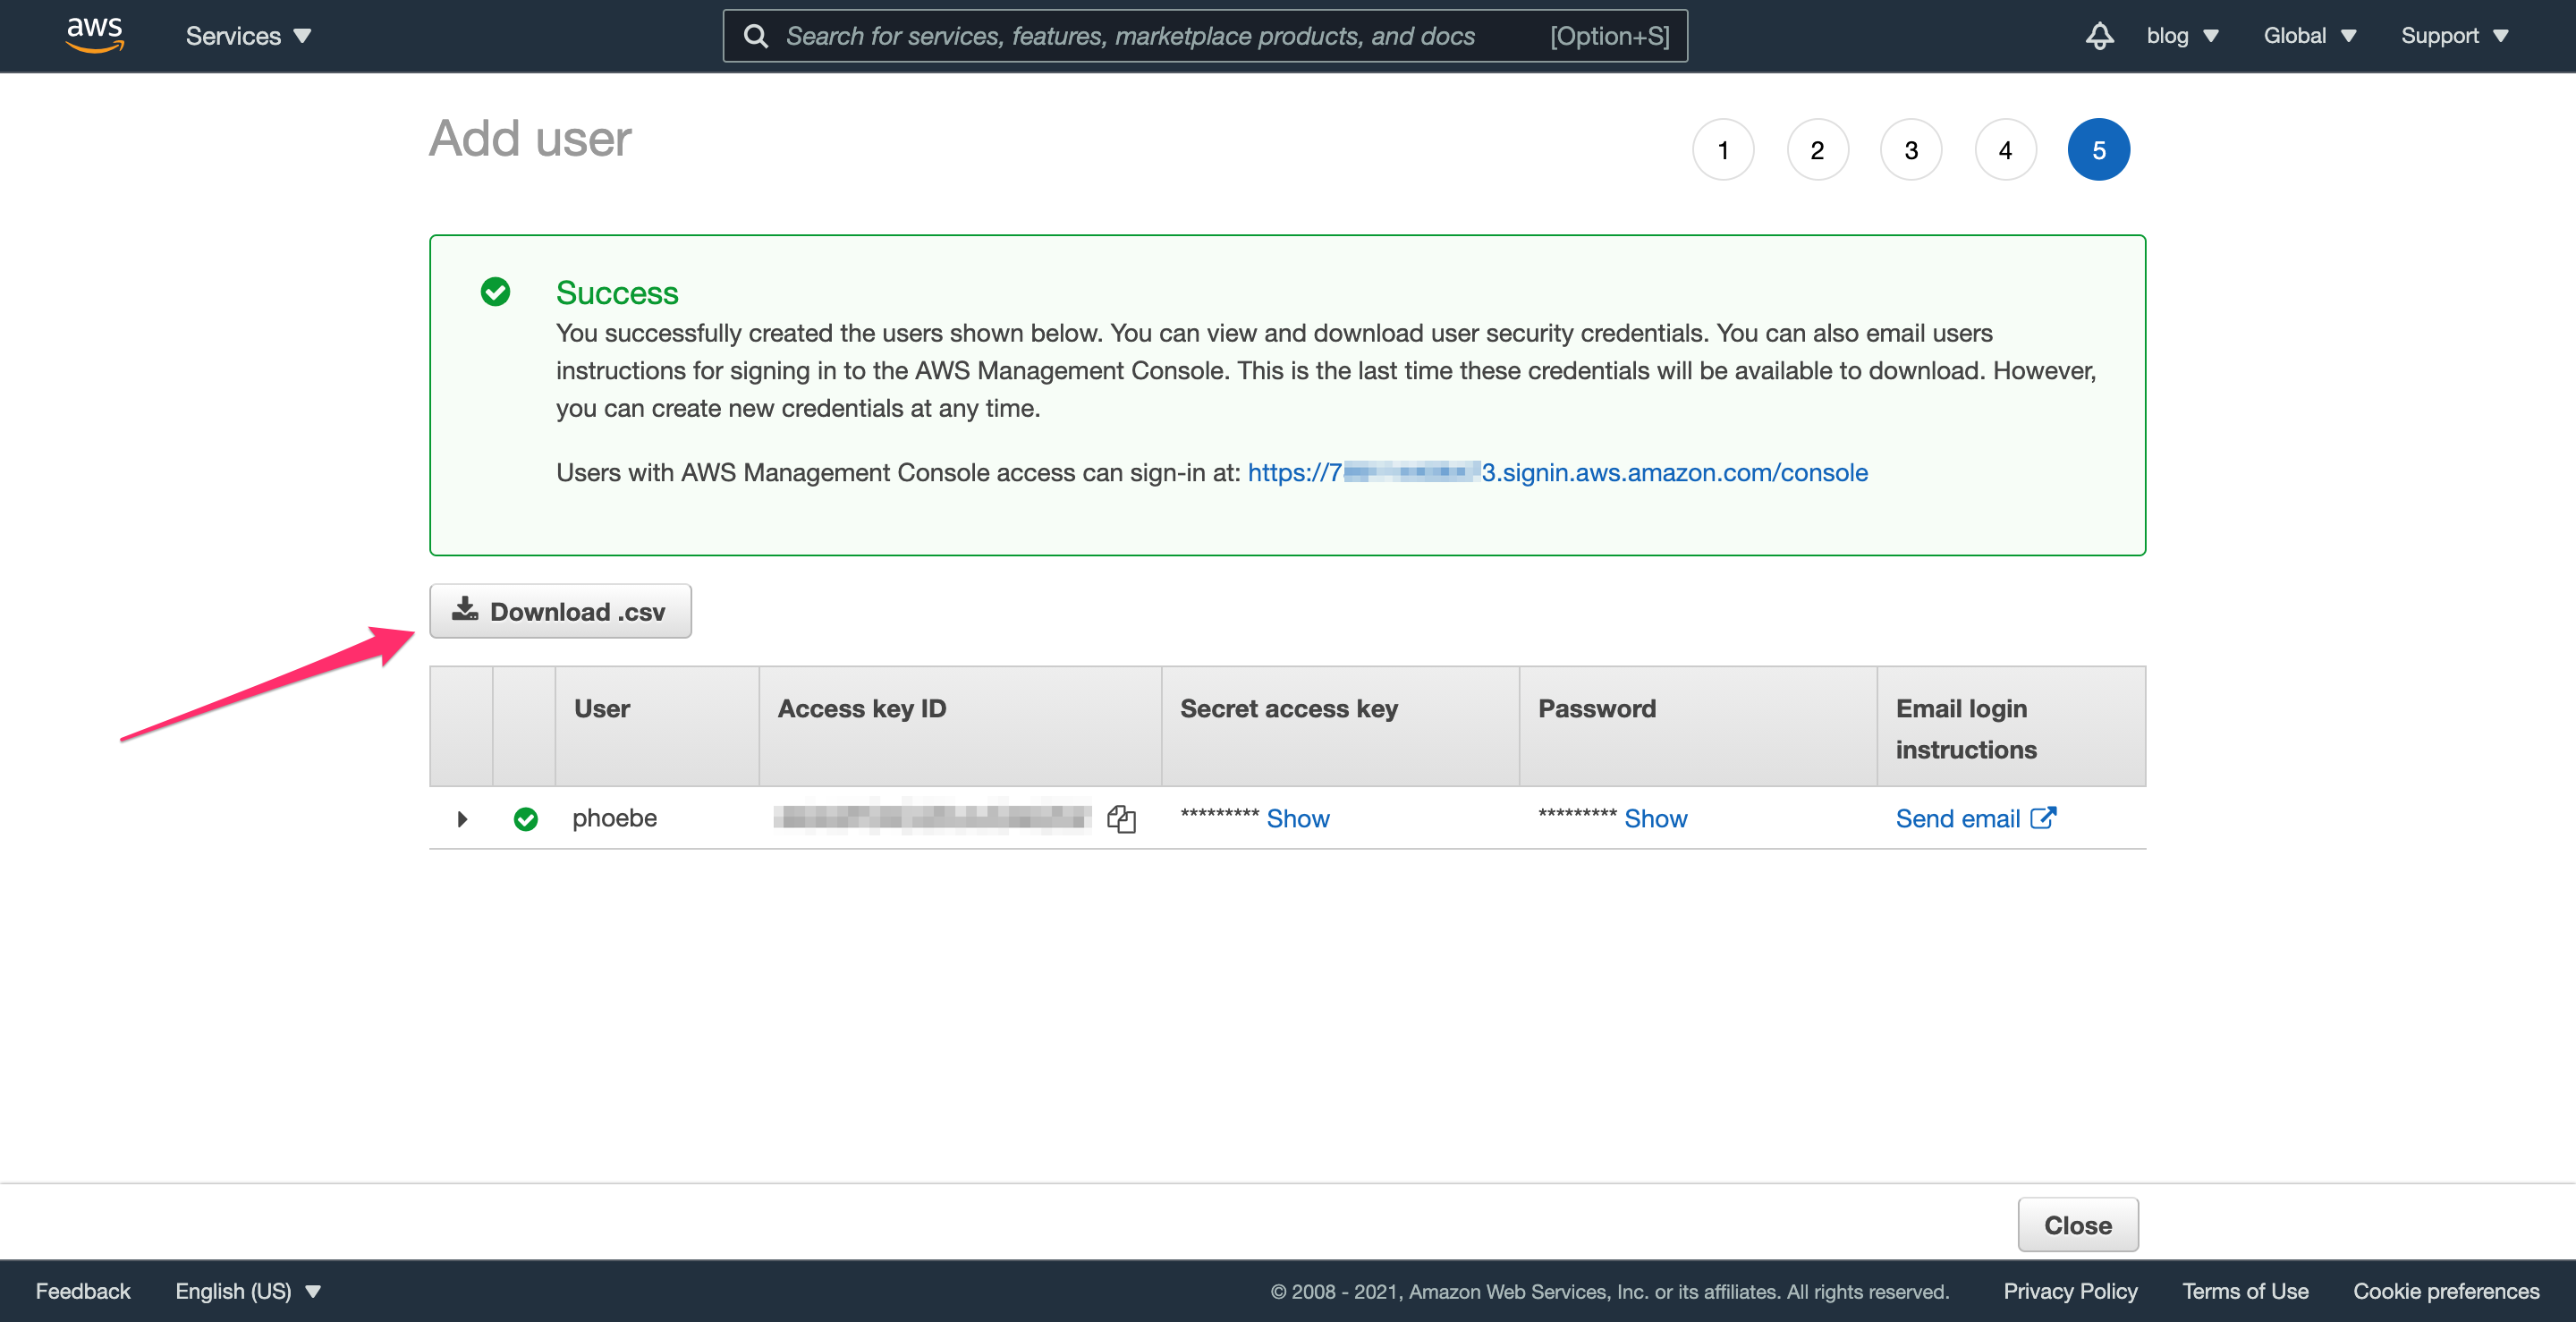
Step 2.5: Download the user credentials CSV
Click “Download .csv” and you’ll get a file that looks like this:
User name,Password,Access key ID,Secret access key,Console login link
phoebe,<password>,AKIA3PO...,<secret access key>,https://<account id>.signin.aws.amazon.com/console
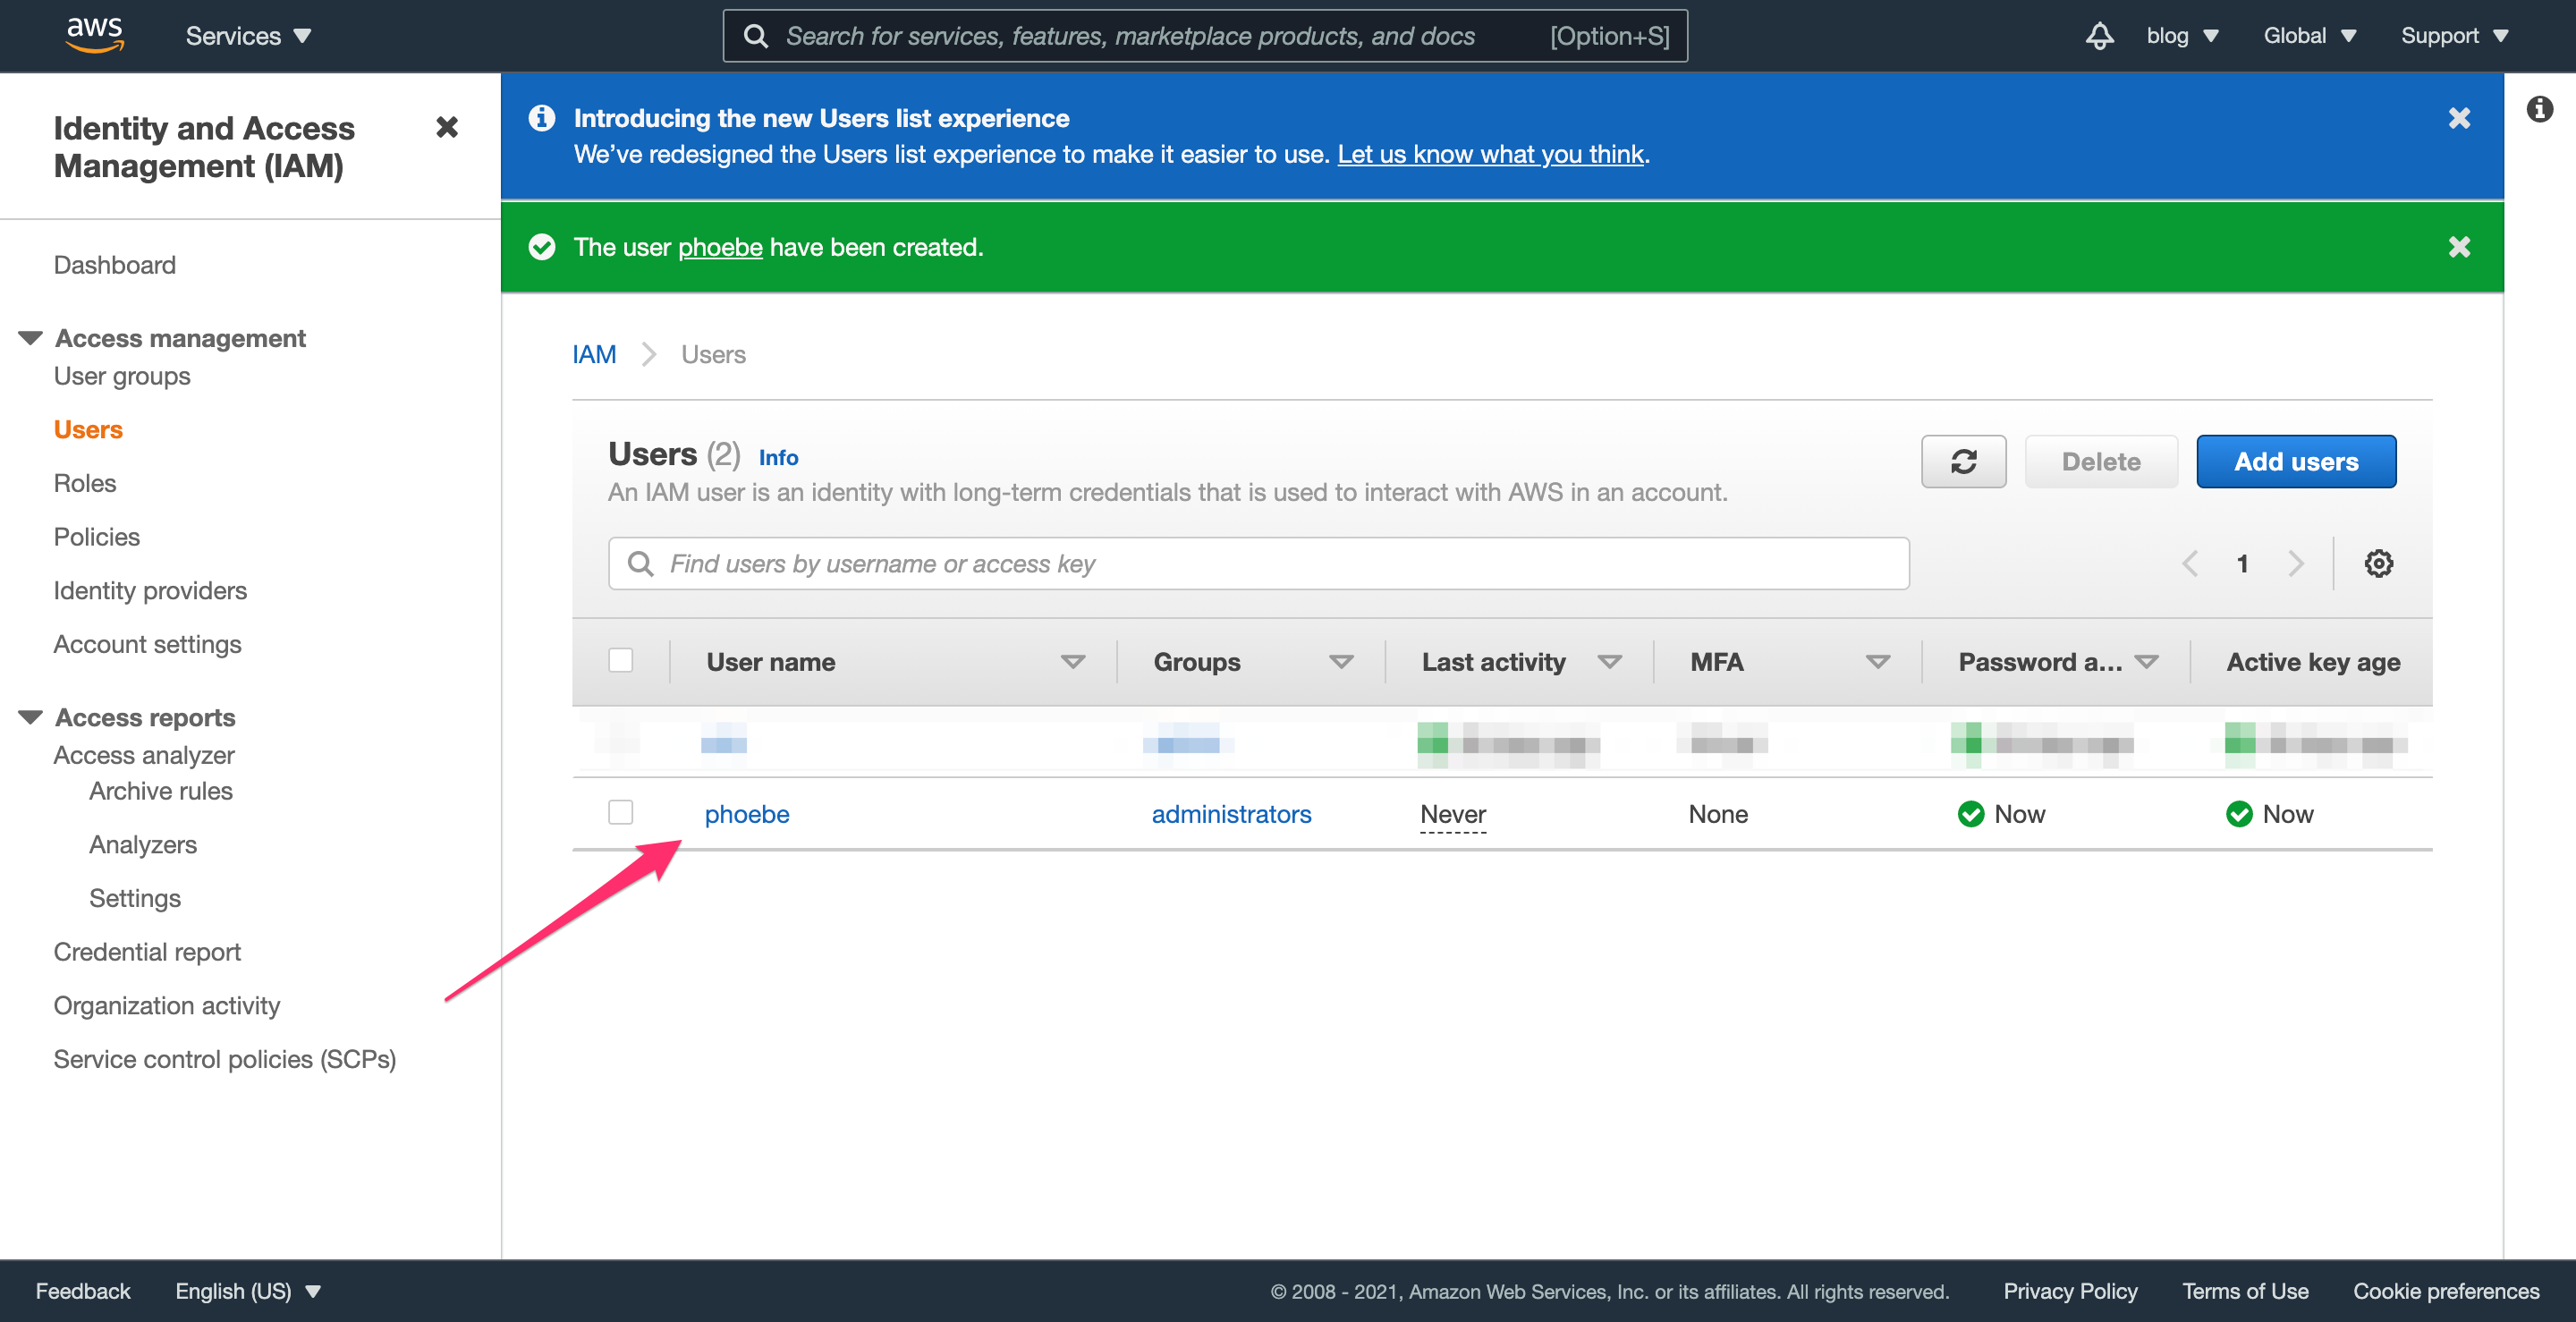
Step 3.0: Sign in as the admin user
In steps 1 and 2, you signed in as the root user in order to create an admin user. You should use this admin account for everything AWS-related moving forward, unless you’re doing something that requires logging in as the root user. In other words, using the root user should be a last resort because it has ultimate control over your entire account.
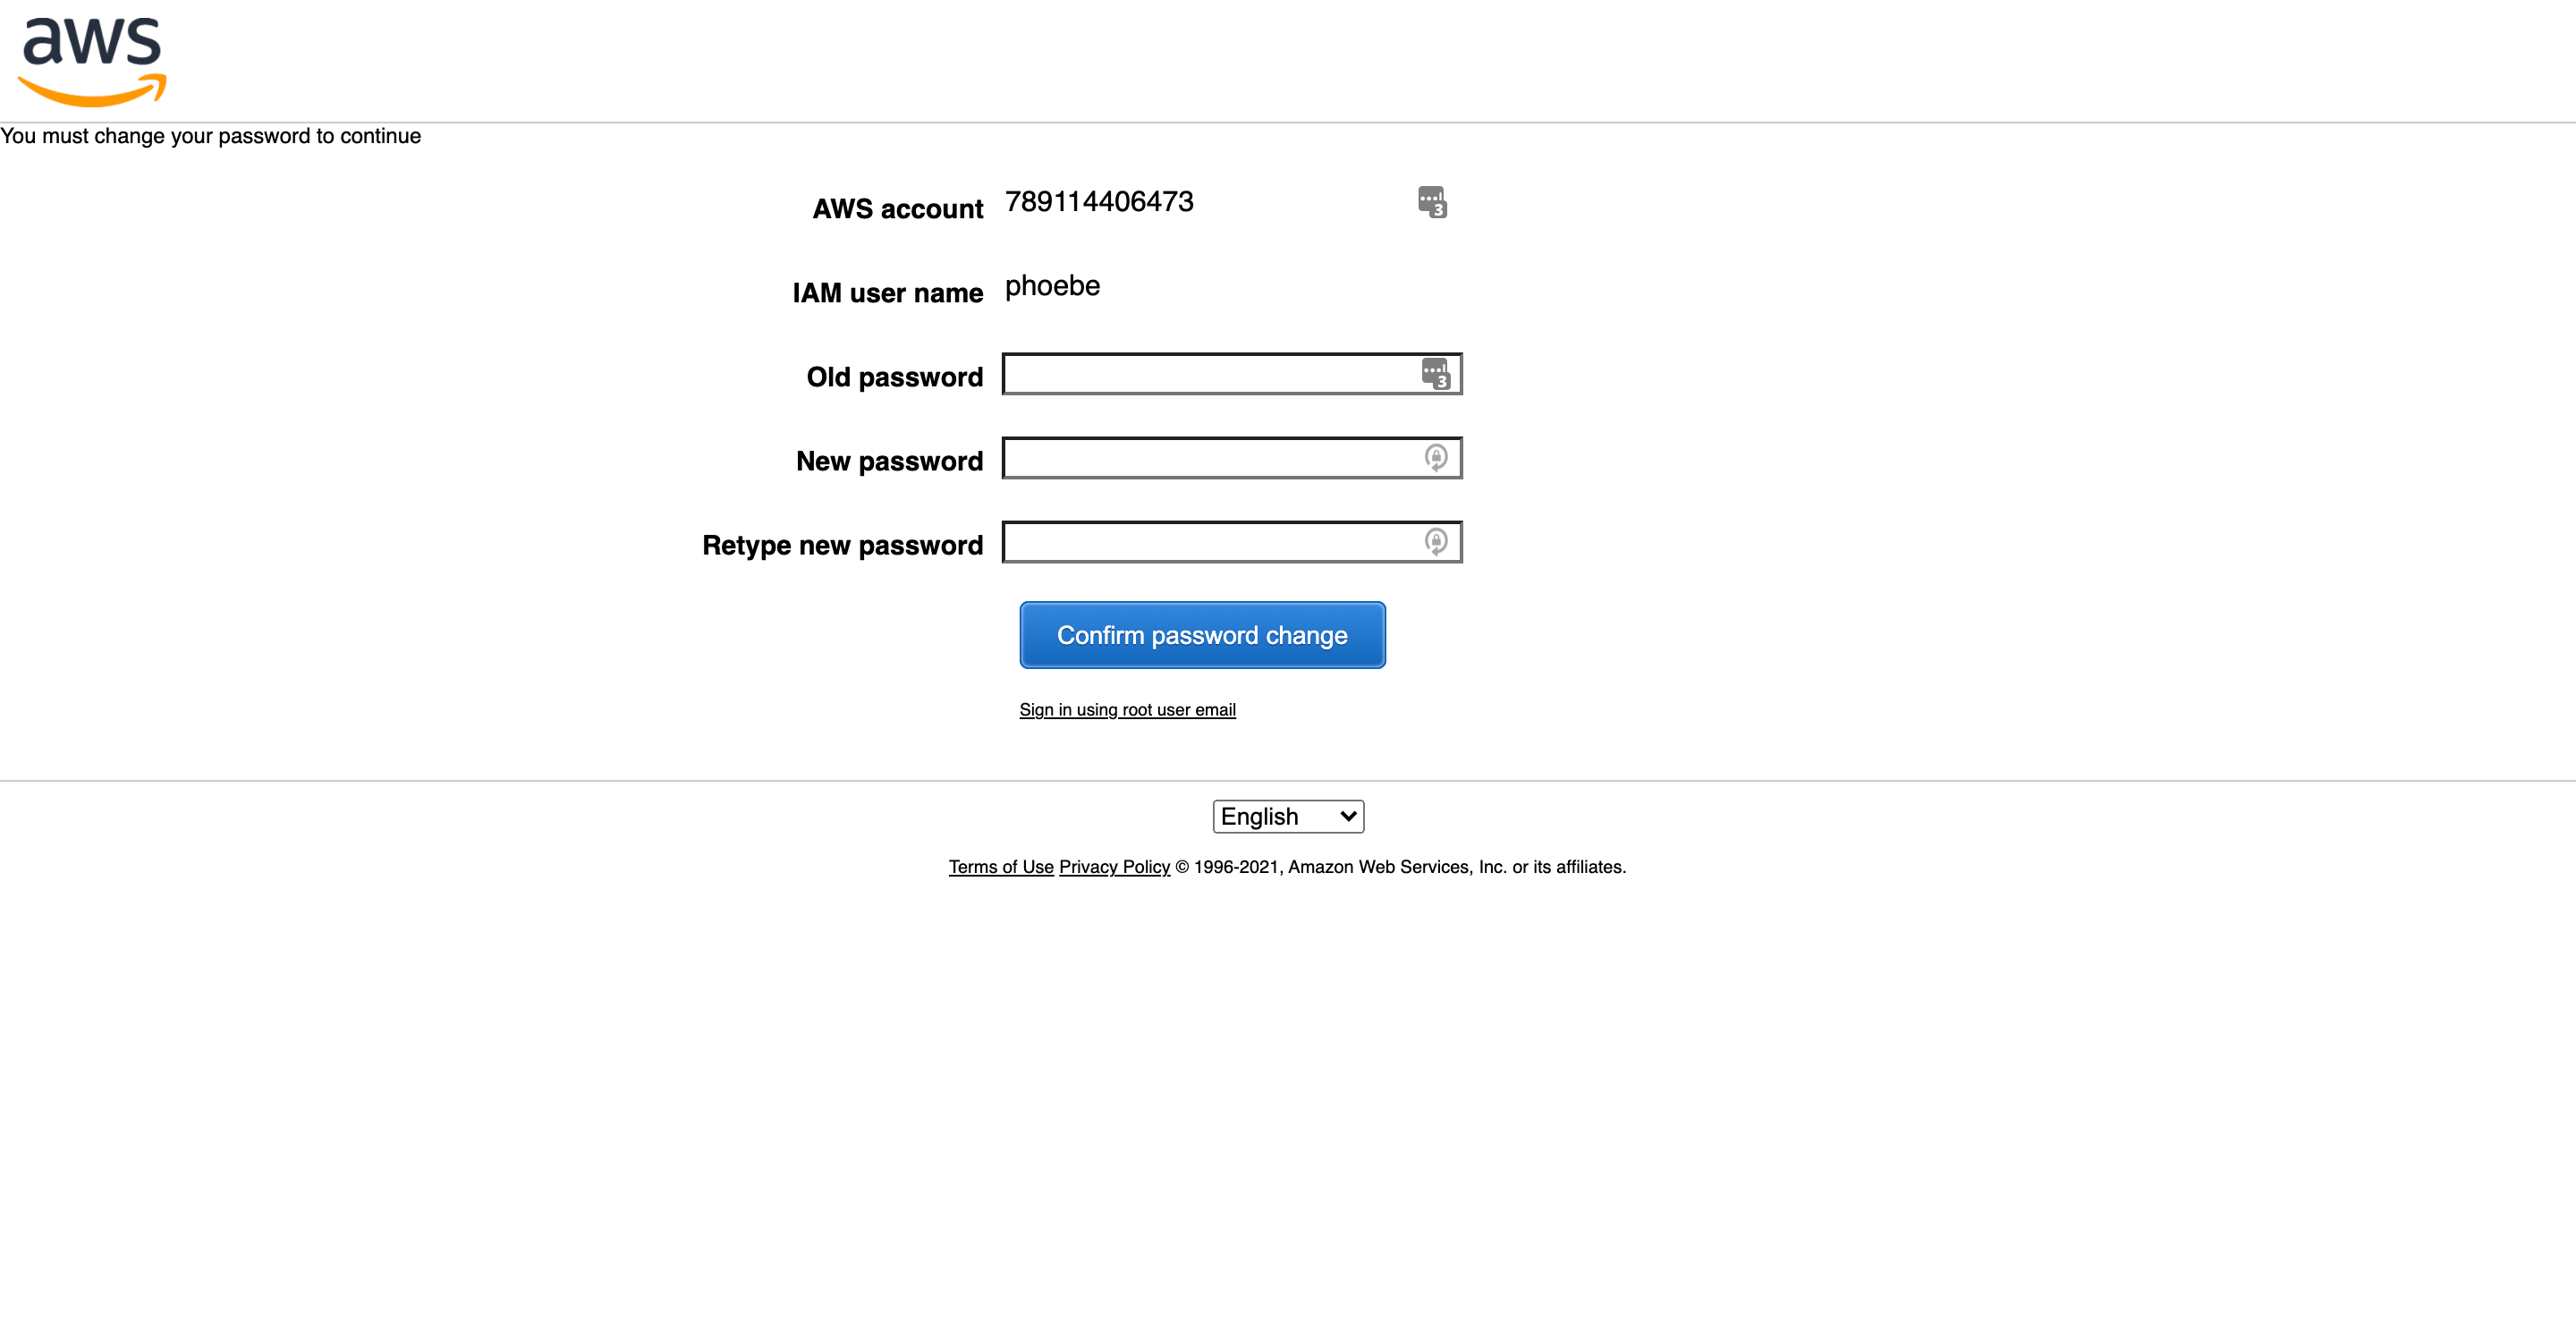
Using the CSV file you downloaded in Step 2.5, use the username, password, and sign-in link to log in to the AWS console as the admin user. You will be prompted to change your password as soon as you log in.

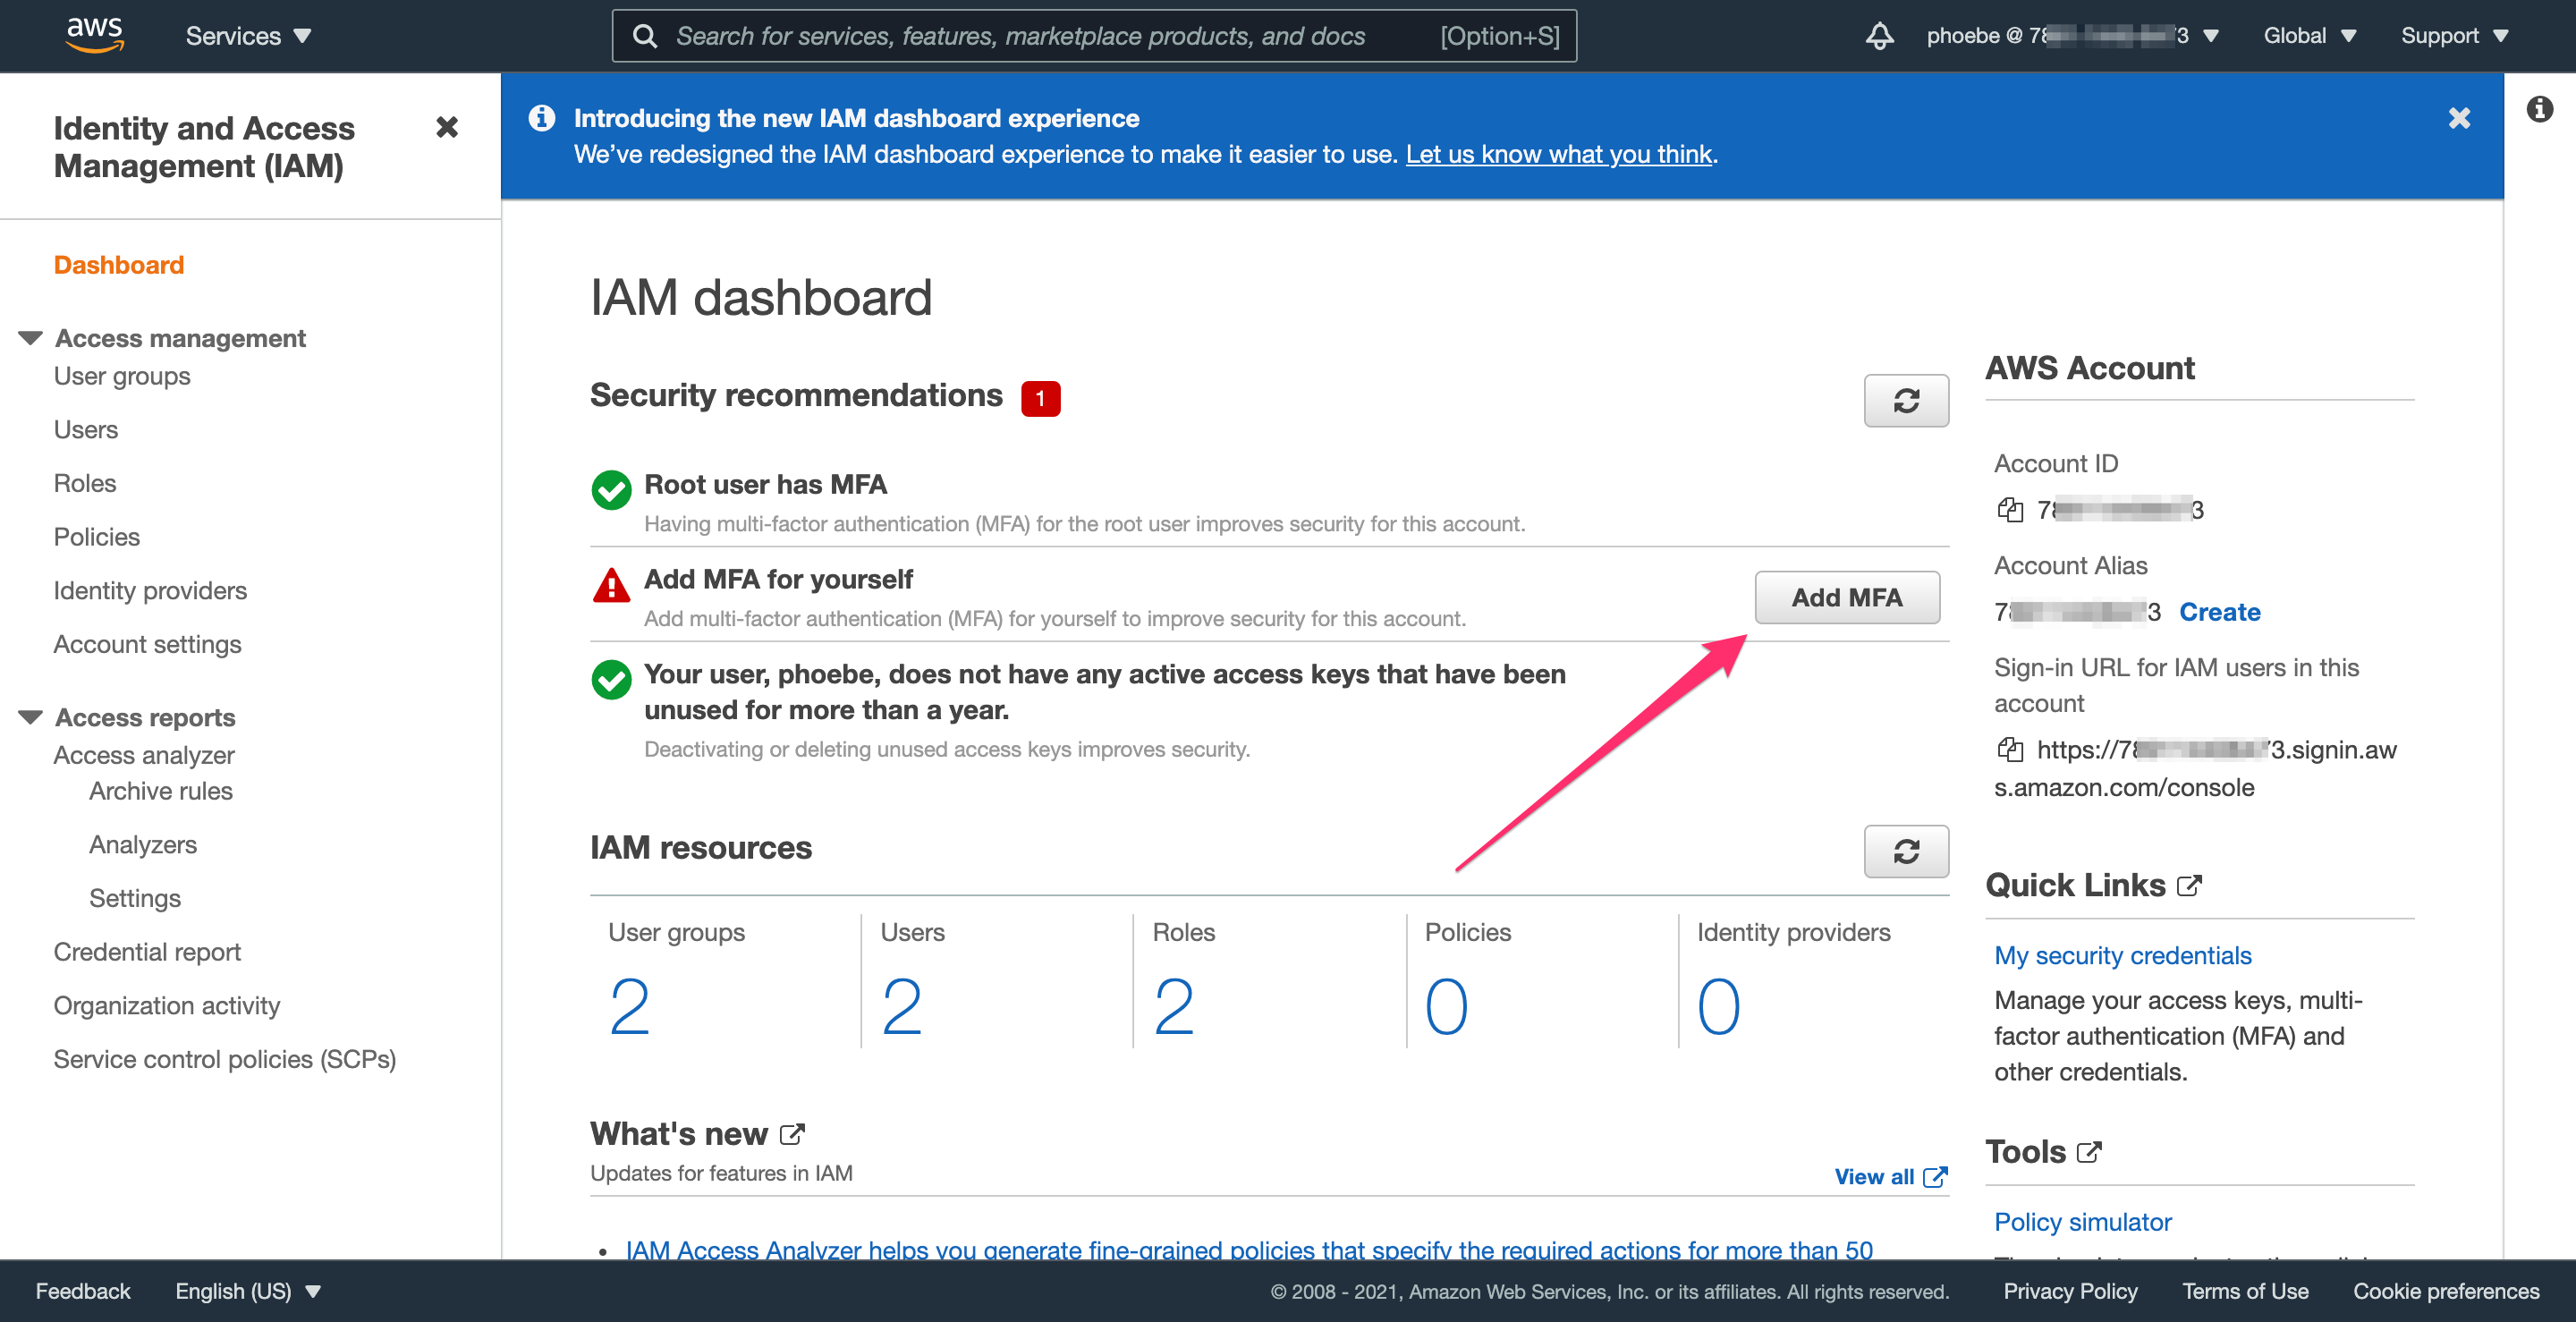
Step 3.1: Set up Multi-Factor Authentication (MFA)
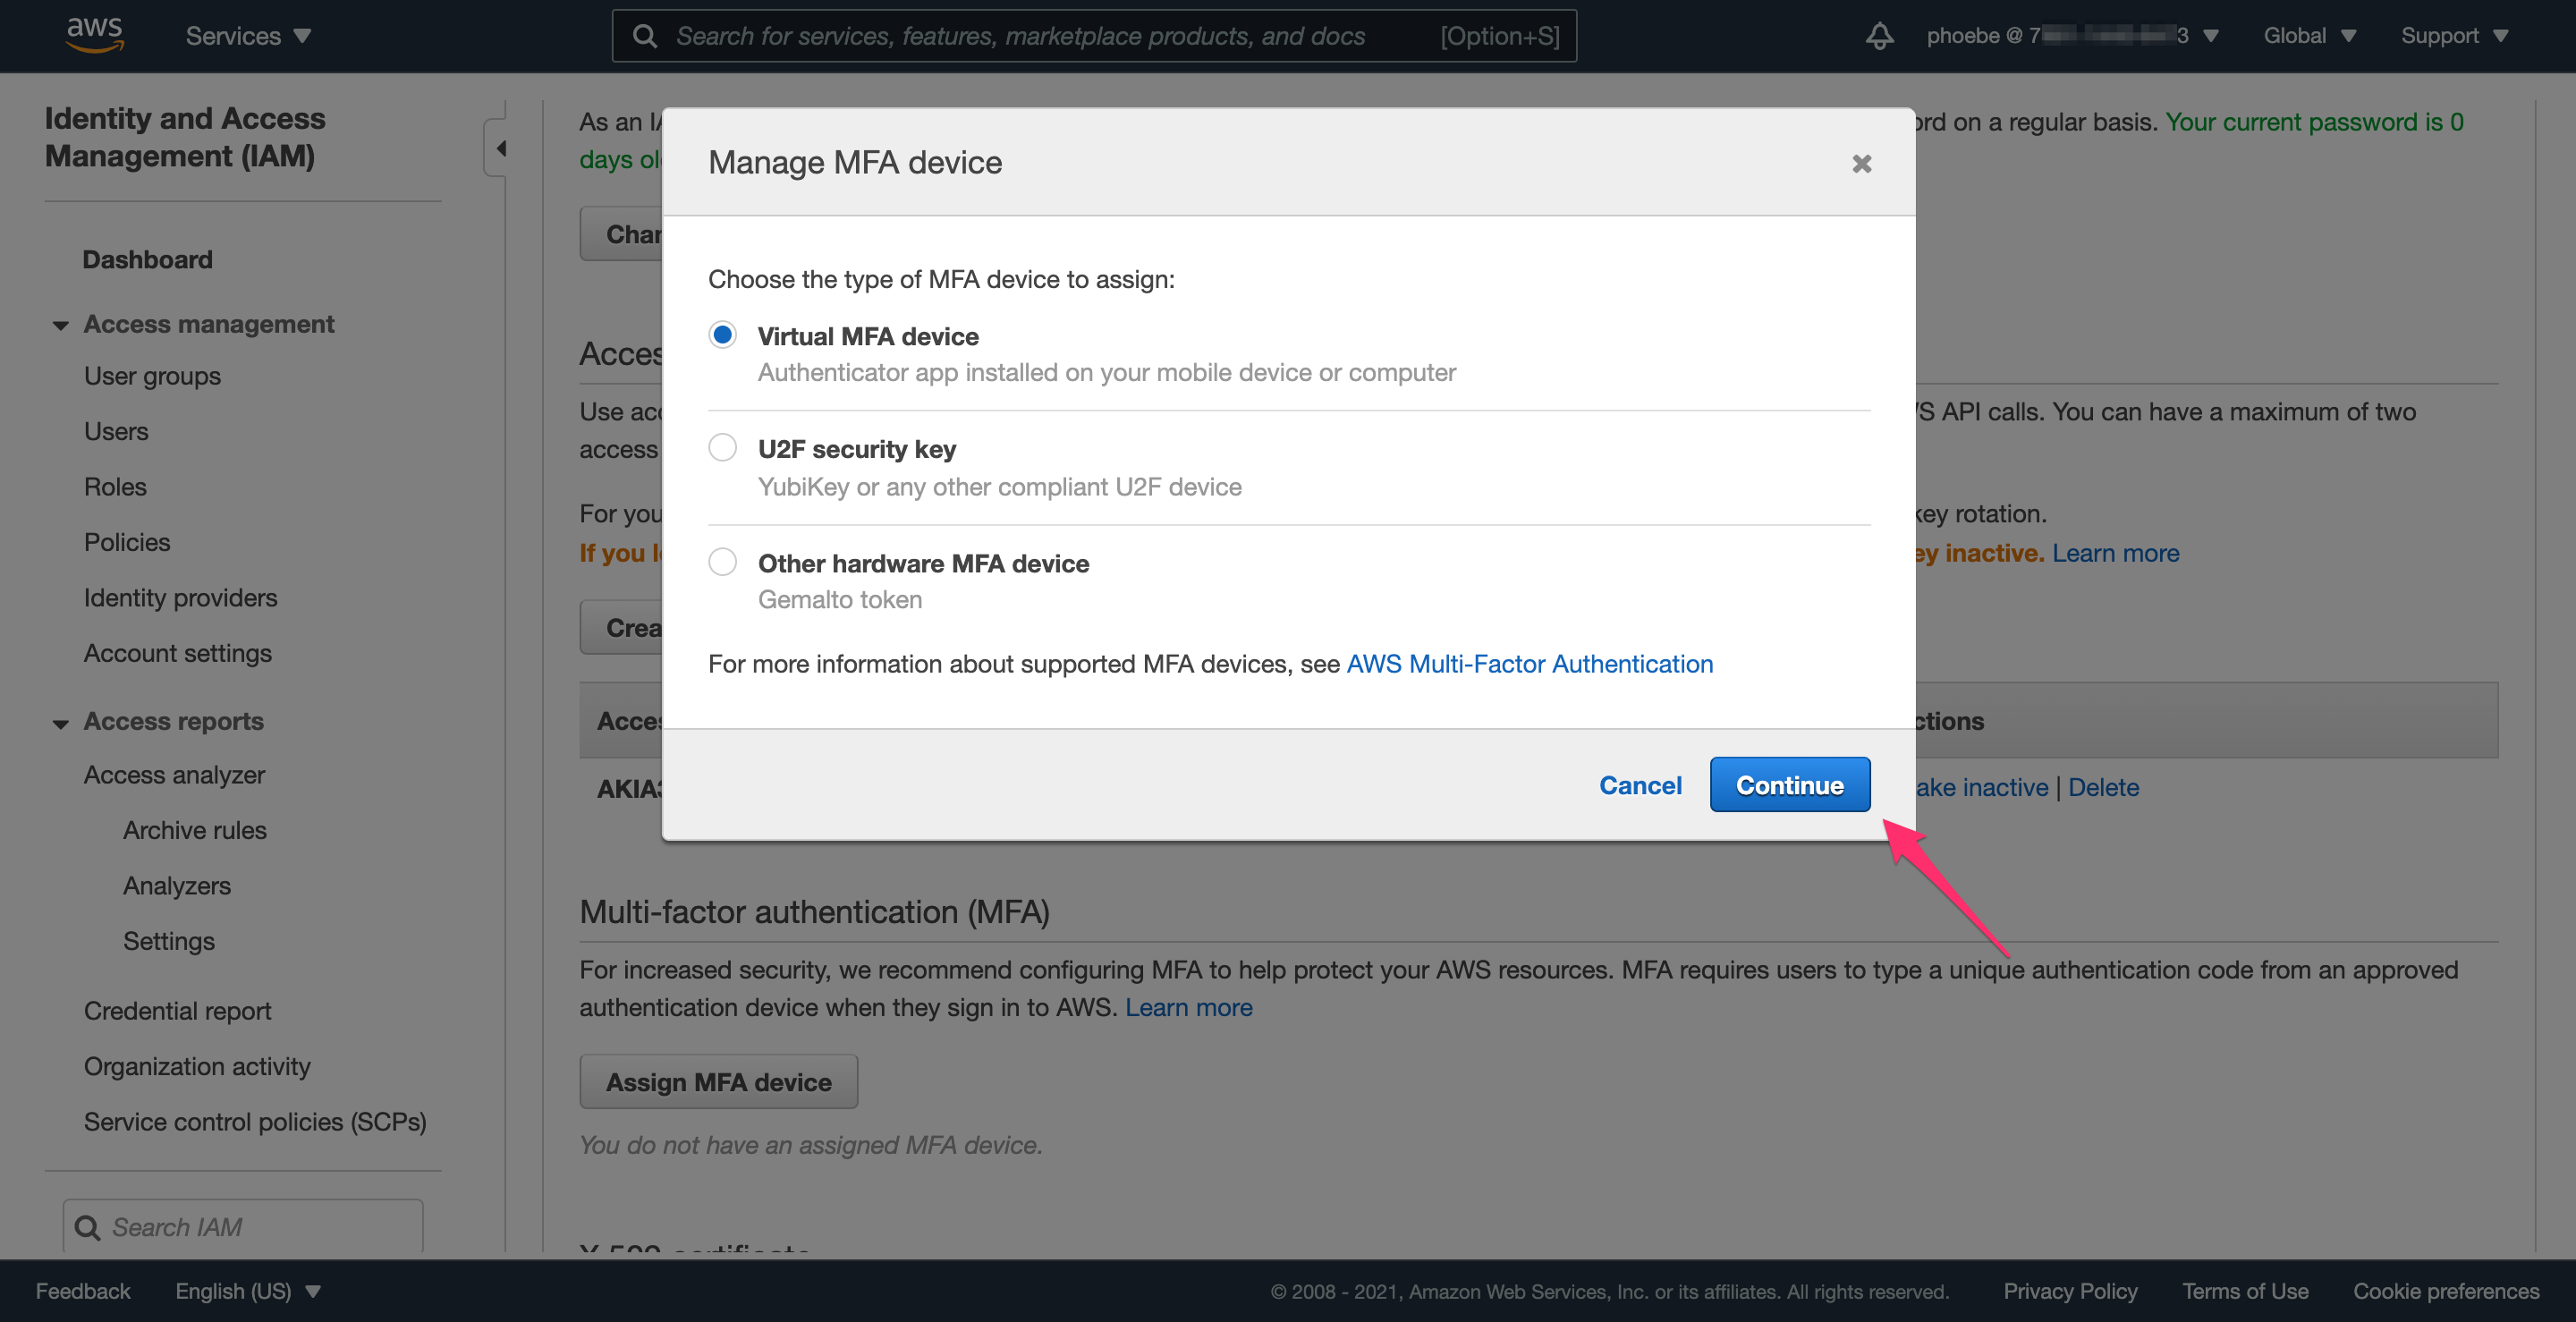
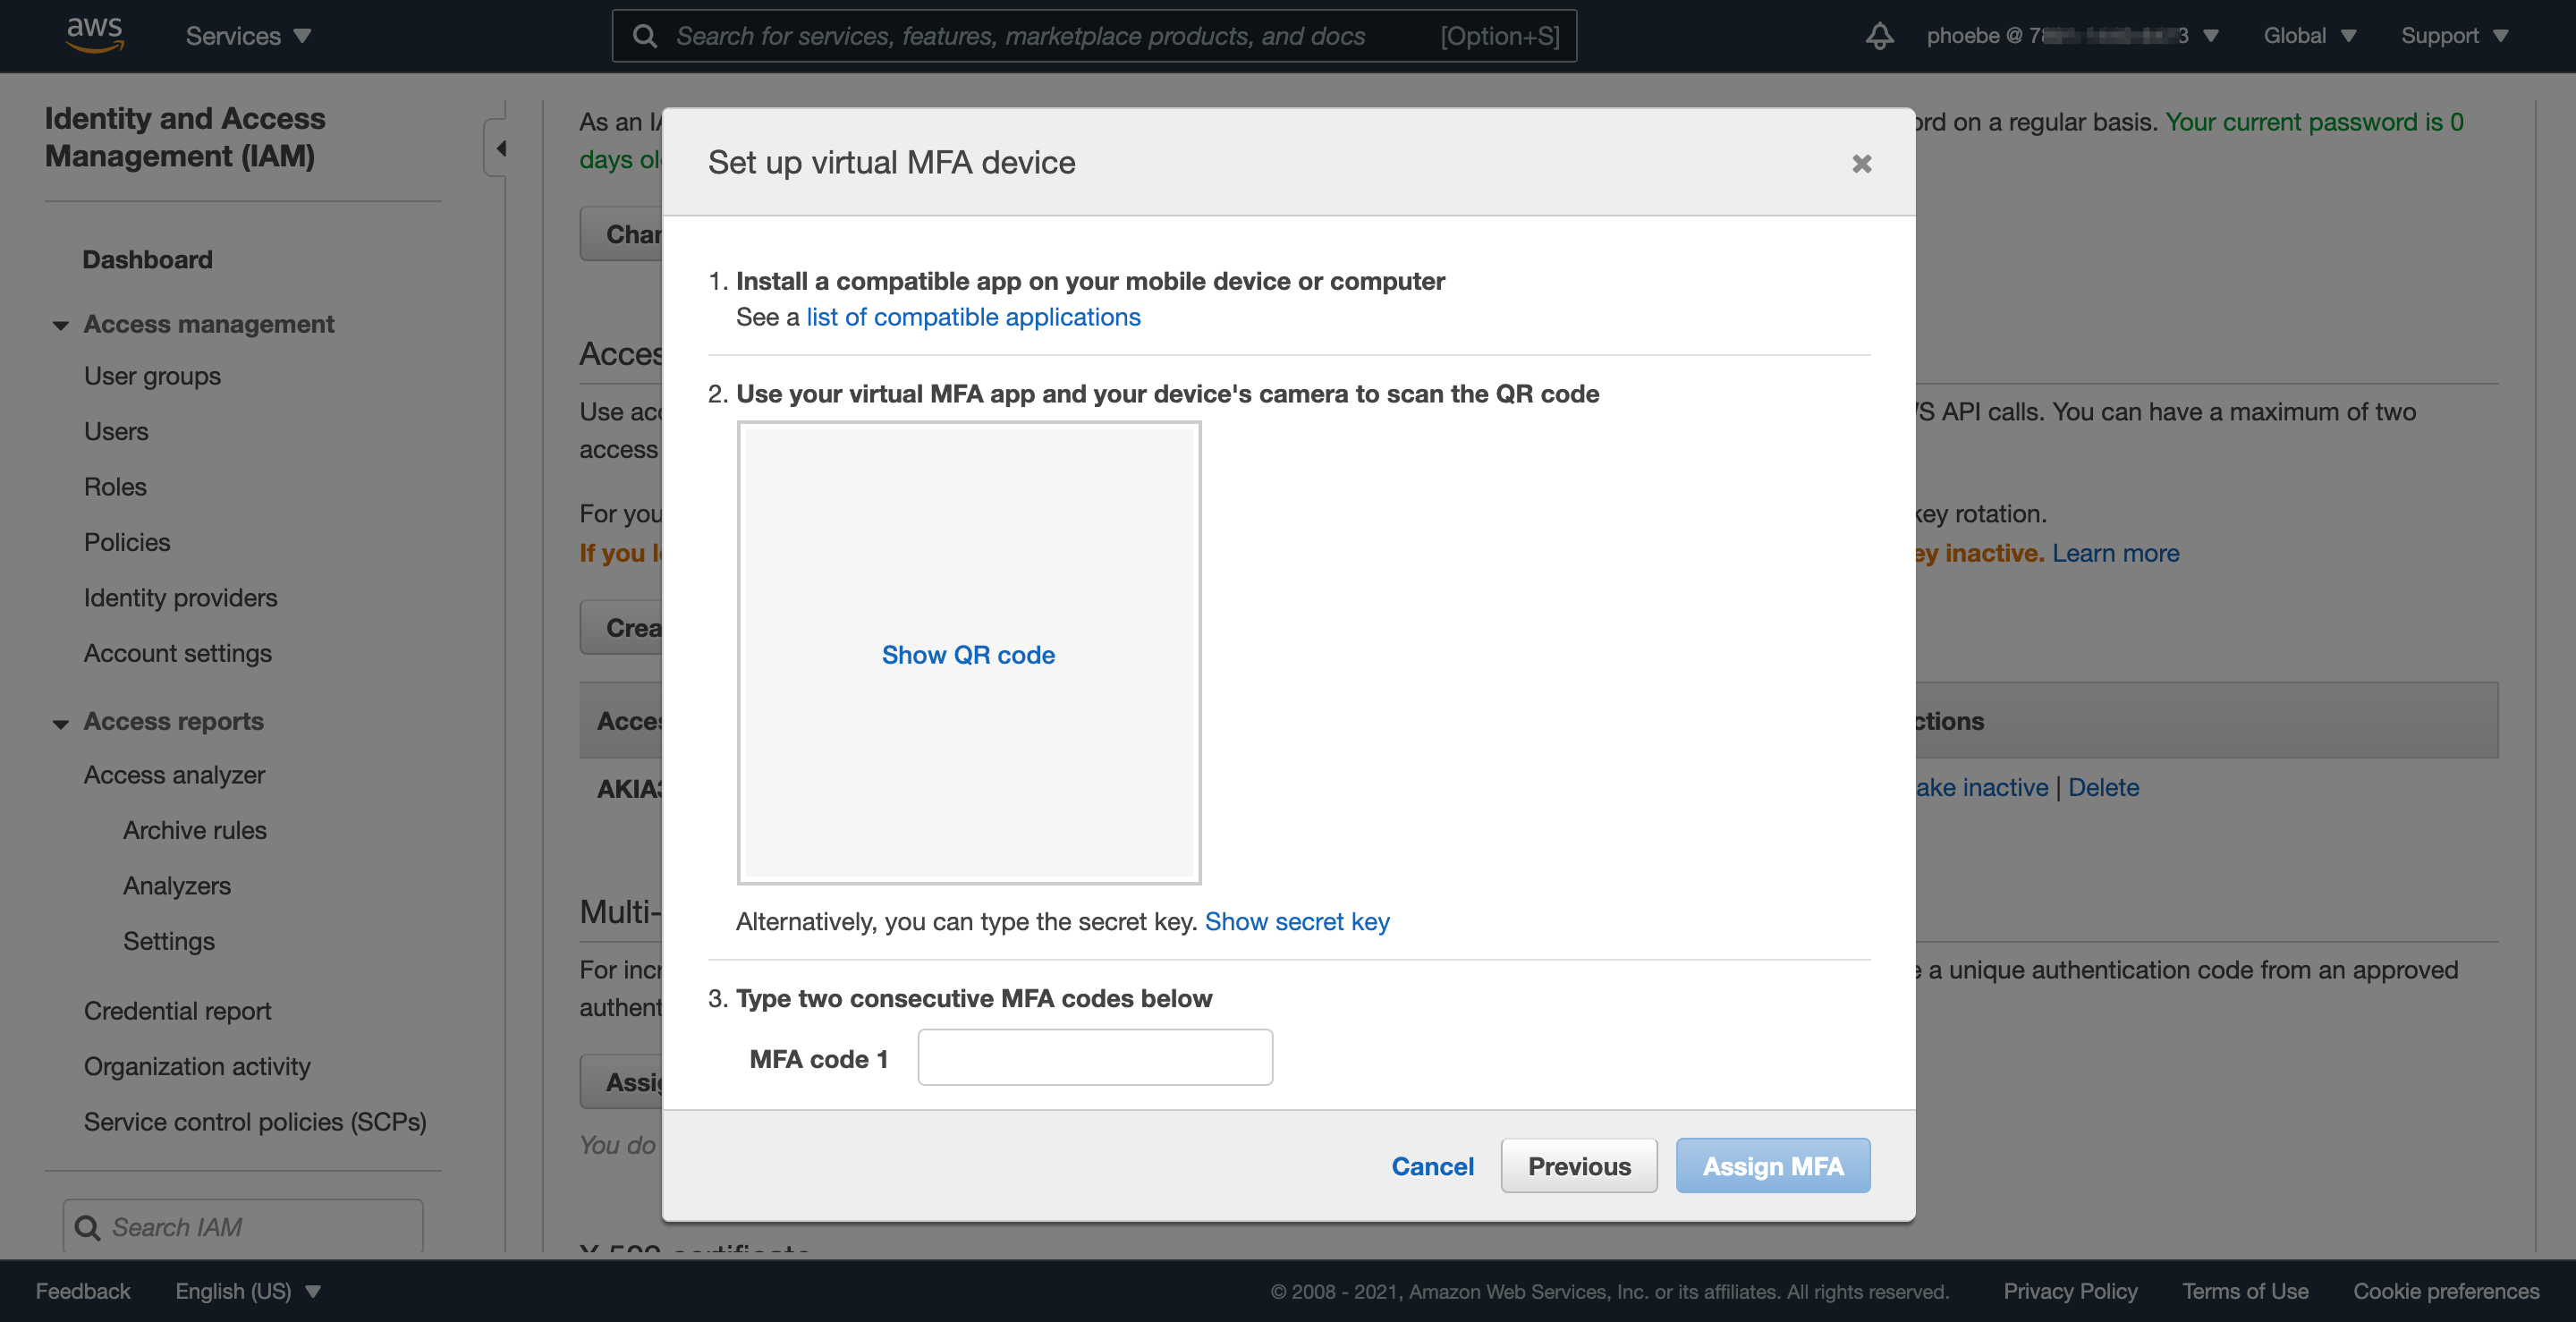
Just like you did for the root account, it’s important to set up MFA for this admin account as well. The process is similar, and the steps below show how to set up MFA.
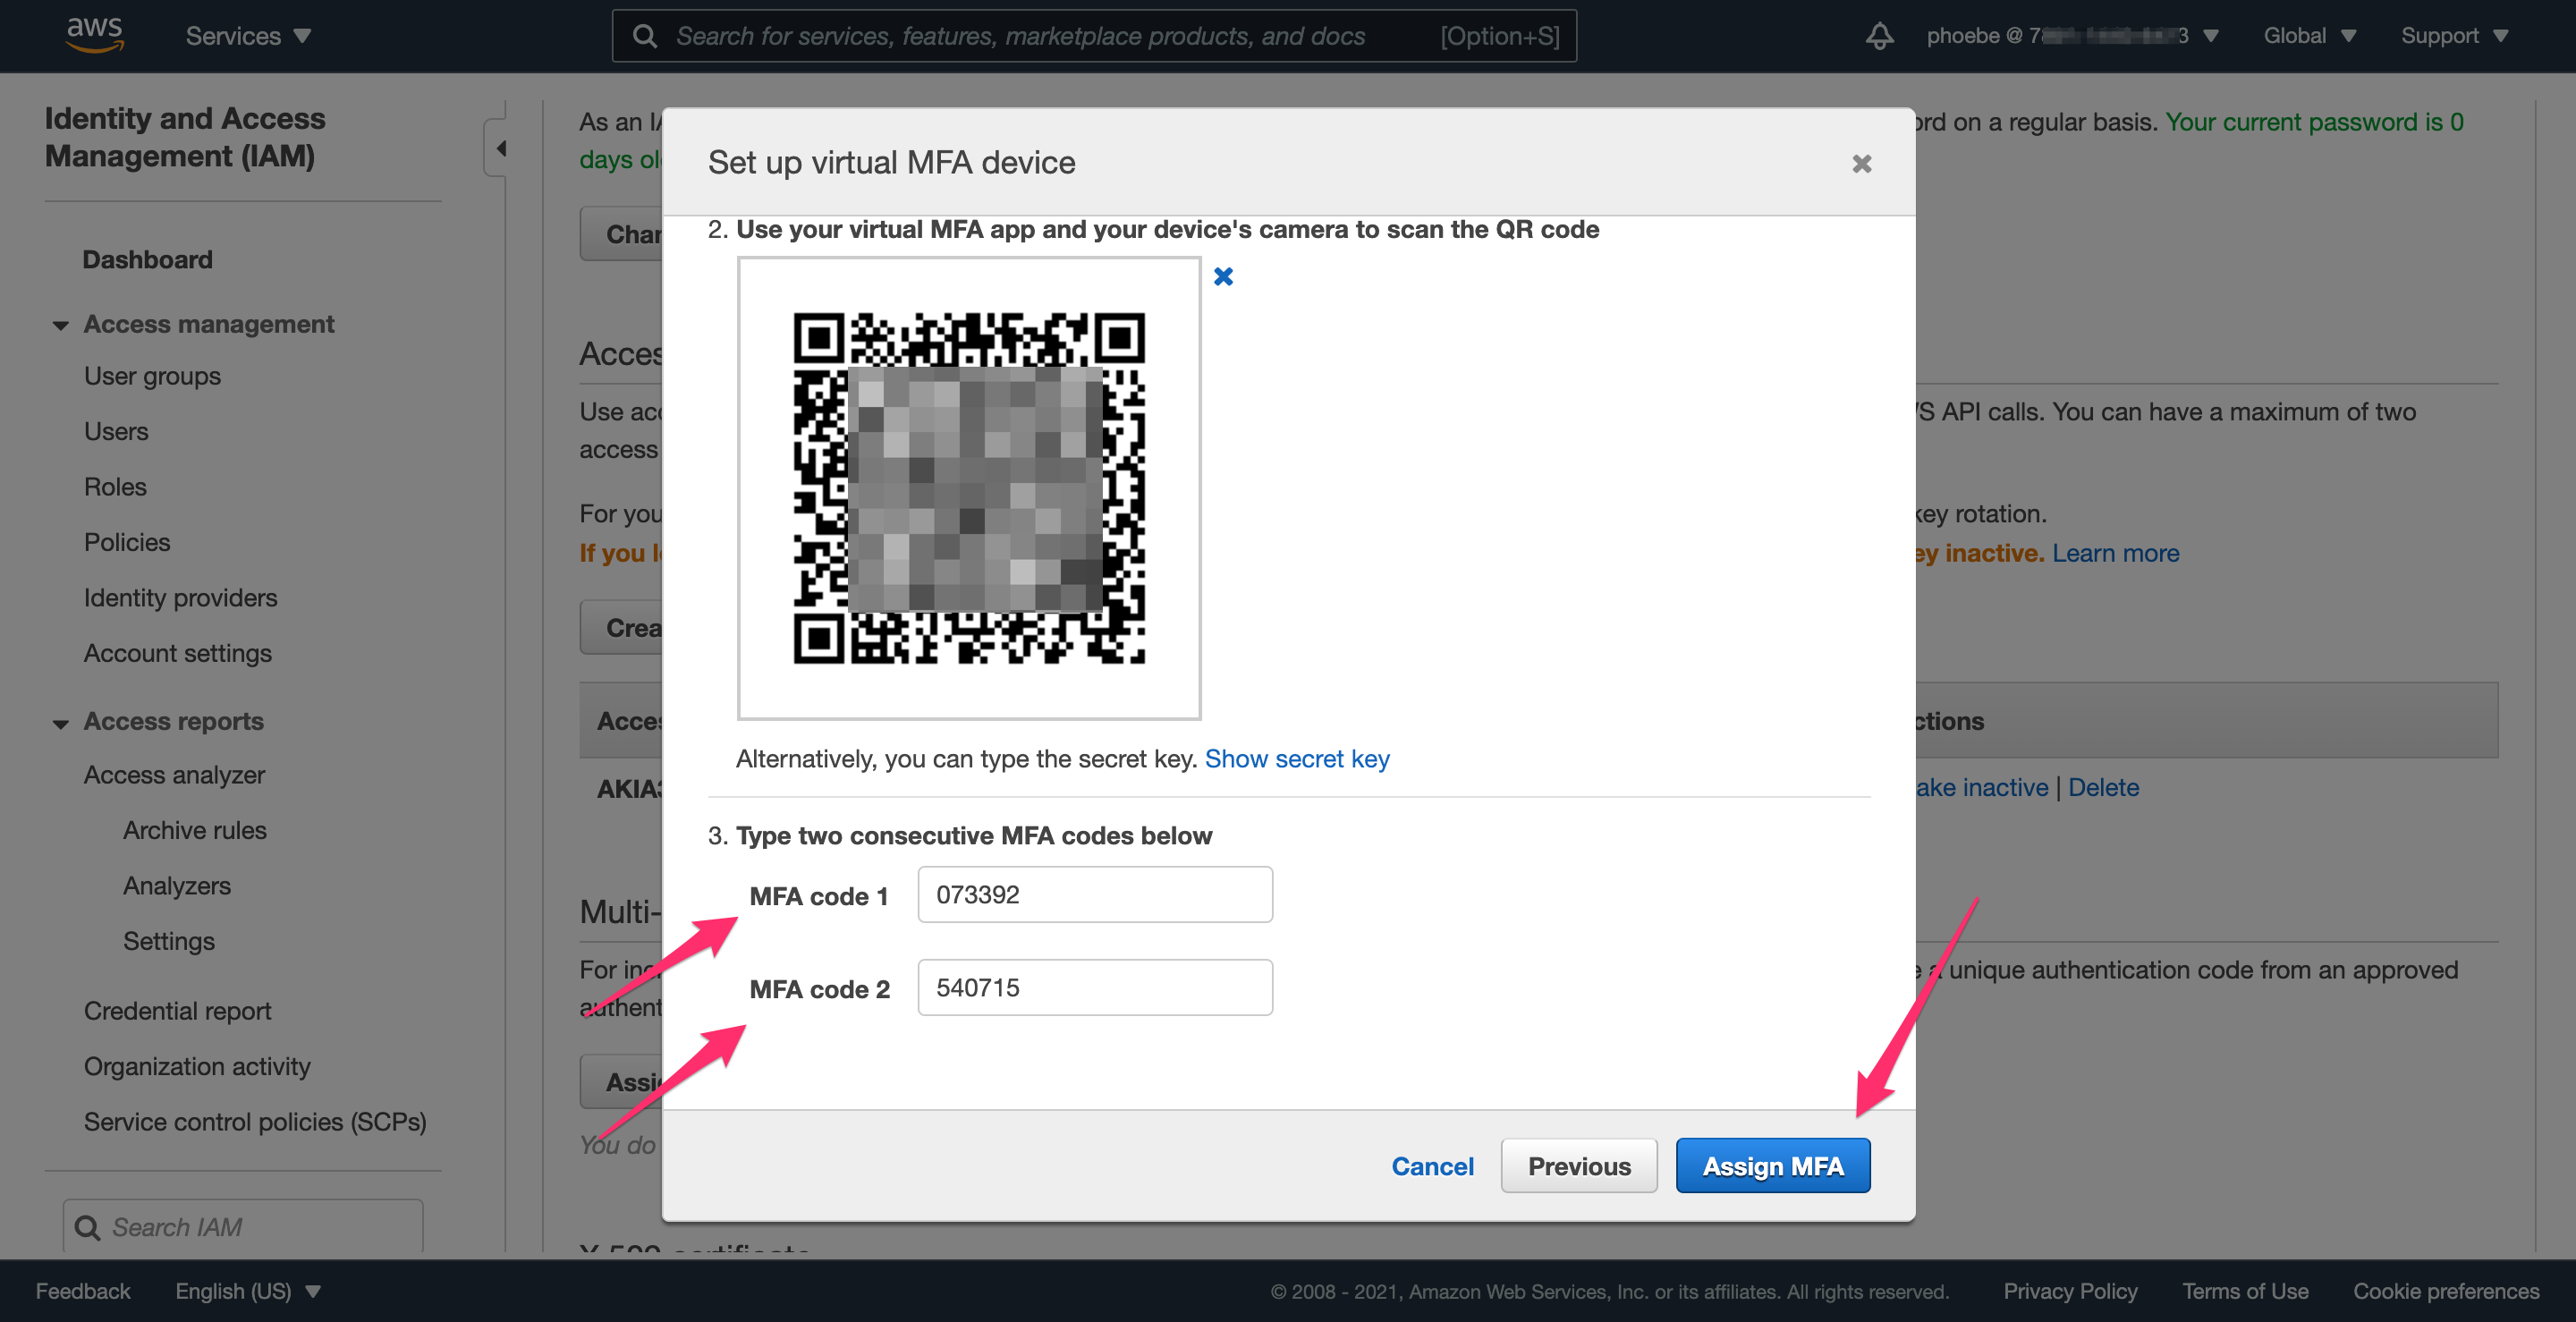
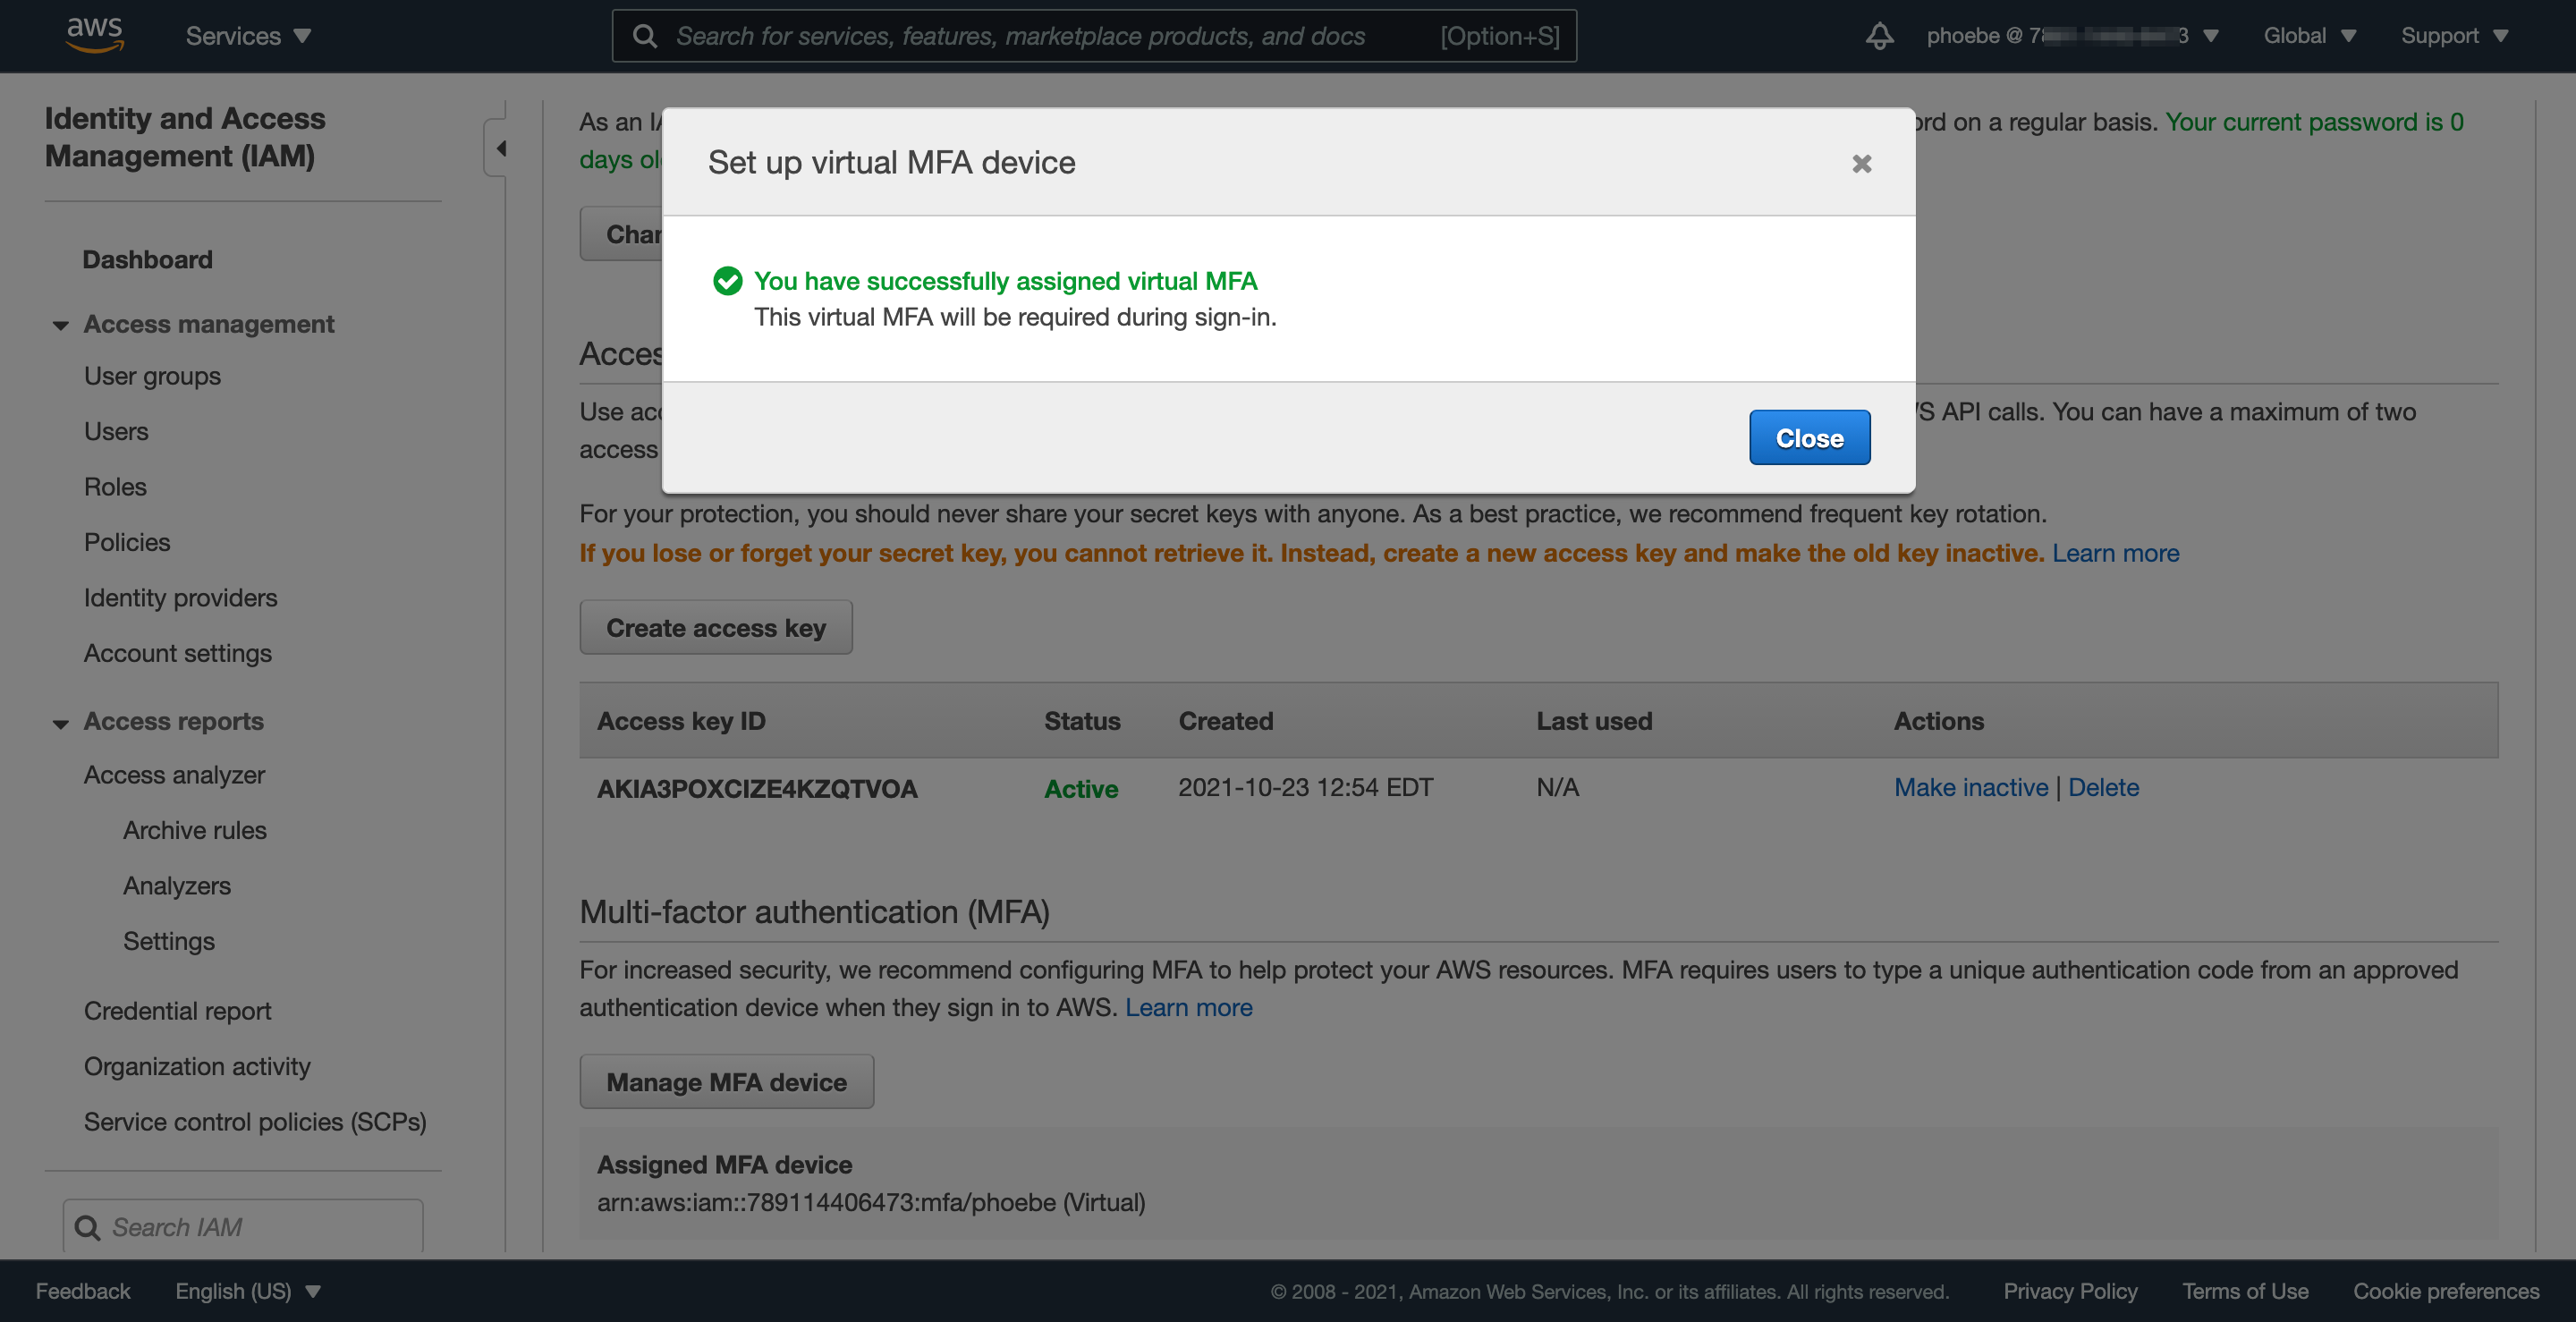
Step 3.2: Sign out and sign back in to finalize MFA setup
The final step to activate MFA for your account is to log out and log back in; until then, AWS will not let you perform any actions that require MFA.
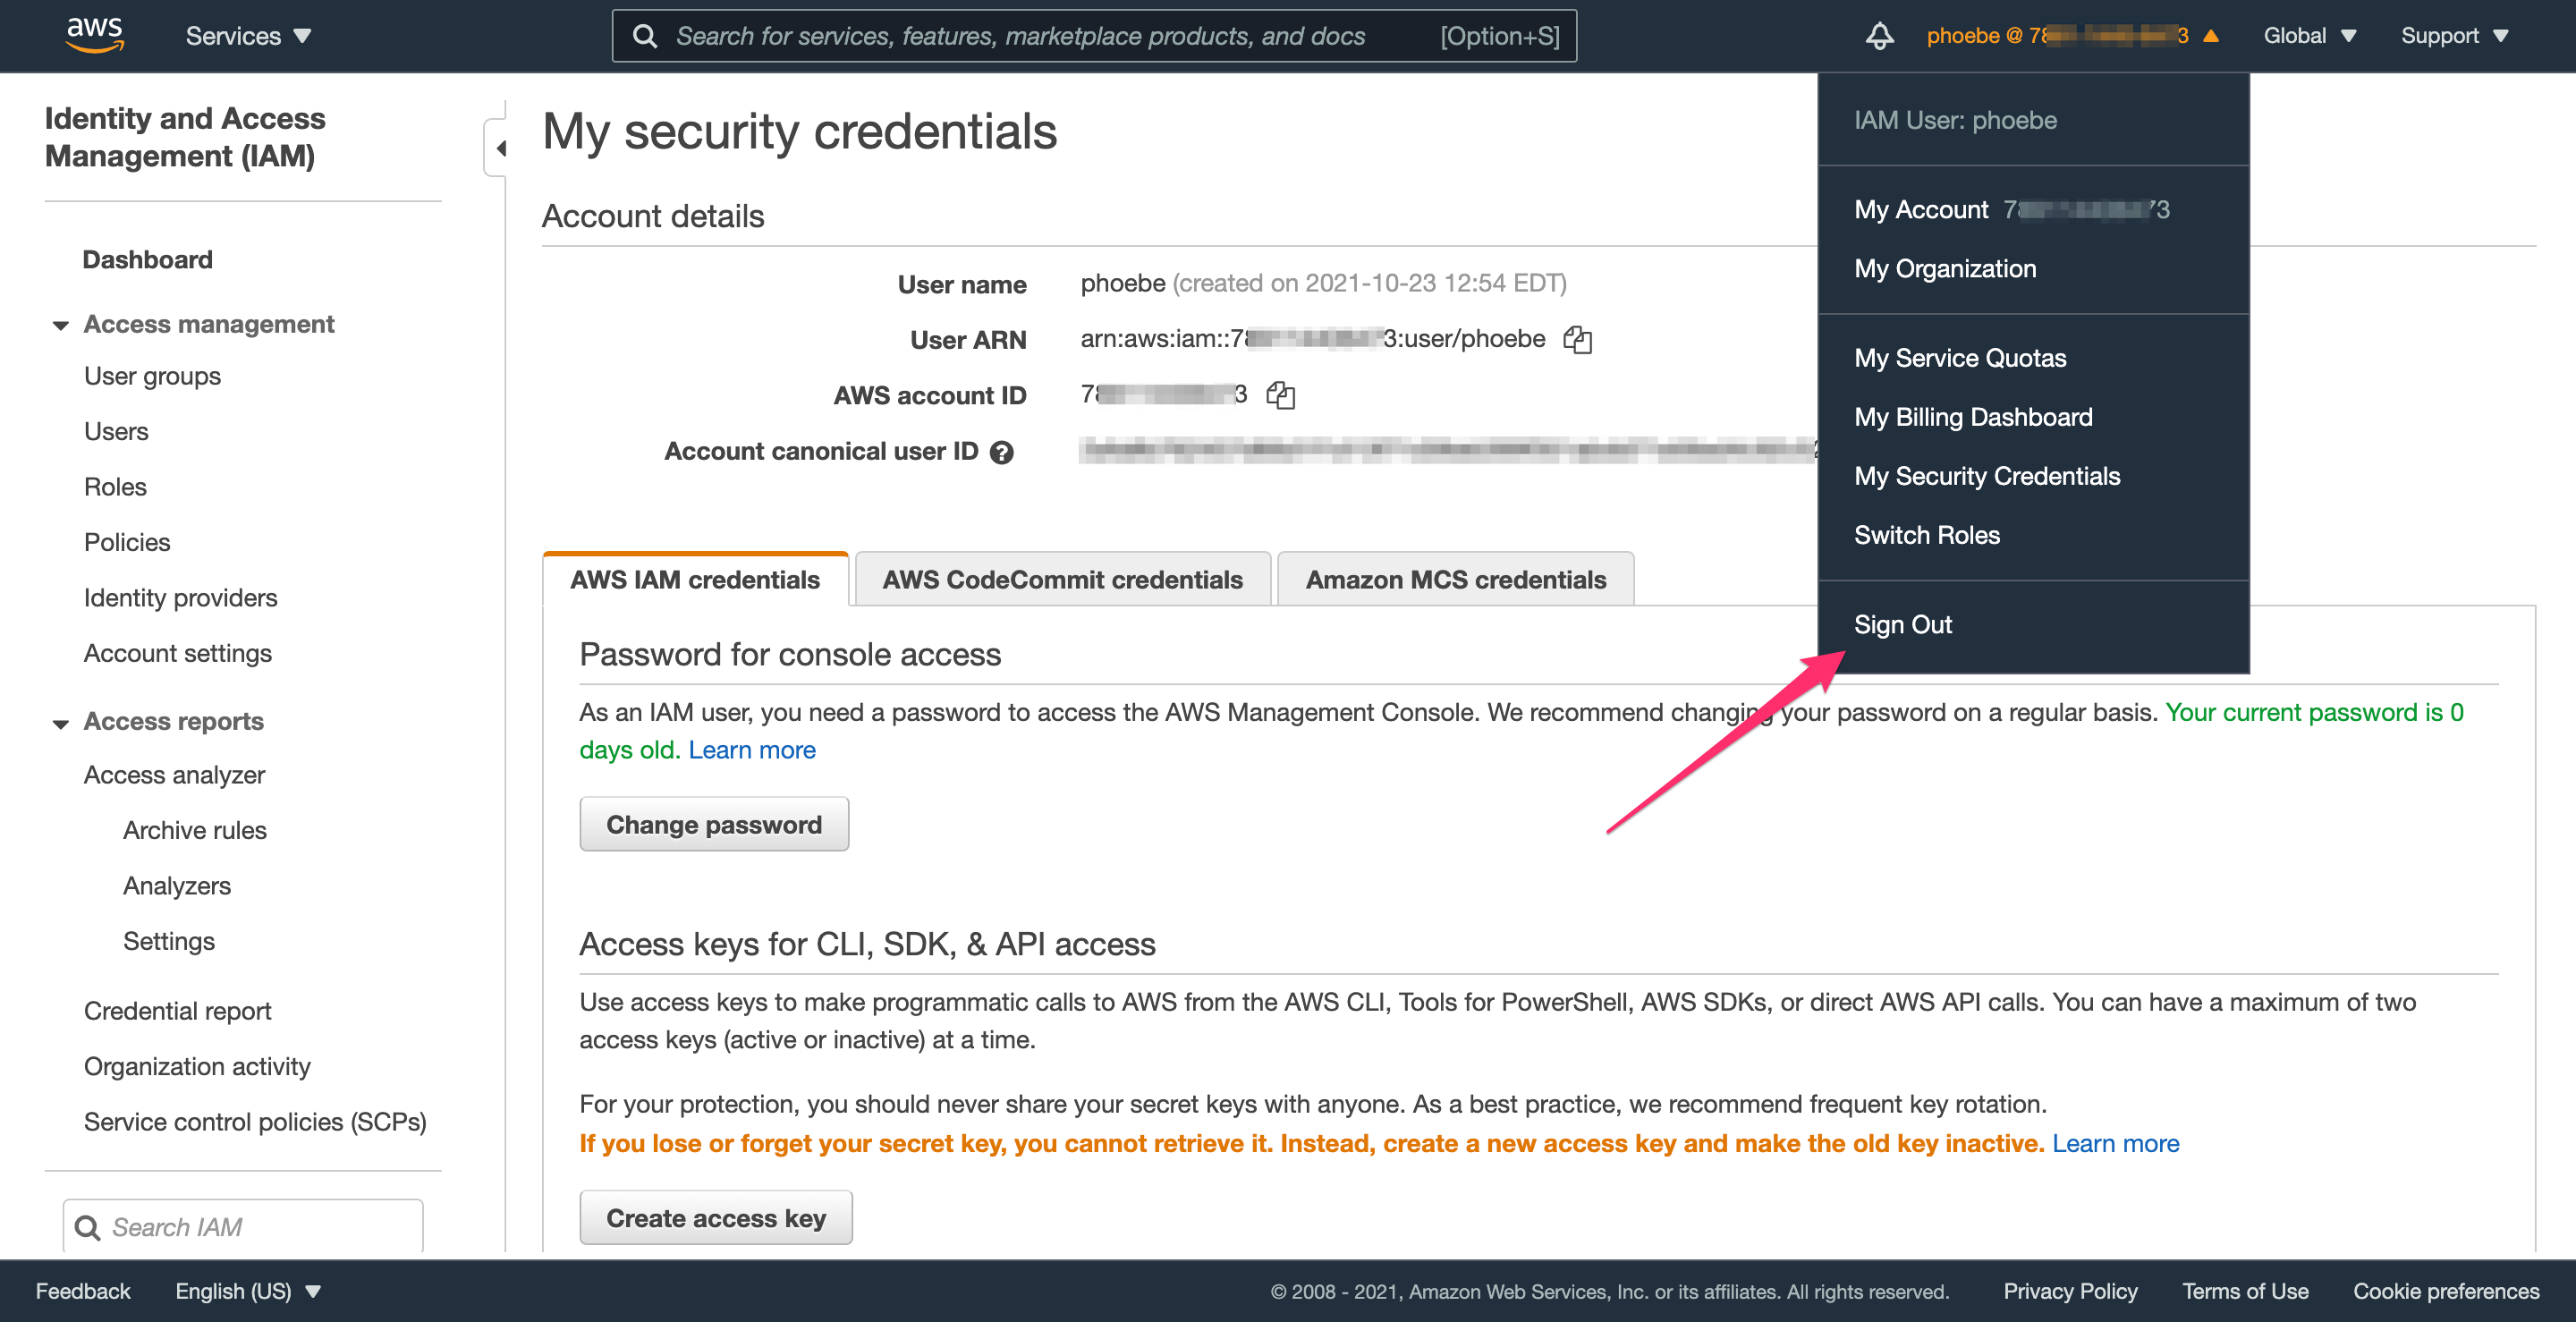
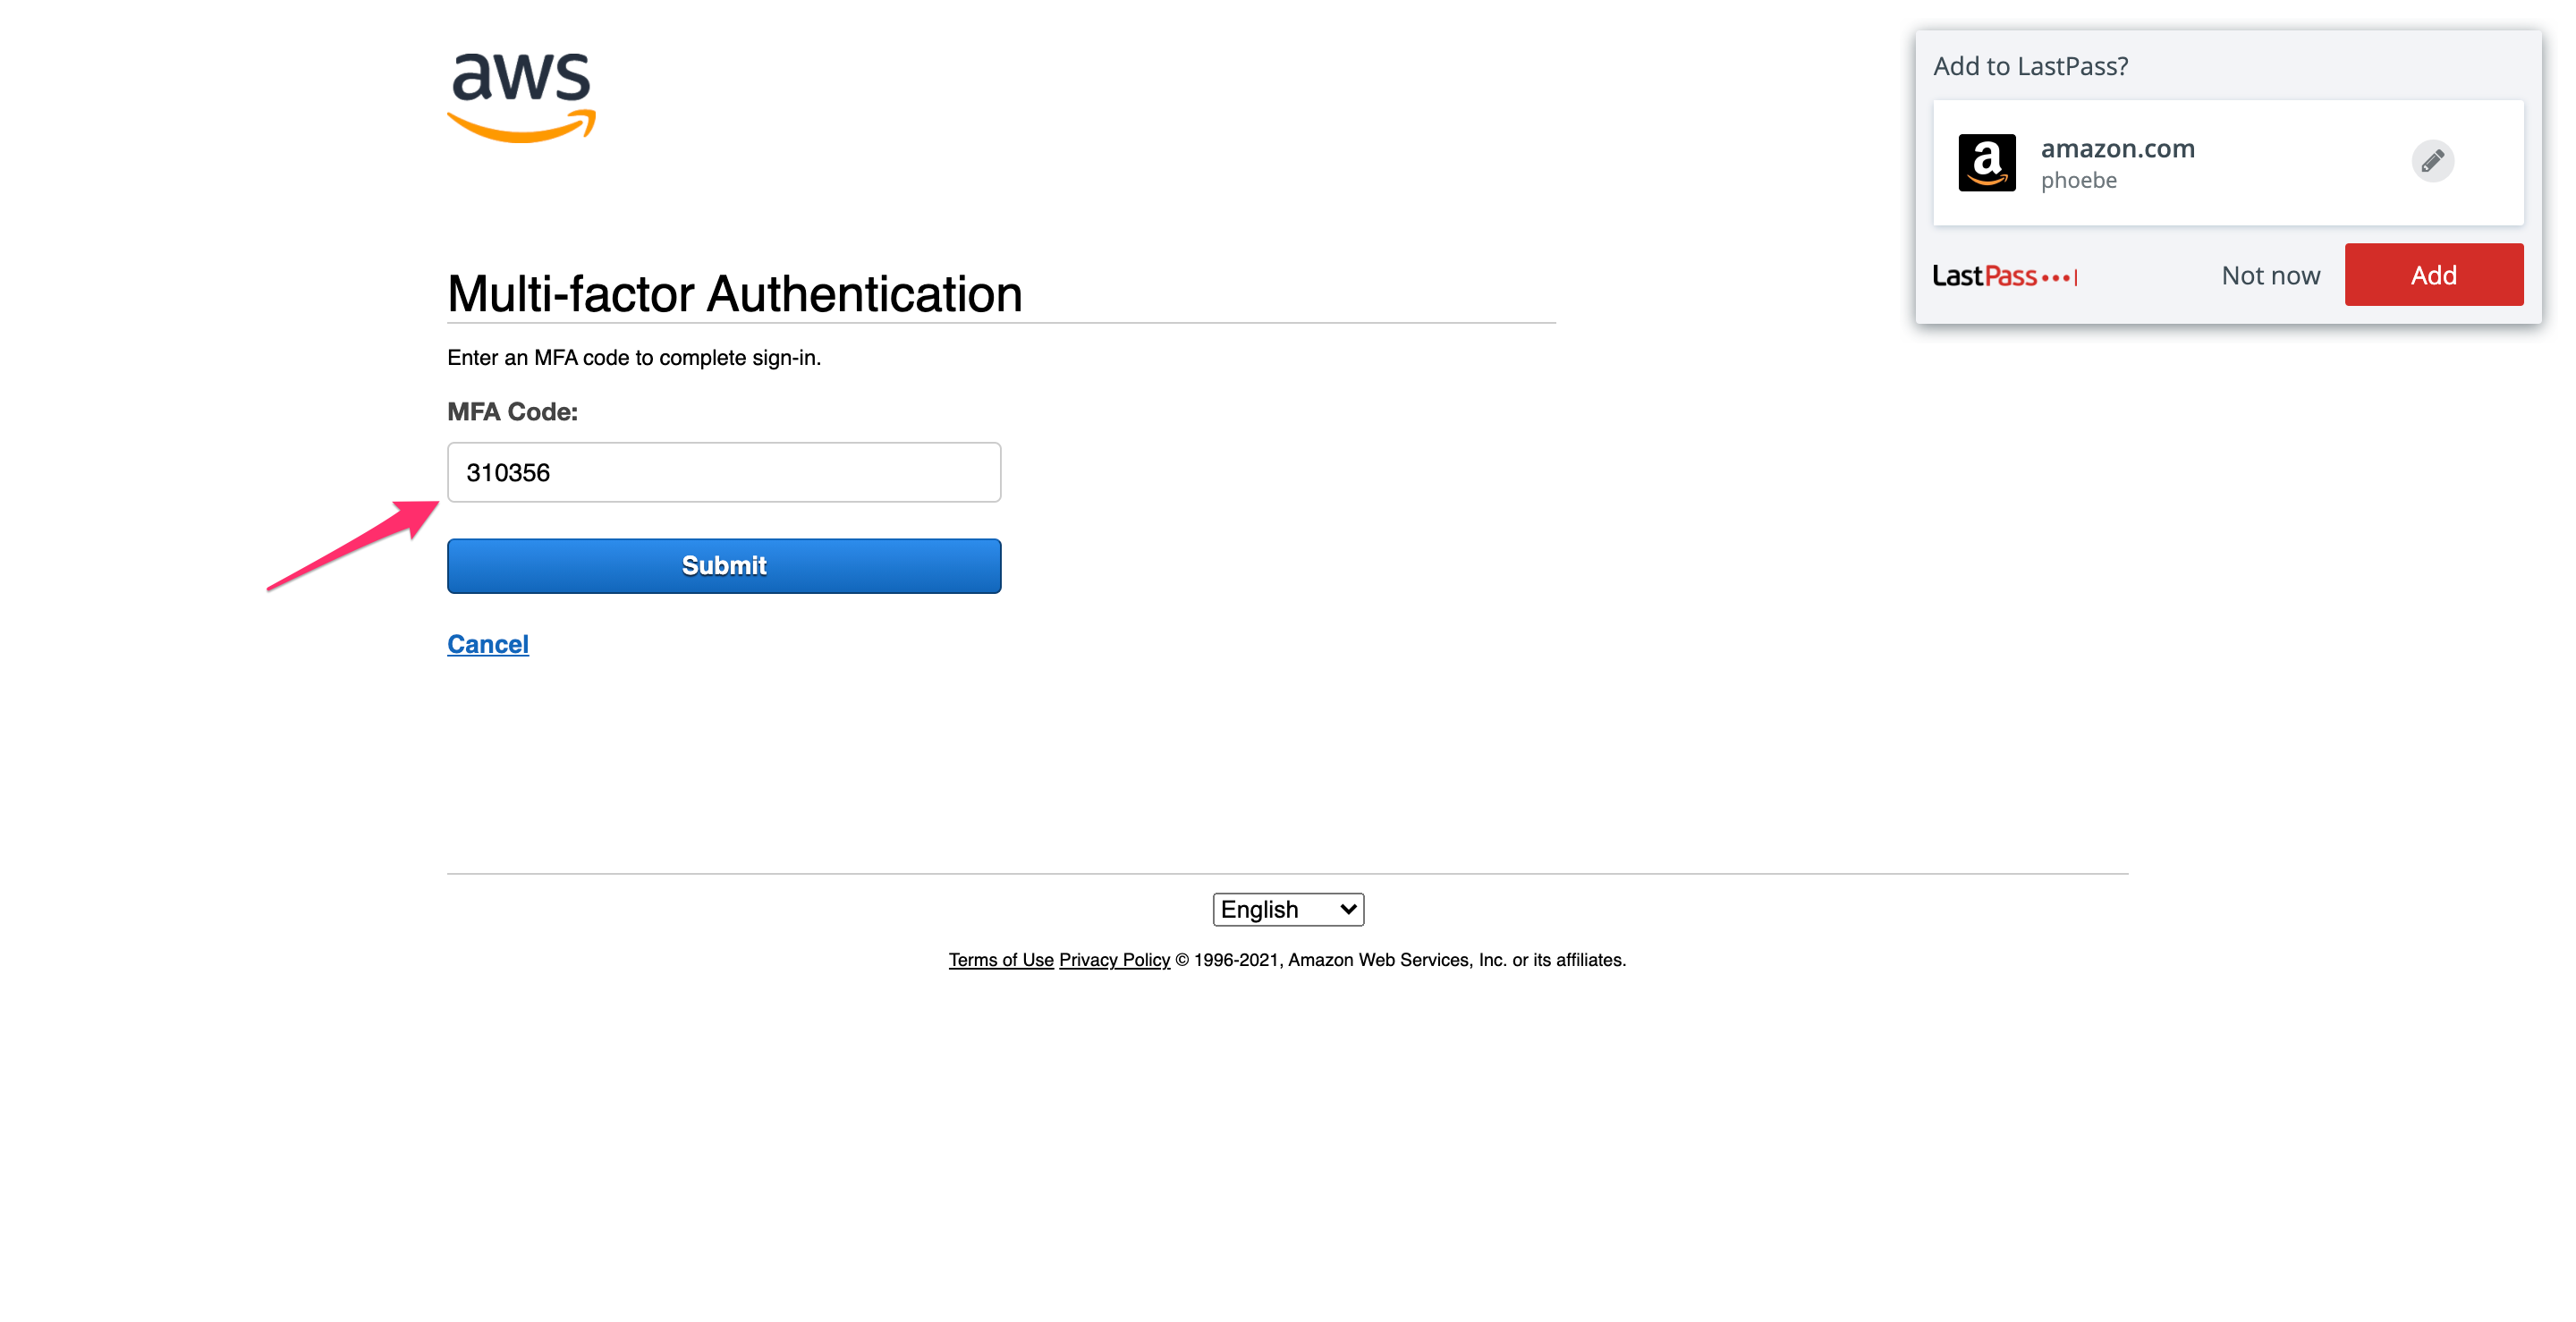
Step 4.0: Adding an extra layer of security with an admin role
In this example, we created a group called administrators, and all members of the group have admin privileges. Taking this a step further, we will add an extra layer of security and instead create an administrator role that anyone in the administrators group can assume. Each time you assume a role, AWS refers to it as a “session”, and the session lasts for 1 hour by default. In other words, this setup lets you become an admin for an hour at a time. For increased security, the role will also require that you authenticated with MFA when you logged in.
Step 4.1: What is a role?
In AWS terms, a role is an identity that can be assumed to temporarily escalate privileges. In this example, we’ll use a role to temporarily assume admin privileges, which is more secure than always being an admin.
Step 4.2: Sign in as the root user again
You’ll need to sign in as the root user since we’ll be modifying the permissions created earlier, and your admin user will temporarily lose admin privileges. Refer to Step 2.0 for instructions on logging into the root account.
Step 4.3: Creating the admin role
From the IAM section of the AWS console, navigate to the Roles section and click “Create role”.
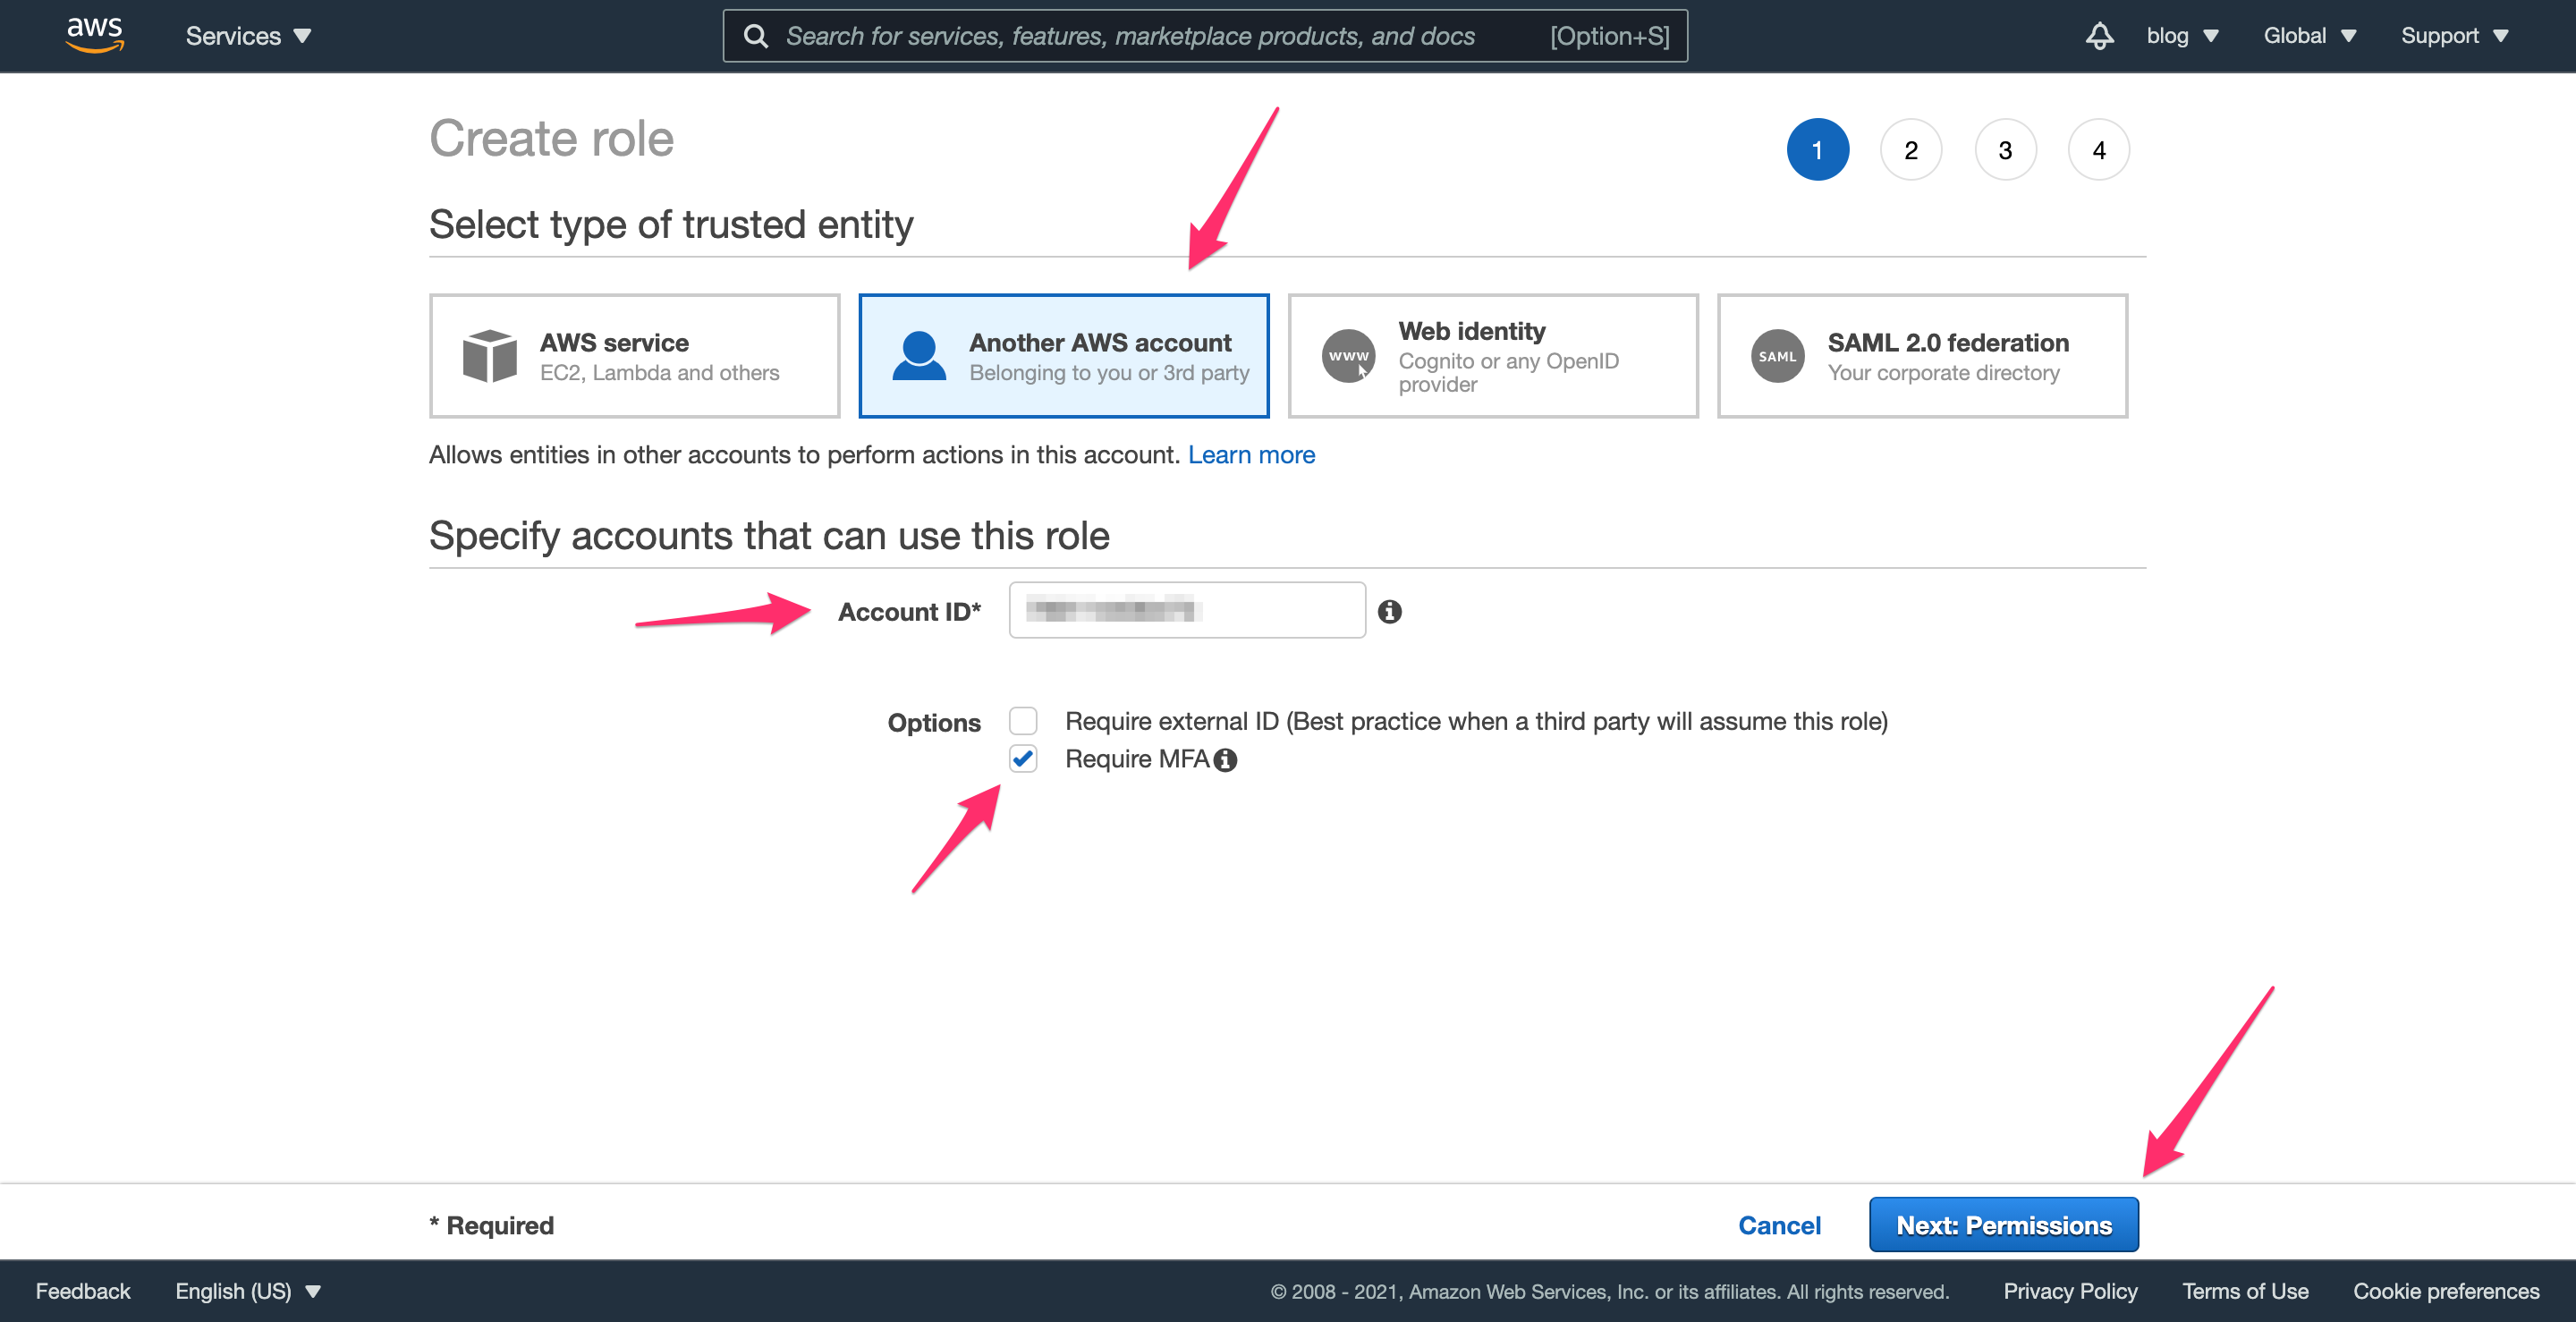
This page will prompt you to select the type of “trusted entity”, which is the person, computer, or AWS service that can assume the role. In this case, select “Another AWS Account (Belonging to you or a 3rd party)”. The wording is confusing since you’ll need to enter your own account id here. Select the “Require MFA” checkbox so that any user who assumes this role has to authenticate with MFA. Click “Next: Permissions” to continue.
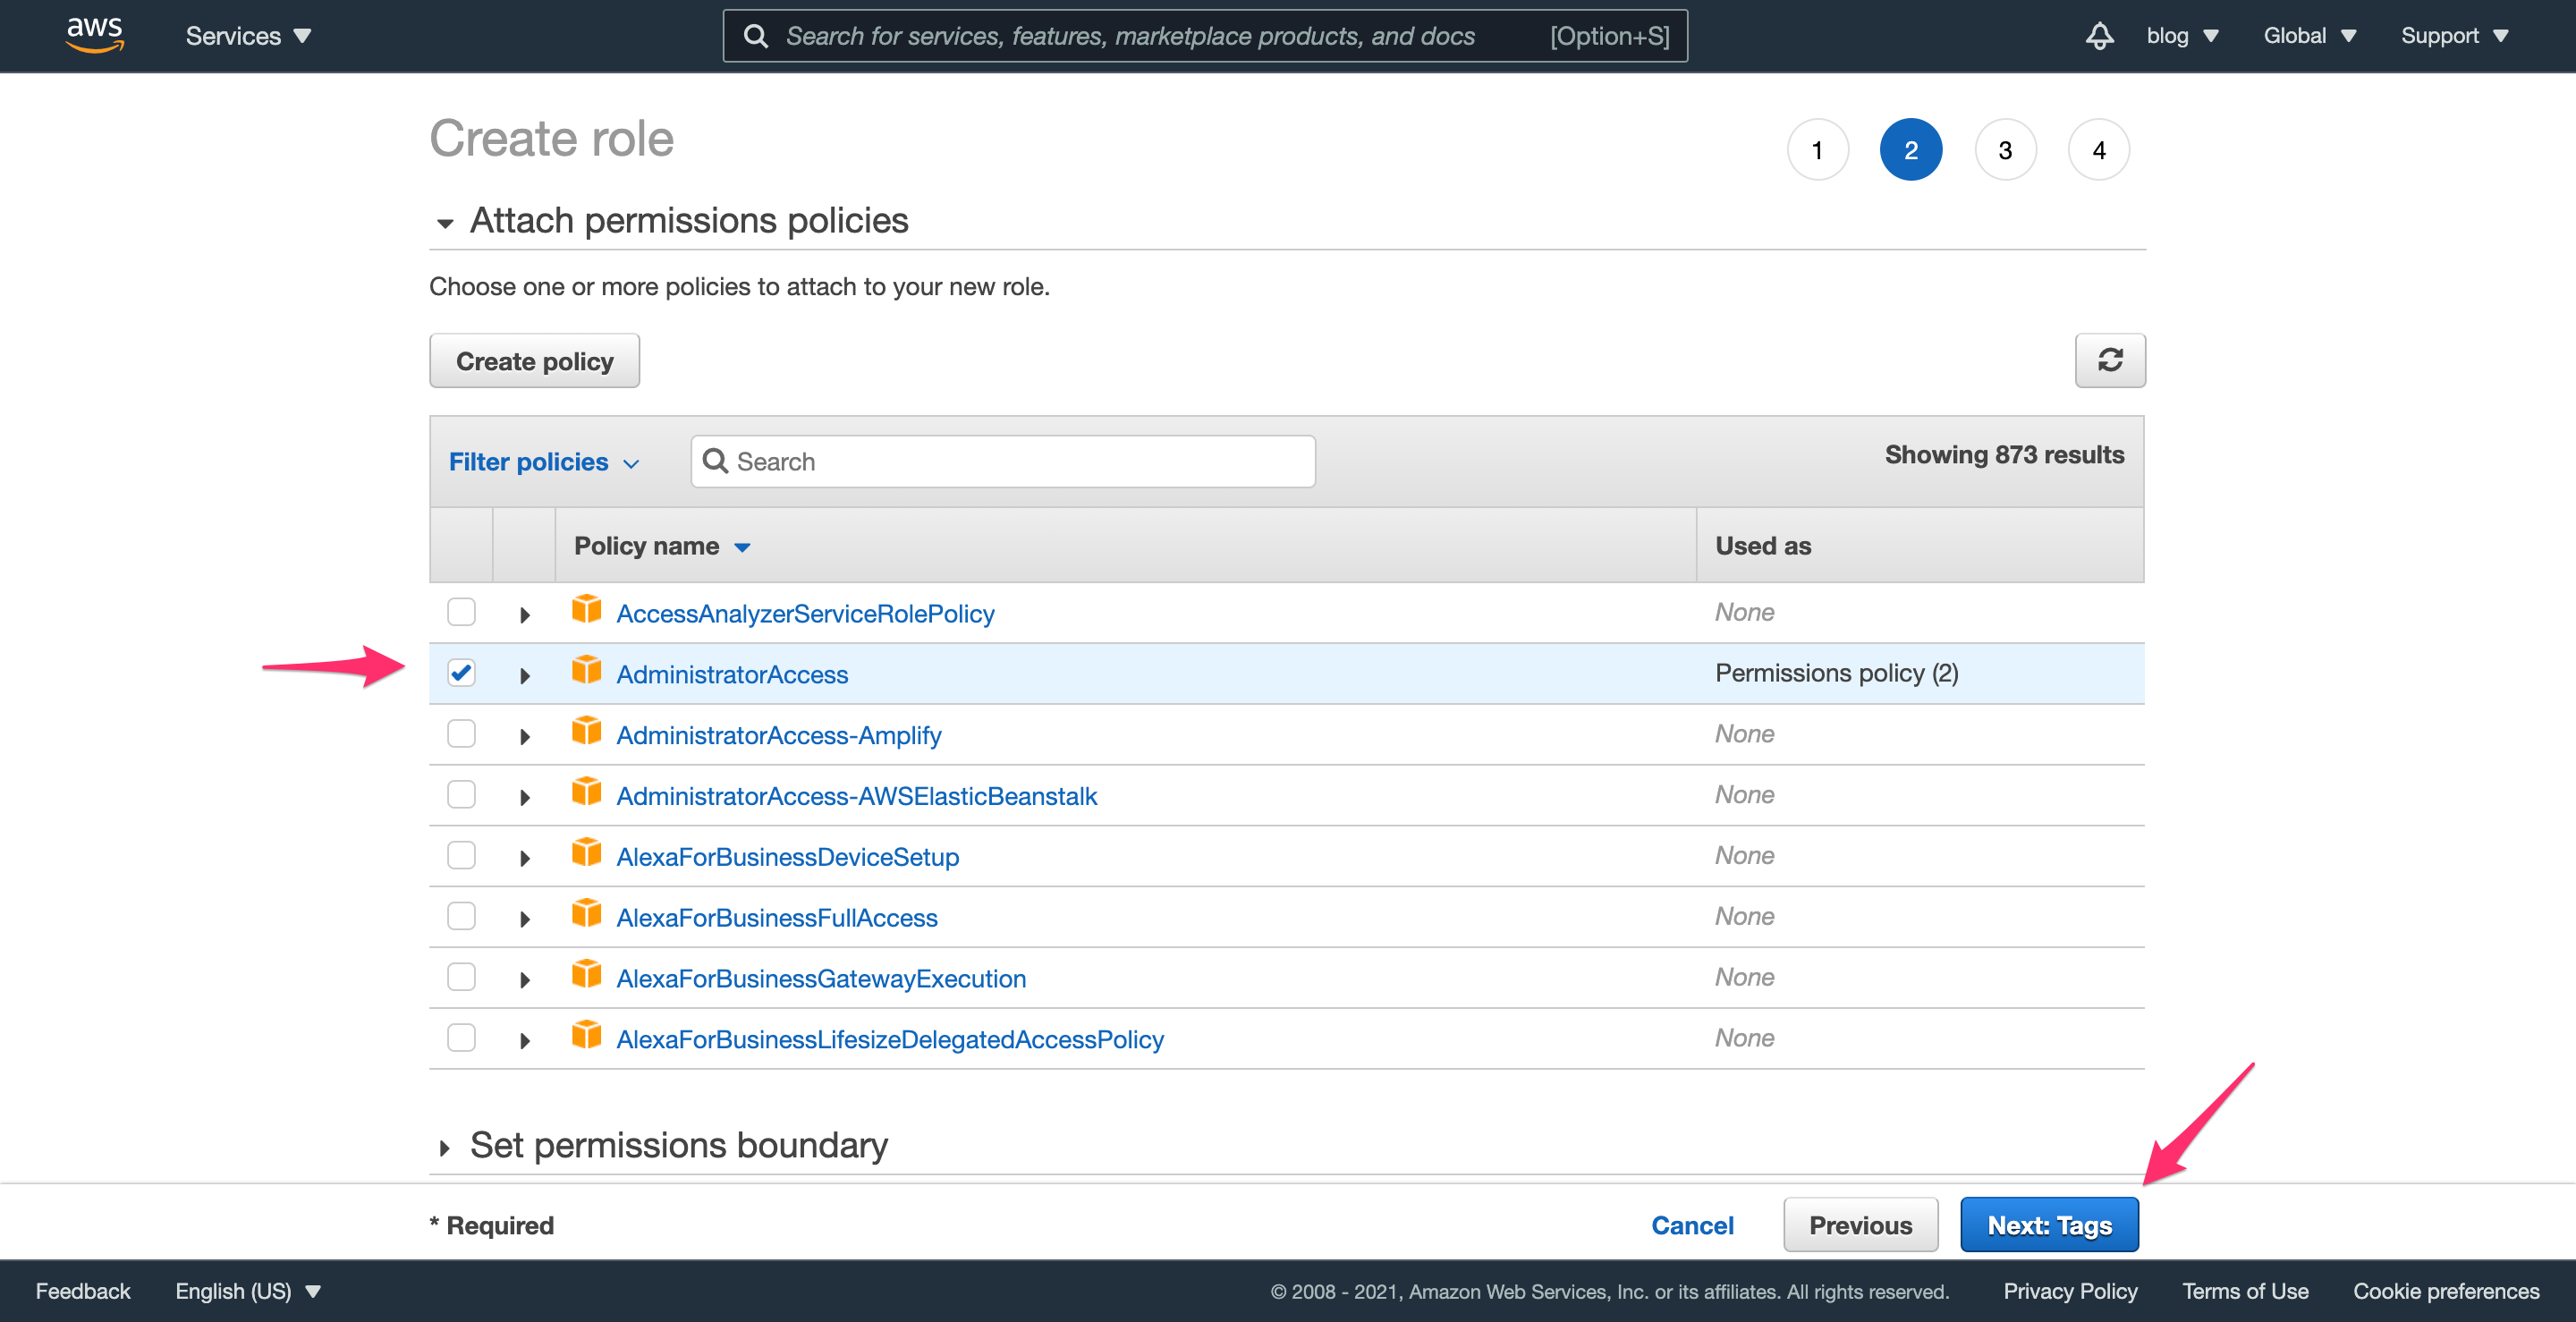
This next part may look familiar, since it’s the same process as Step 2.3. On the next page, select the AdministratorAccess policy. Click “Next: Tags”, and skip through the next screen by clicking “Next: Review”.
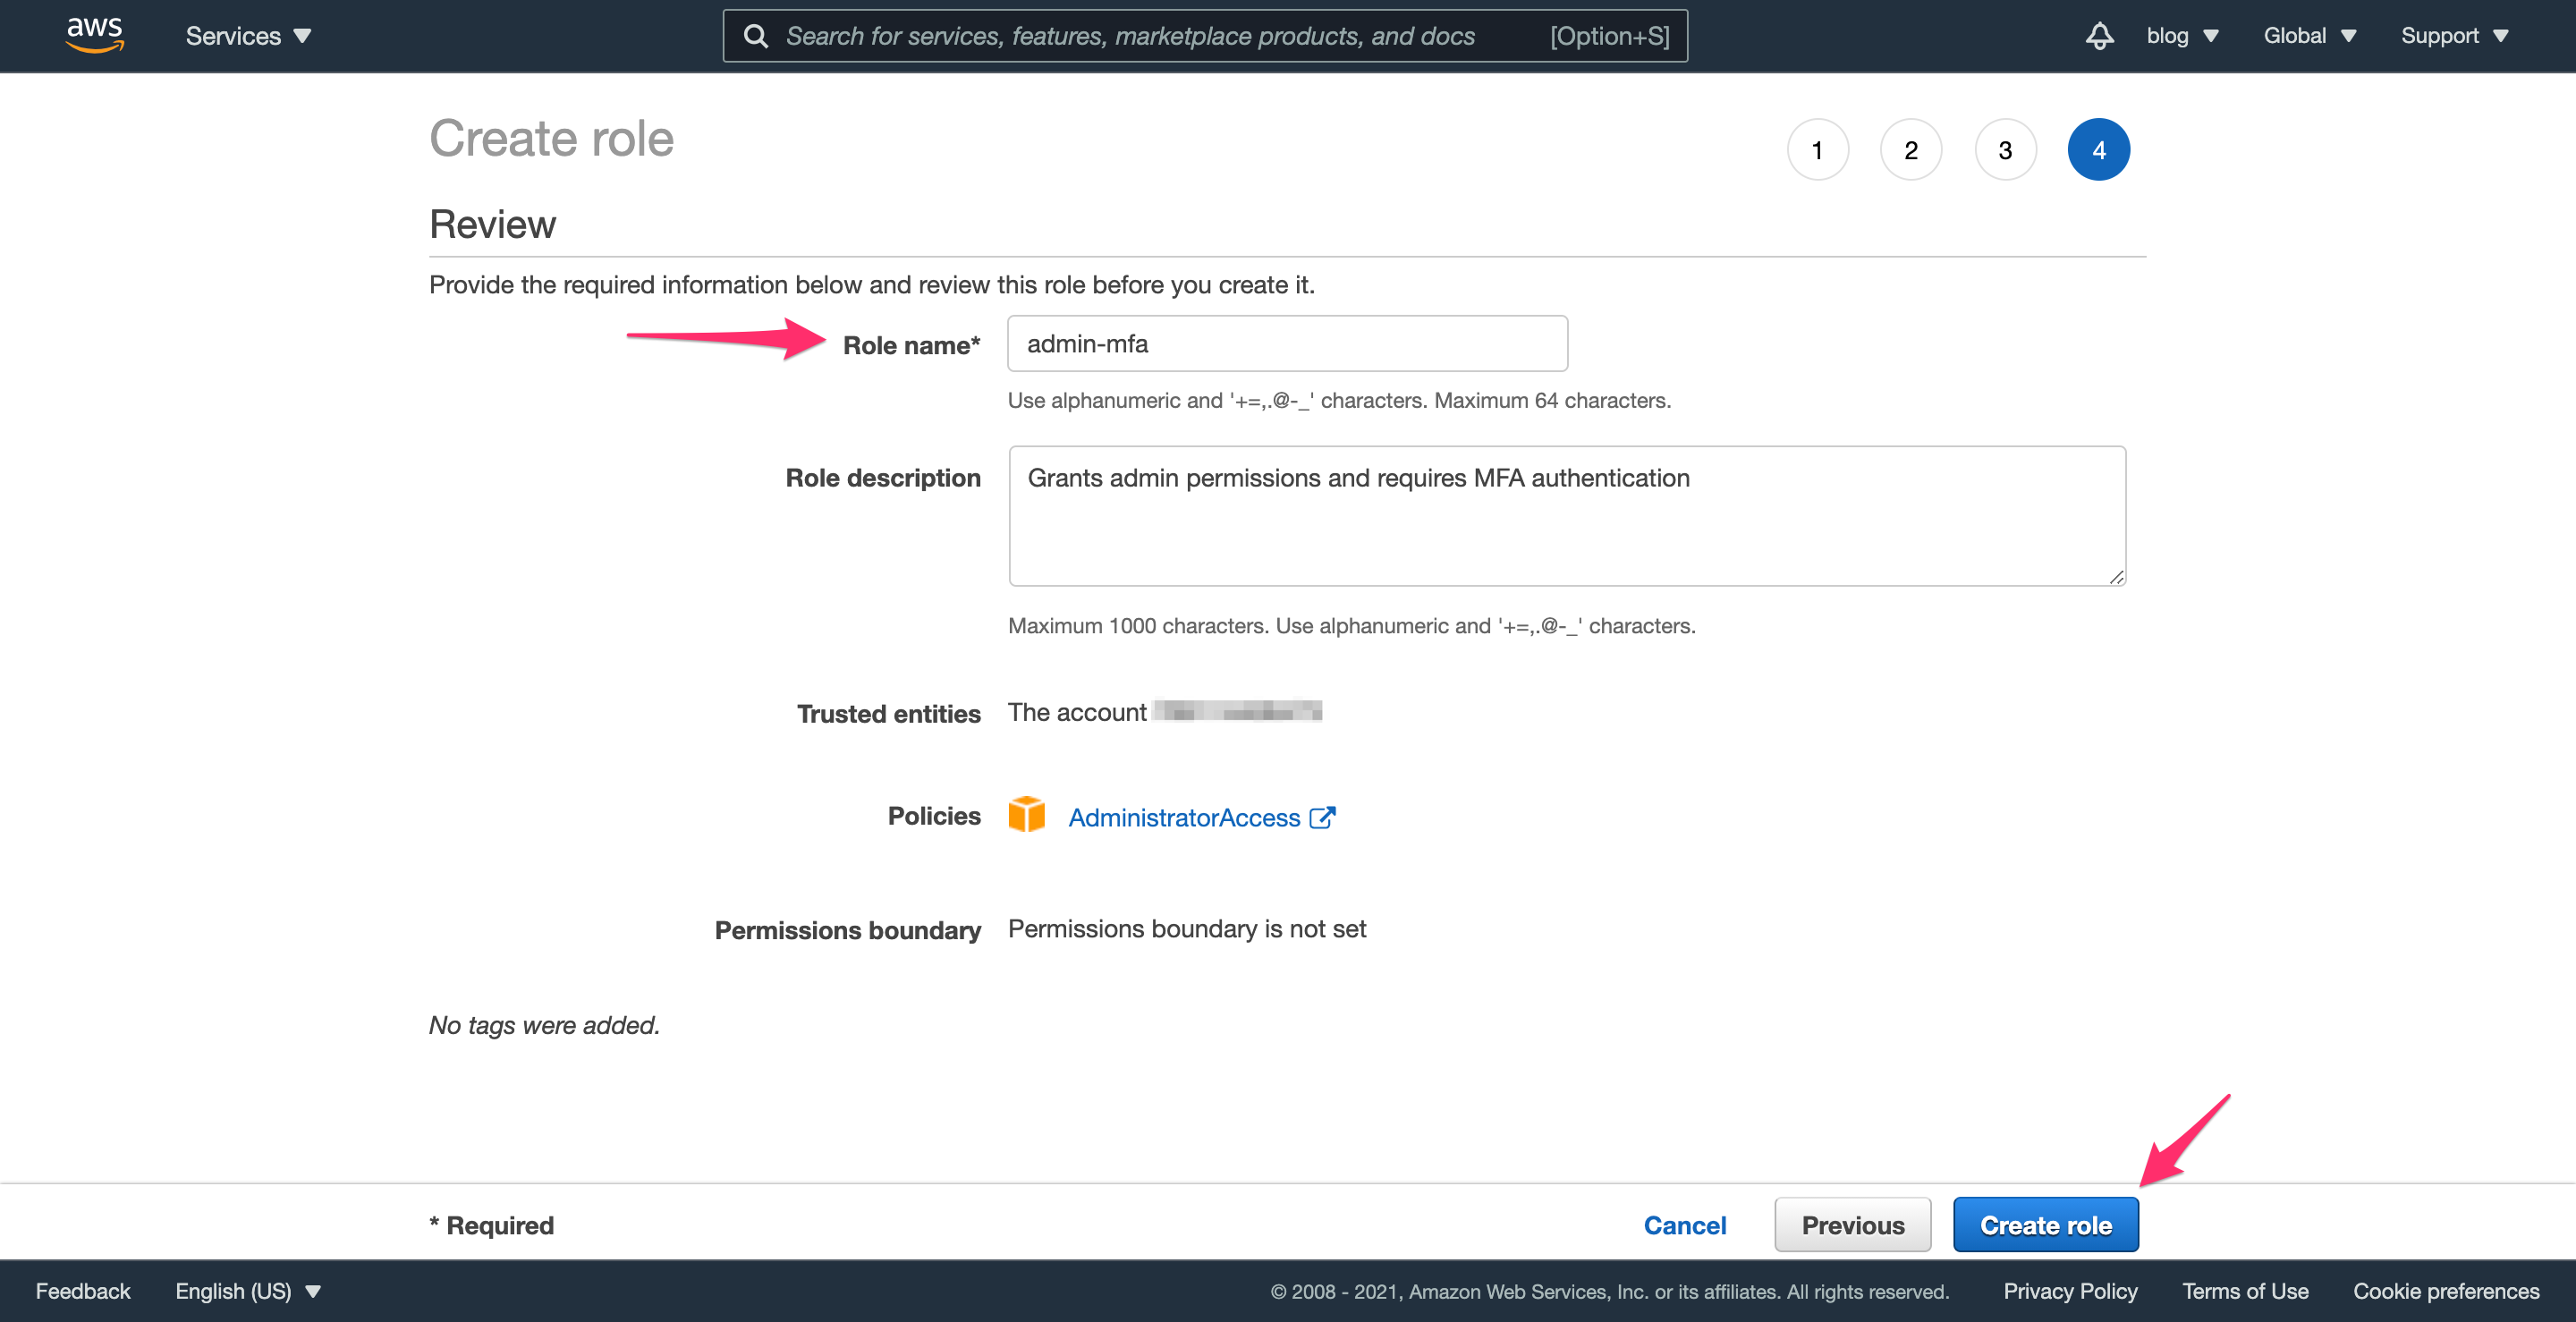
Finally, provide a name for the role, such as admin-mfa and an optional description if you’d like. Click “Create Role” and you’ll be ready to move on to the next step.
Step 4.4: Update the administrators group to refine permissions
This part involves three steps:
- create a policy that allows the group to assume the
admin-mfarole - attach this policy to the administrators group
- remove the “always on” admin permissions for the administrators group
Step 4.5: Creating a policy to assume the admin-mfa role
IAM allows users to create extremely granular access permissions. This is the first step that requires a policy, which is a generic set of permissions rules. These rules can be attached to other IAM objects like groups, roles, and users. In this case, we are creating a policy that allows members of the administrators group assume the admin-mfa role. In other words, we are requiring administrators to authenticate with MFA in order to perform administrative actions.
Navigate to the IAM policies section and click “Create Policy”. Instead of the visual editor, select the “JSON” tab and enter the following snippet (using your AWS account id instead of 1234567890):
{
    "Version": "2012-10-17",
    "Statement": [
        {
            "Effect": "Allow",
            "Action": [
                "sts:AssumeRole"
            ],
            "Resource": [
                "arn:aws:iam::1234567890:role/admin-mfa"
            ]
        }
    ]
}
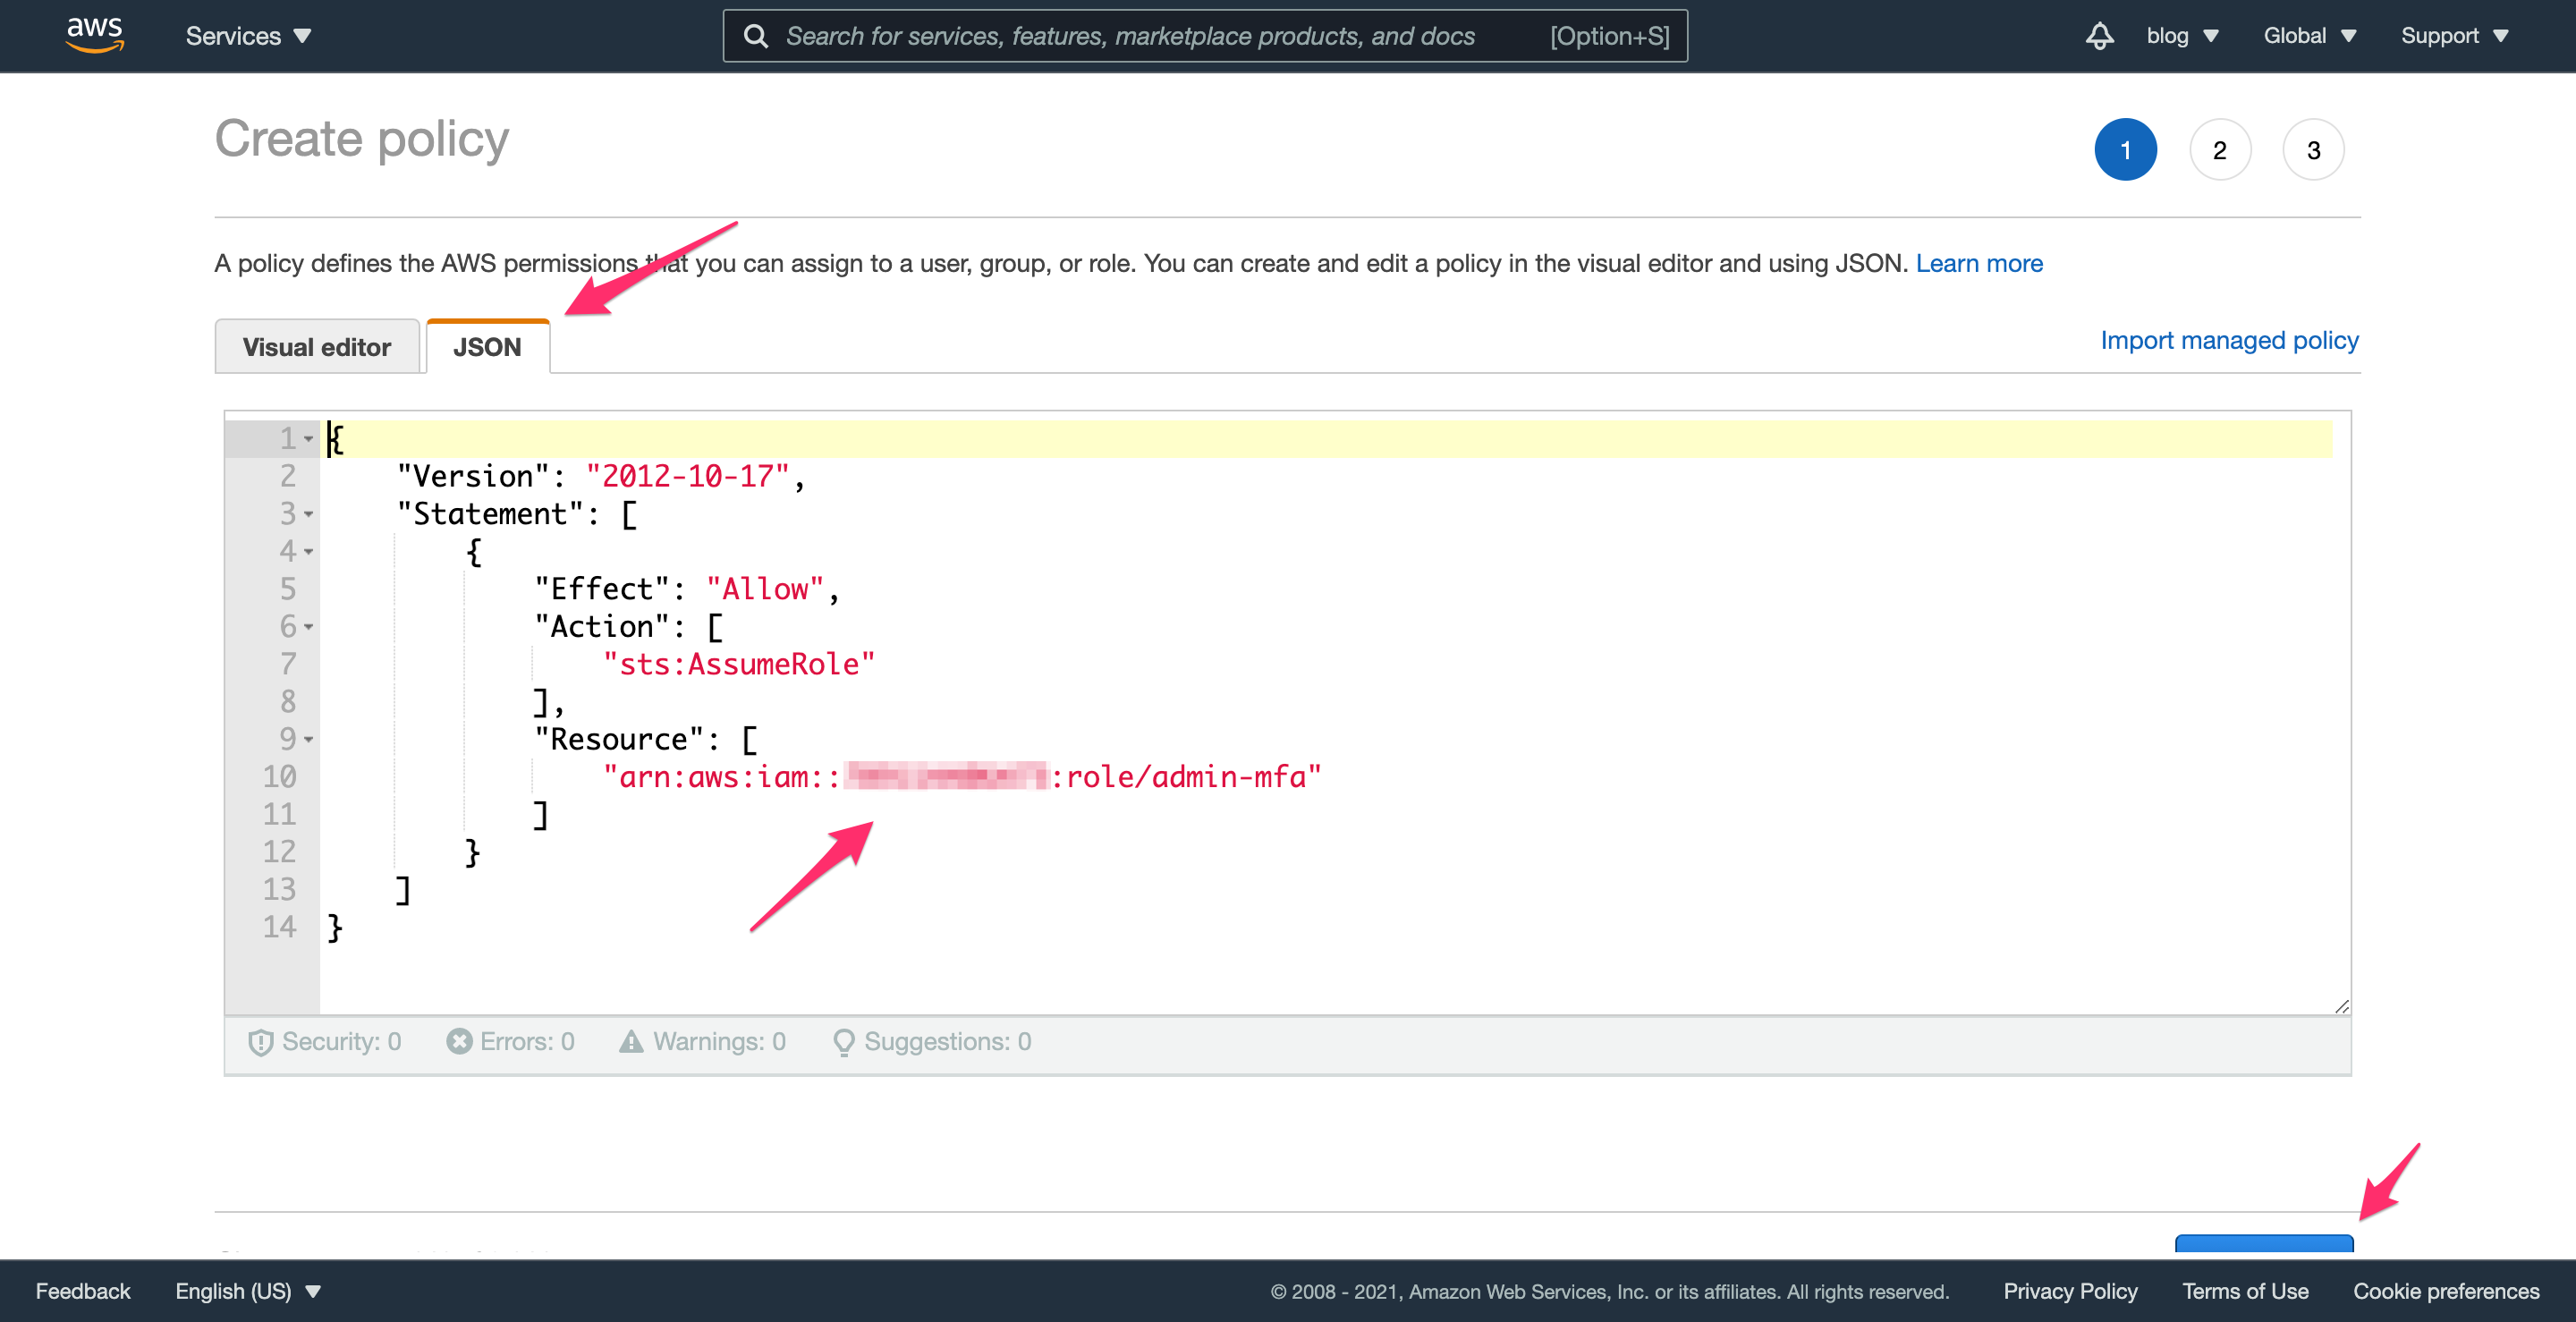
This policy does nothing until it’s attached to another entity. Once it’s attached, it allows the entity to assume the admin-mfa role, which you’ll do in the next step.
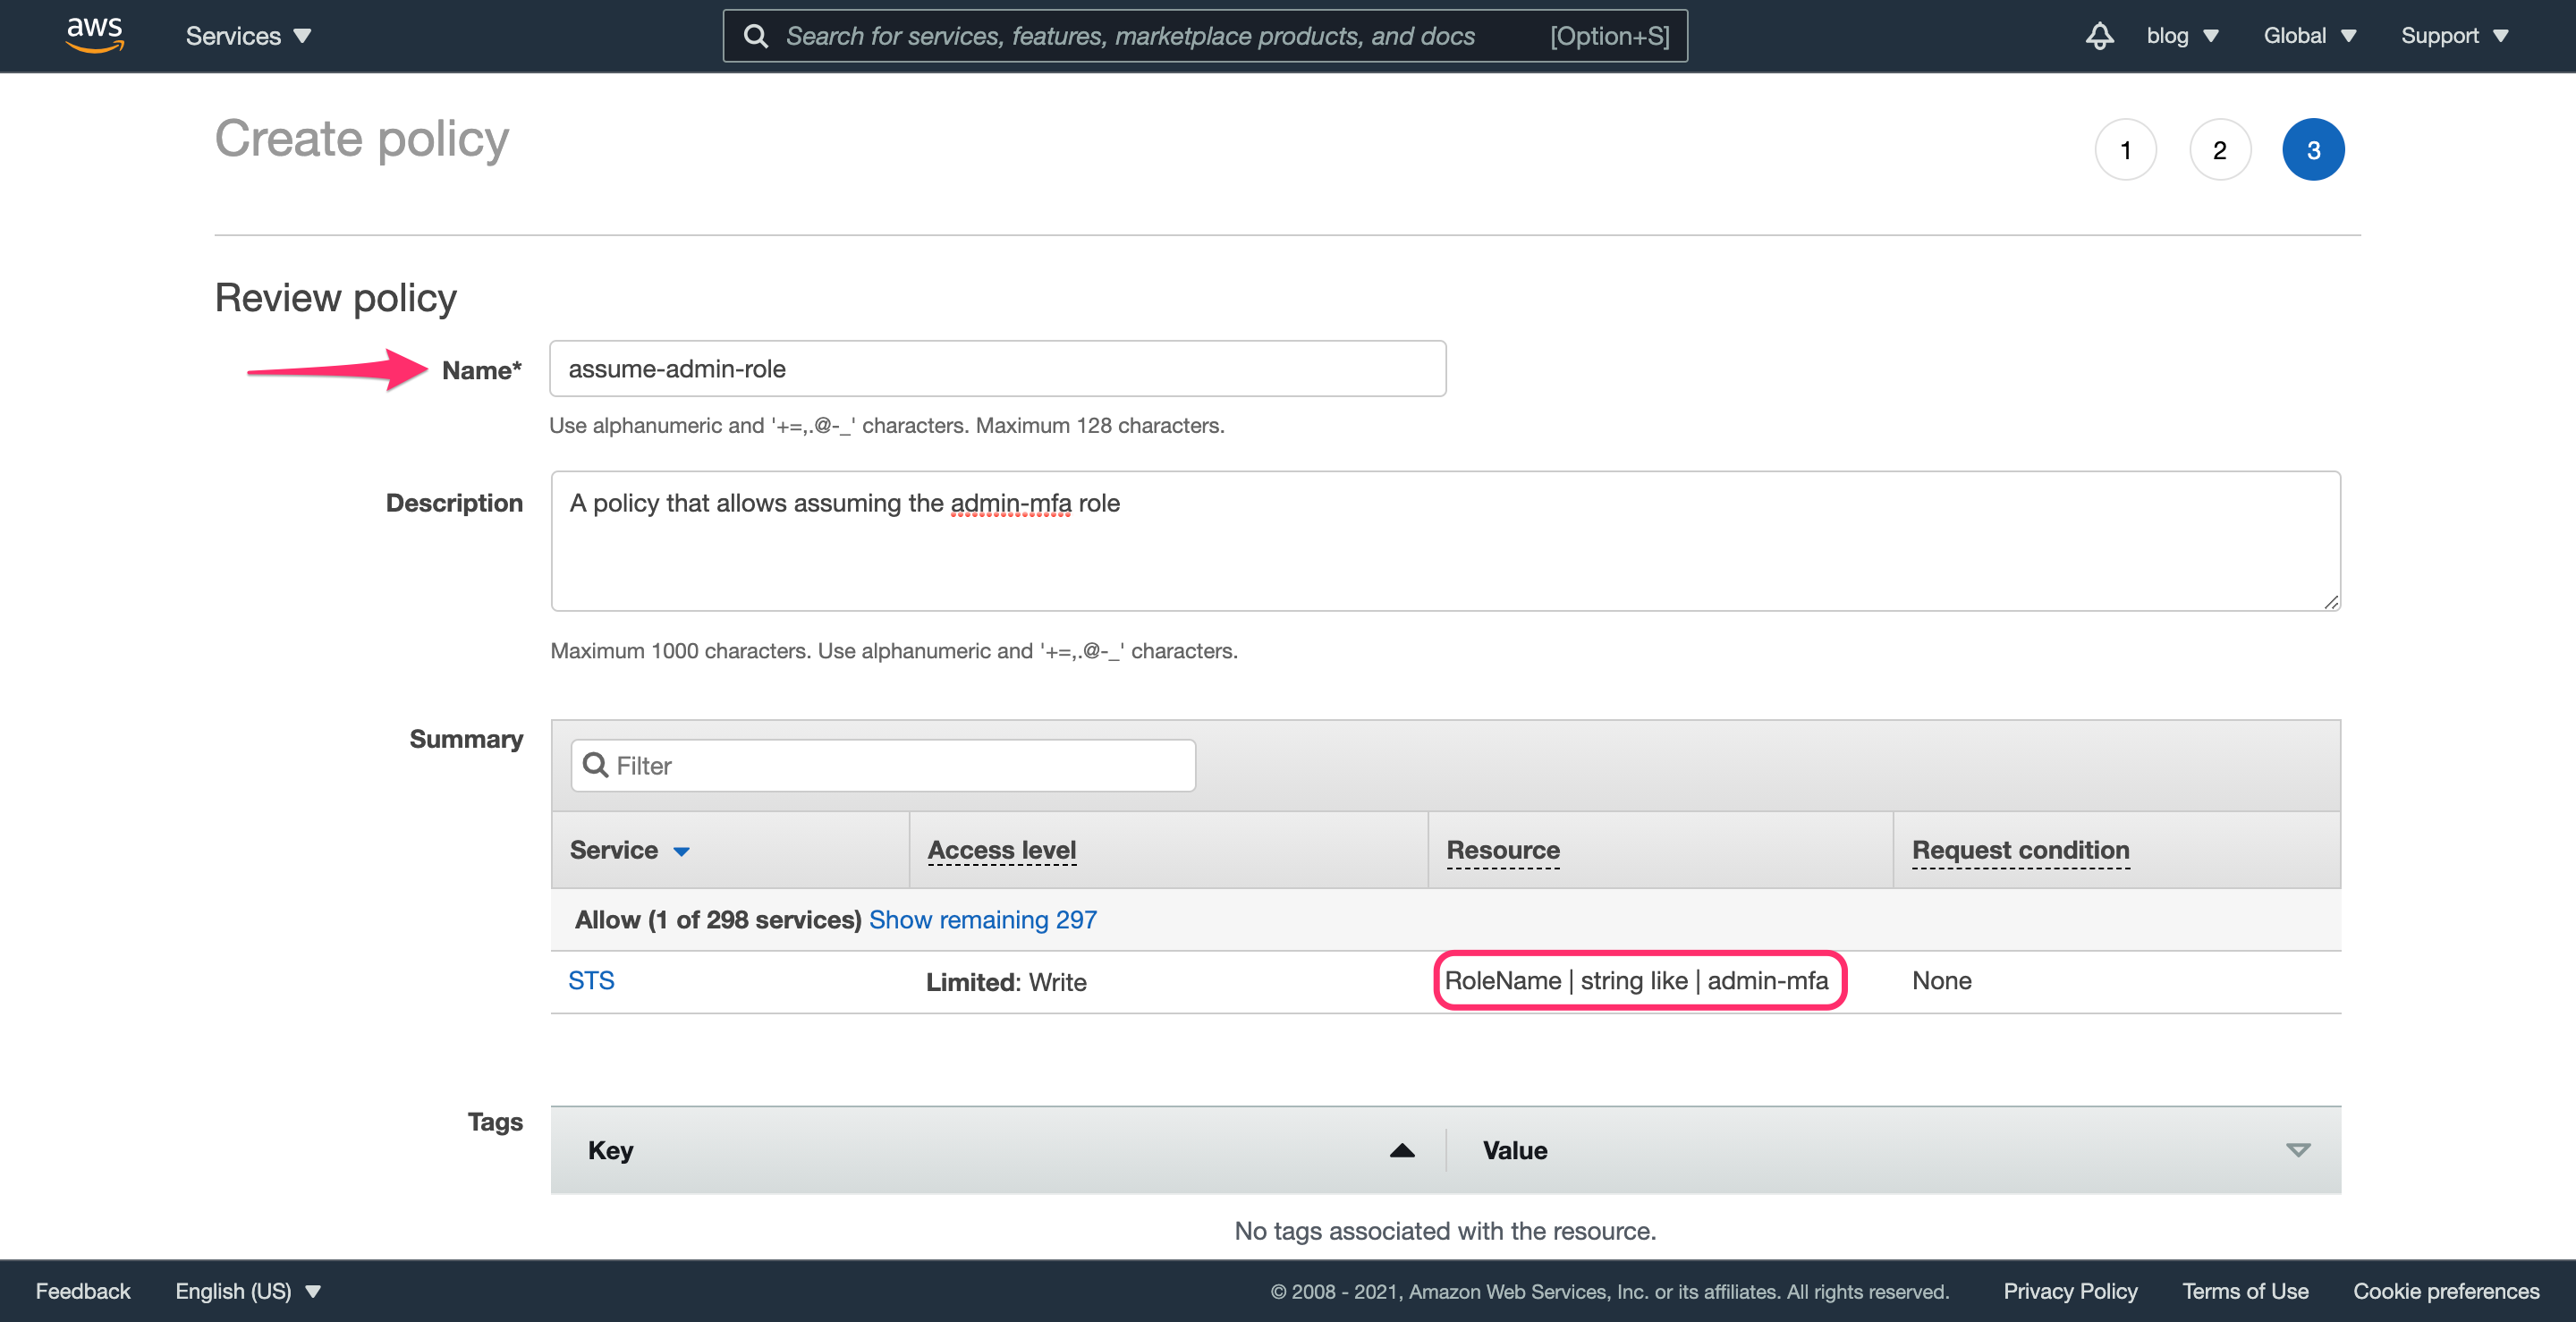
Click “Next: Tags”, then “Next: Review” and fill in the required fields. Finally, click “Create Policy” and proceed to the next step.
Step 4.6: Updating the administrators group permissions
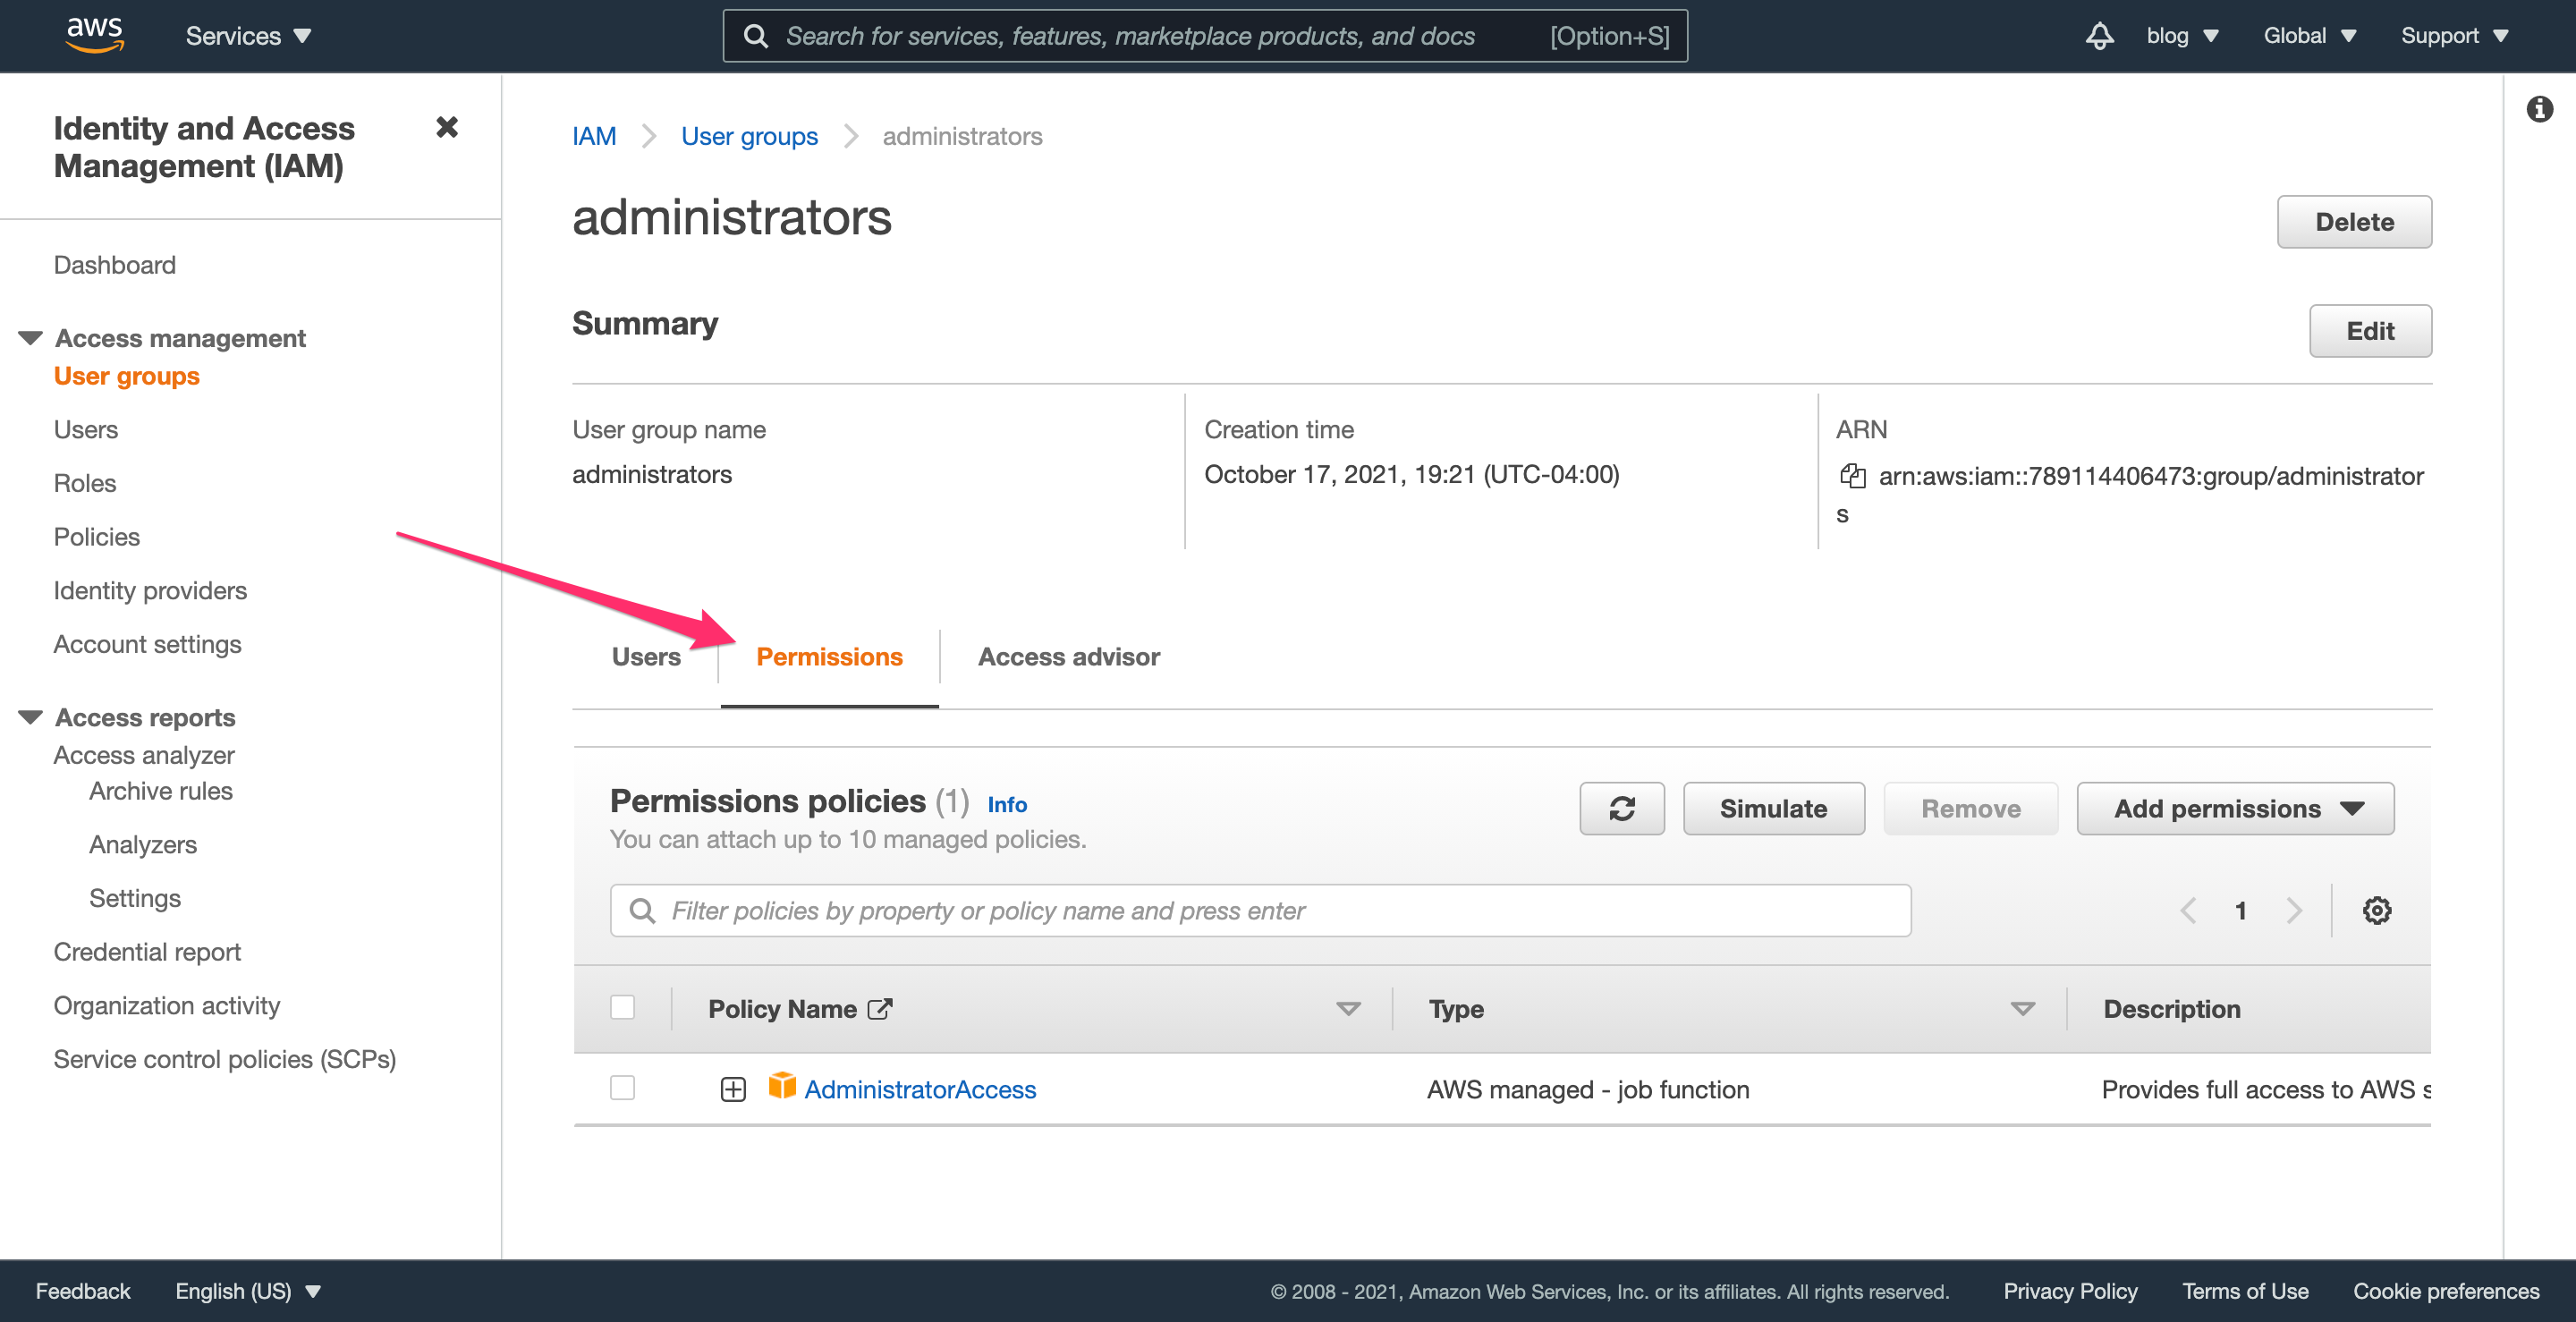
Navigate to the IAM user groups section and find the administrators group that you created. Click on the “Permissions” tab to begin modifying permissions.
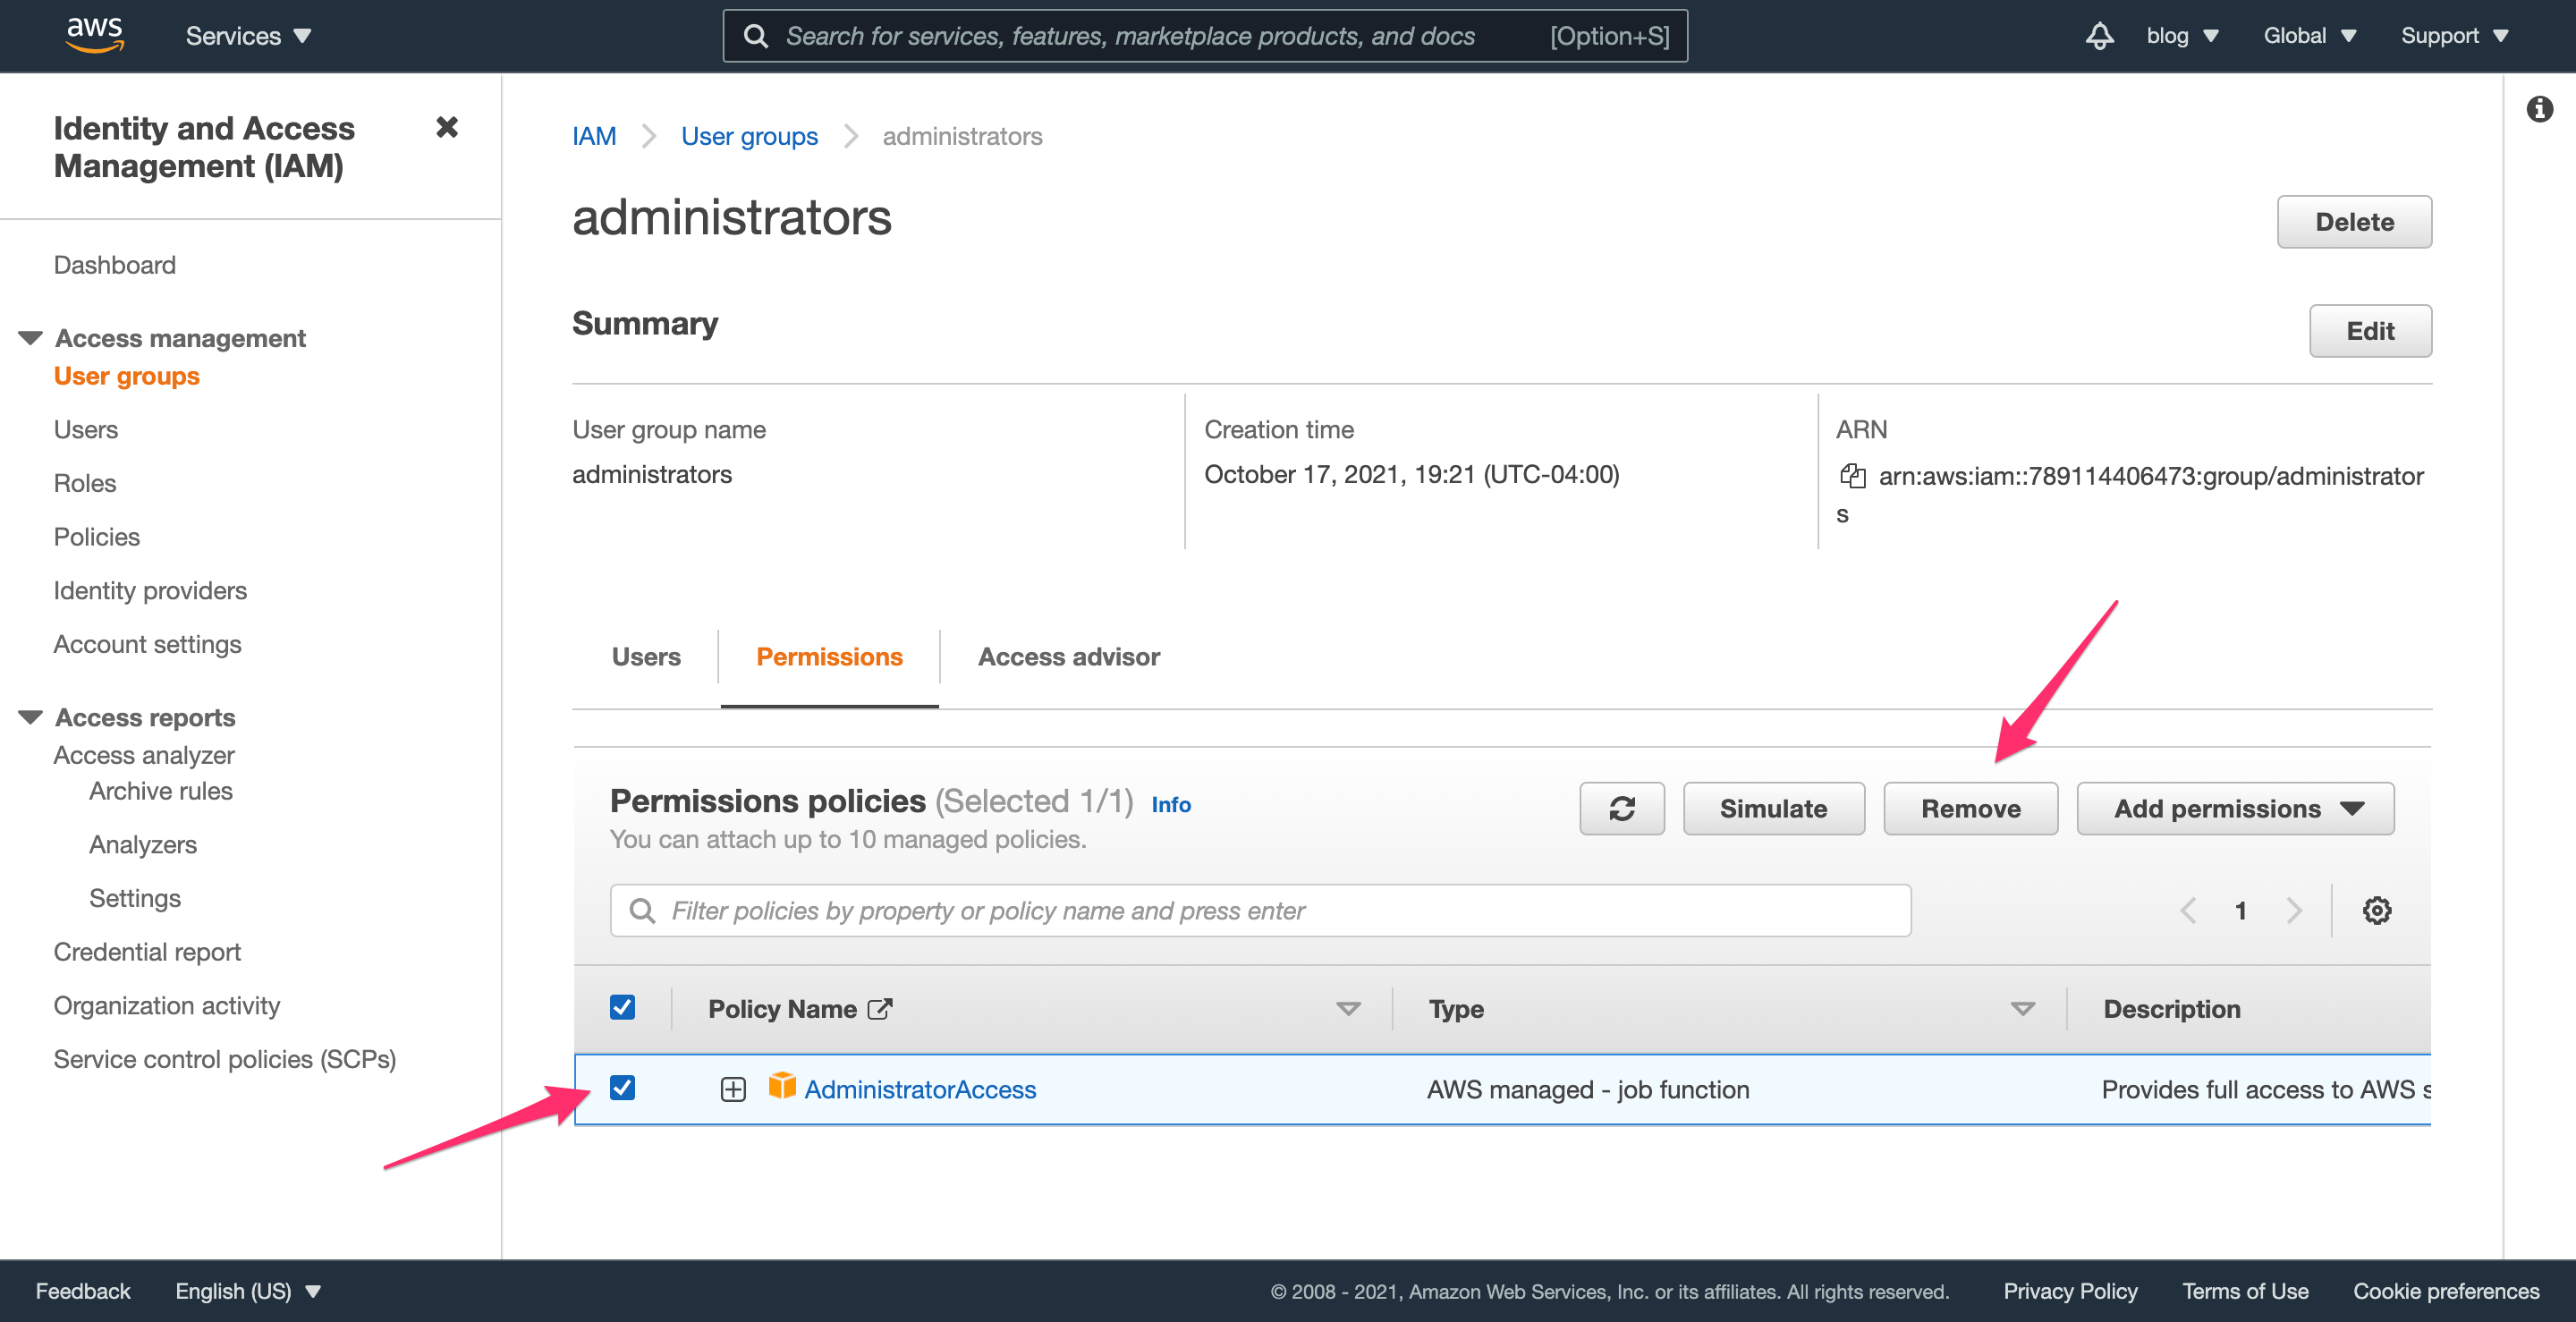
Check the box next to the “Administrator Access” permission and click “Remove”. We no longer want users in this group to have admin privileges by default. Instead, we will give these users permission to assume the admin-mfa role that gives them admin privileges.
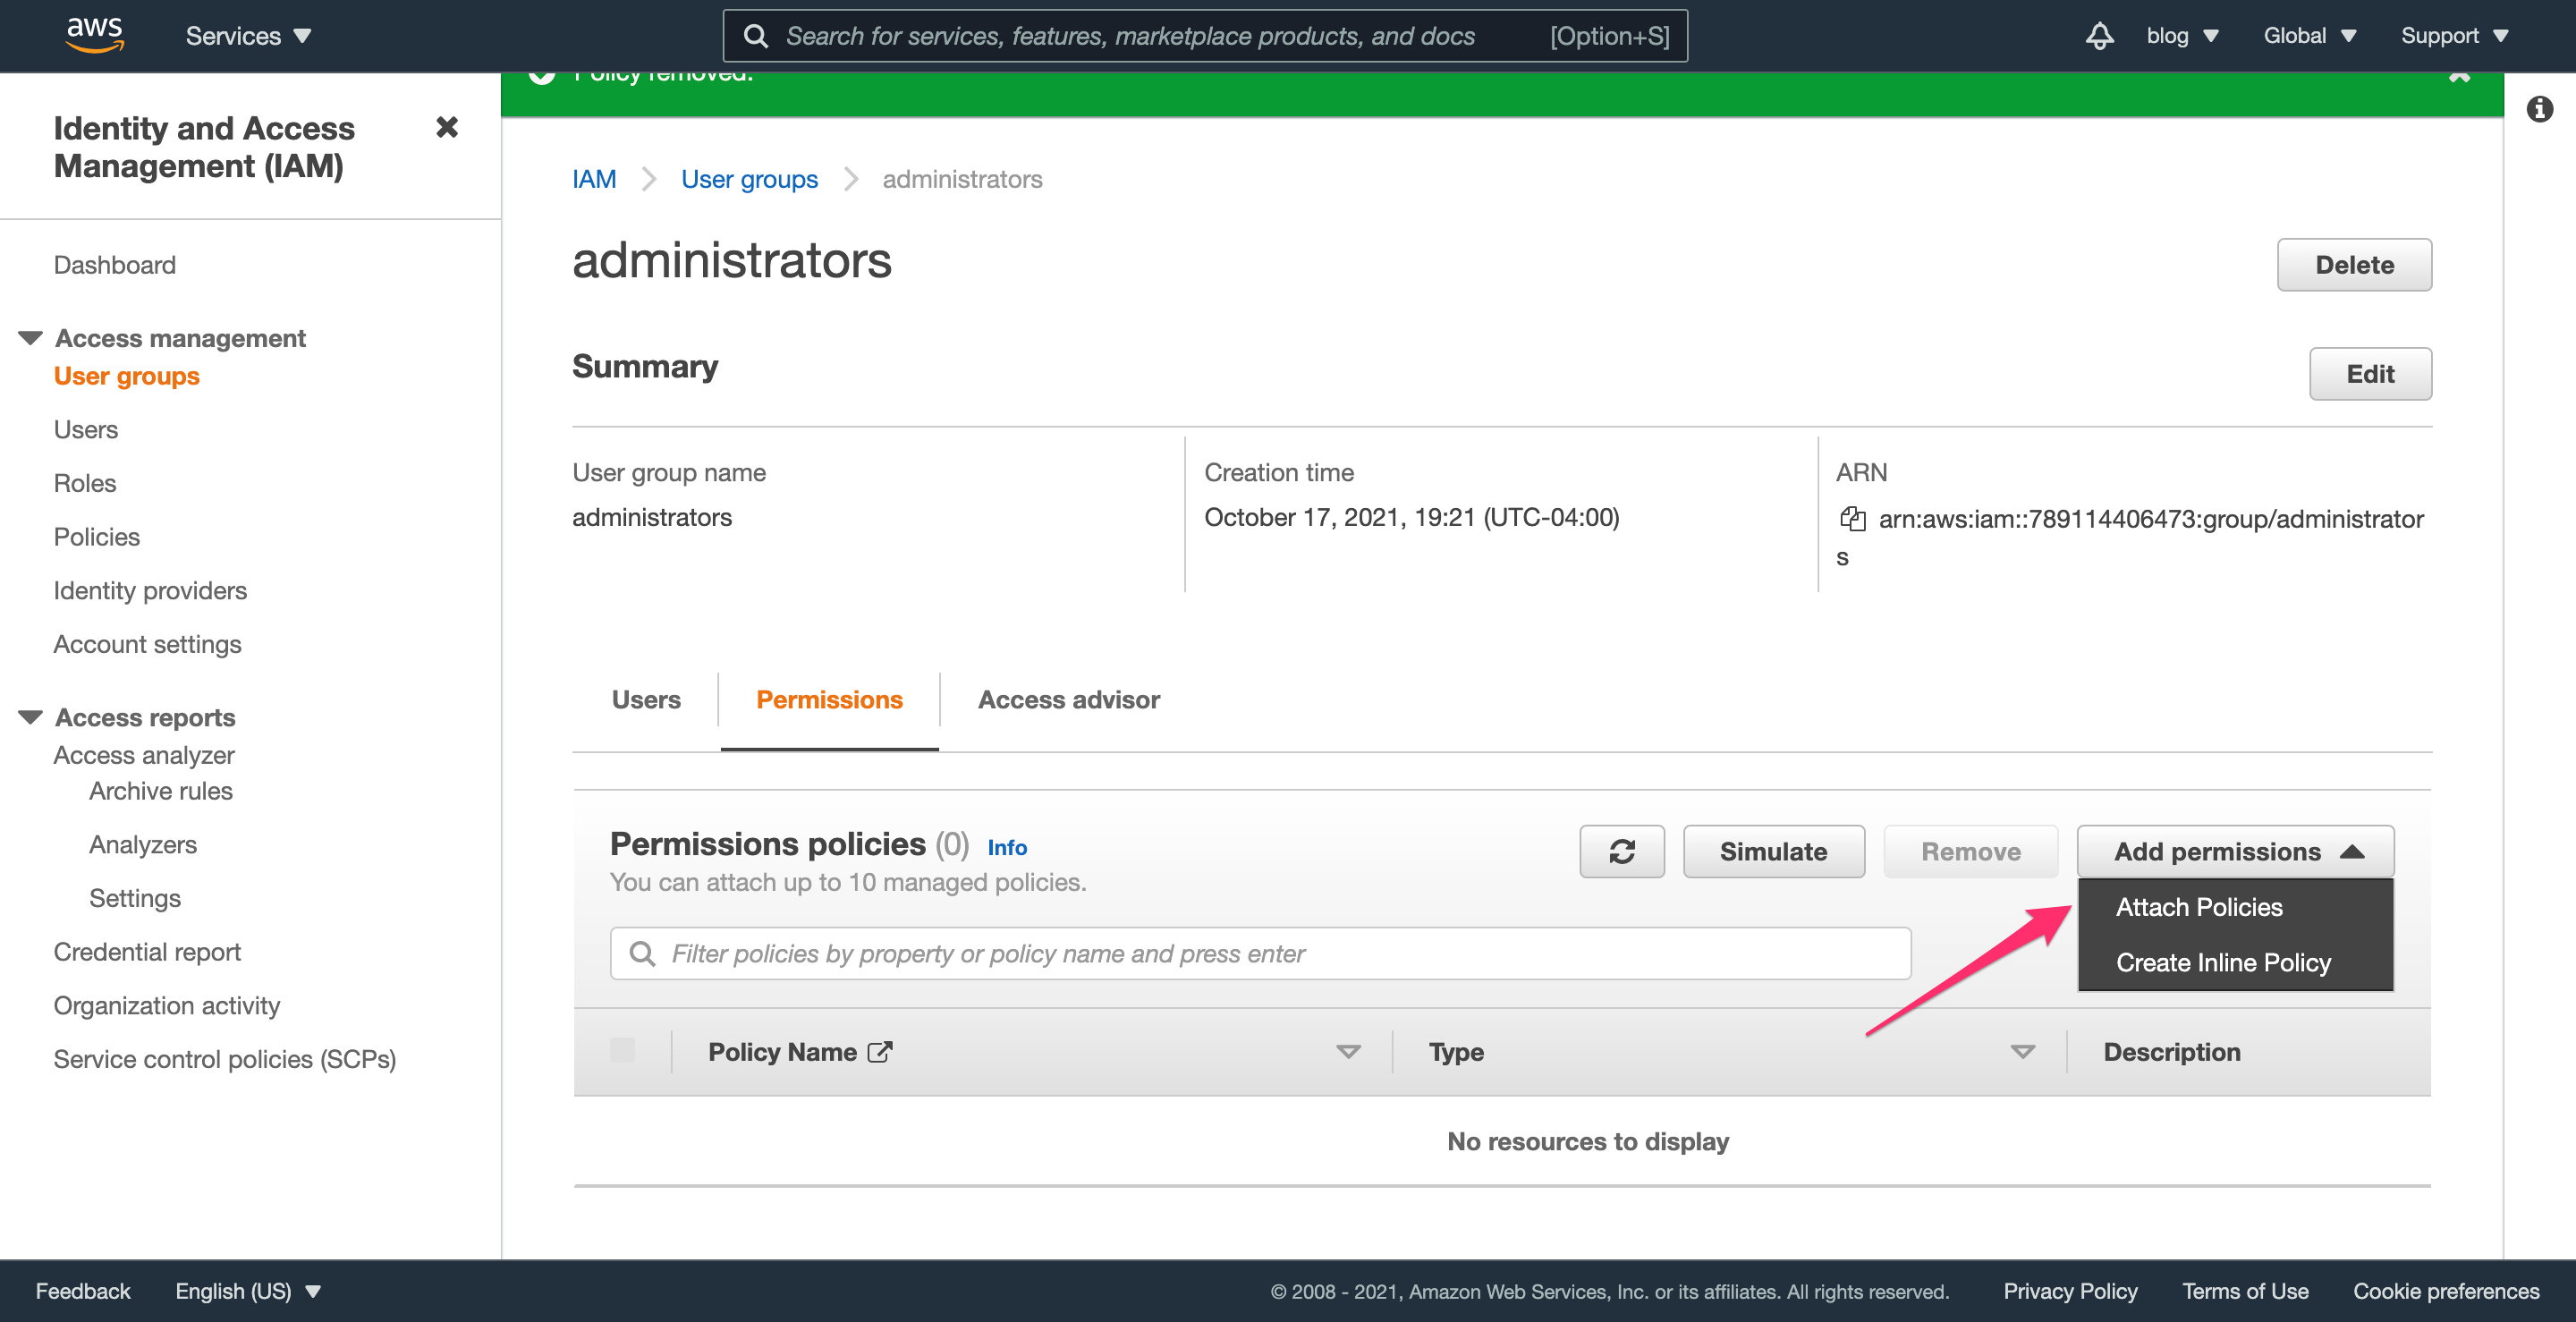
Click “Add permissions” (which opens a dropdown) and select “Attach policies”.
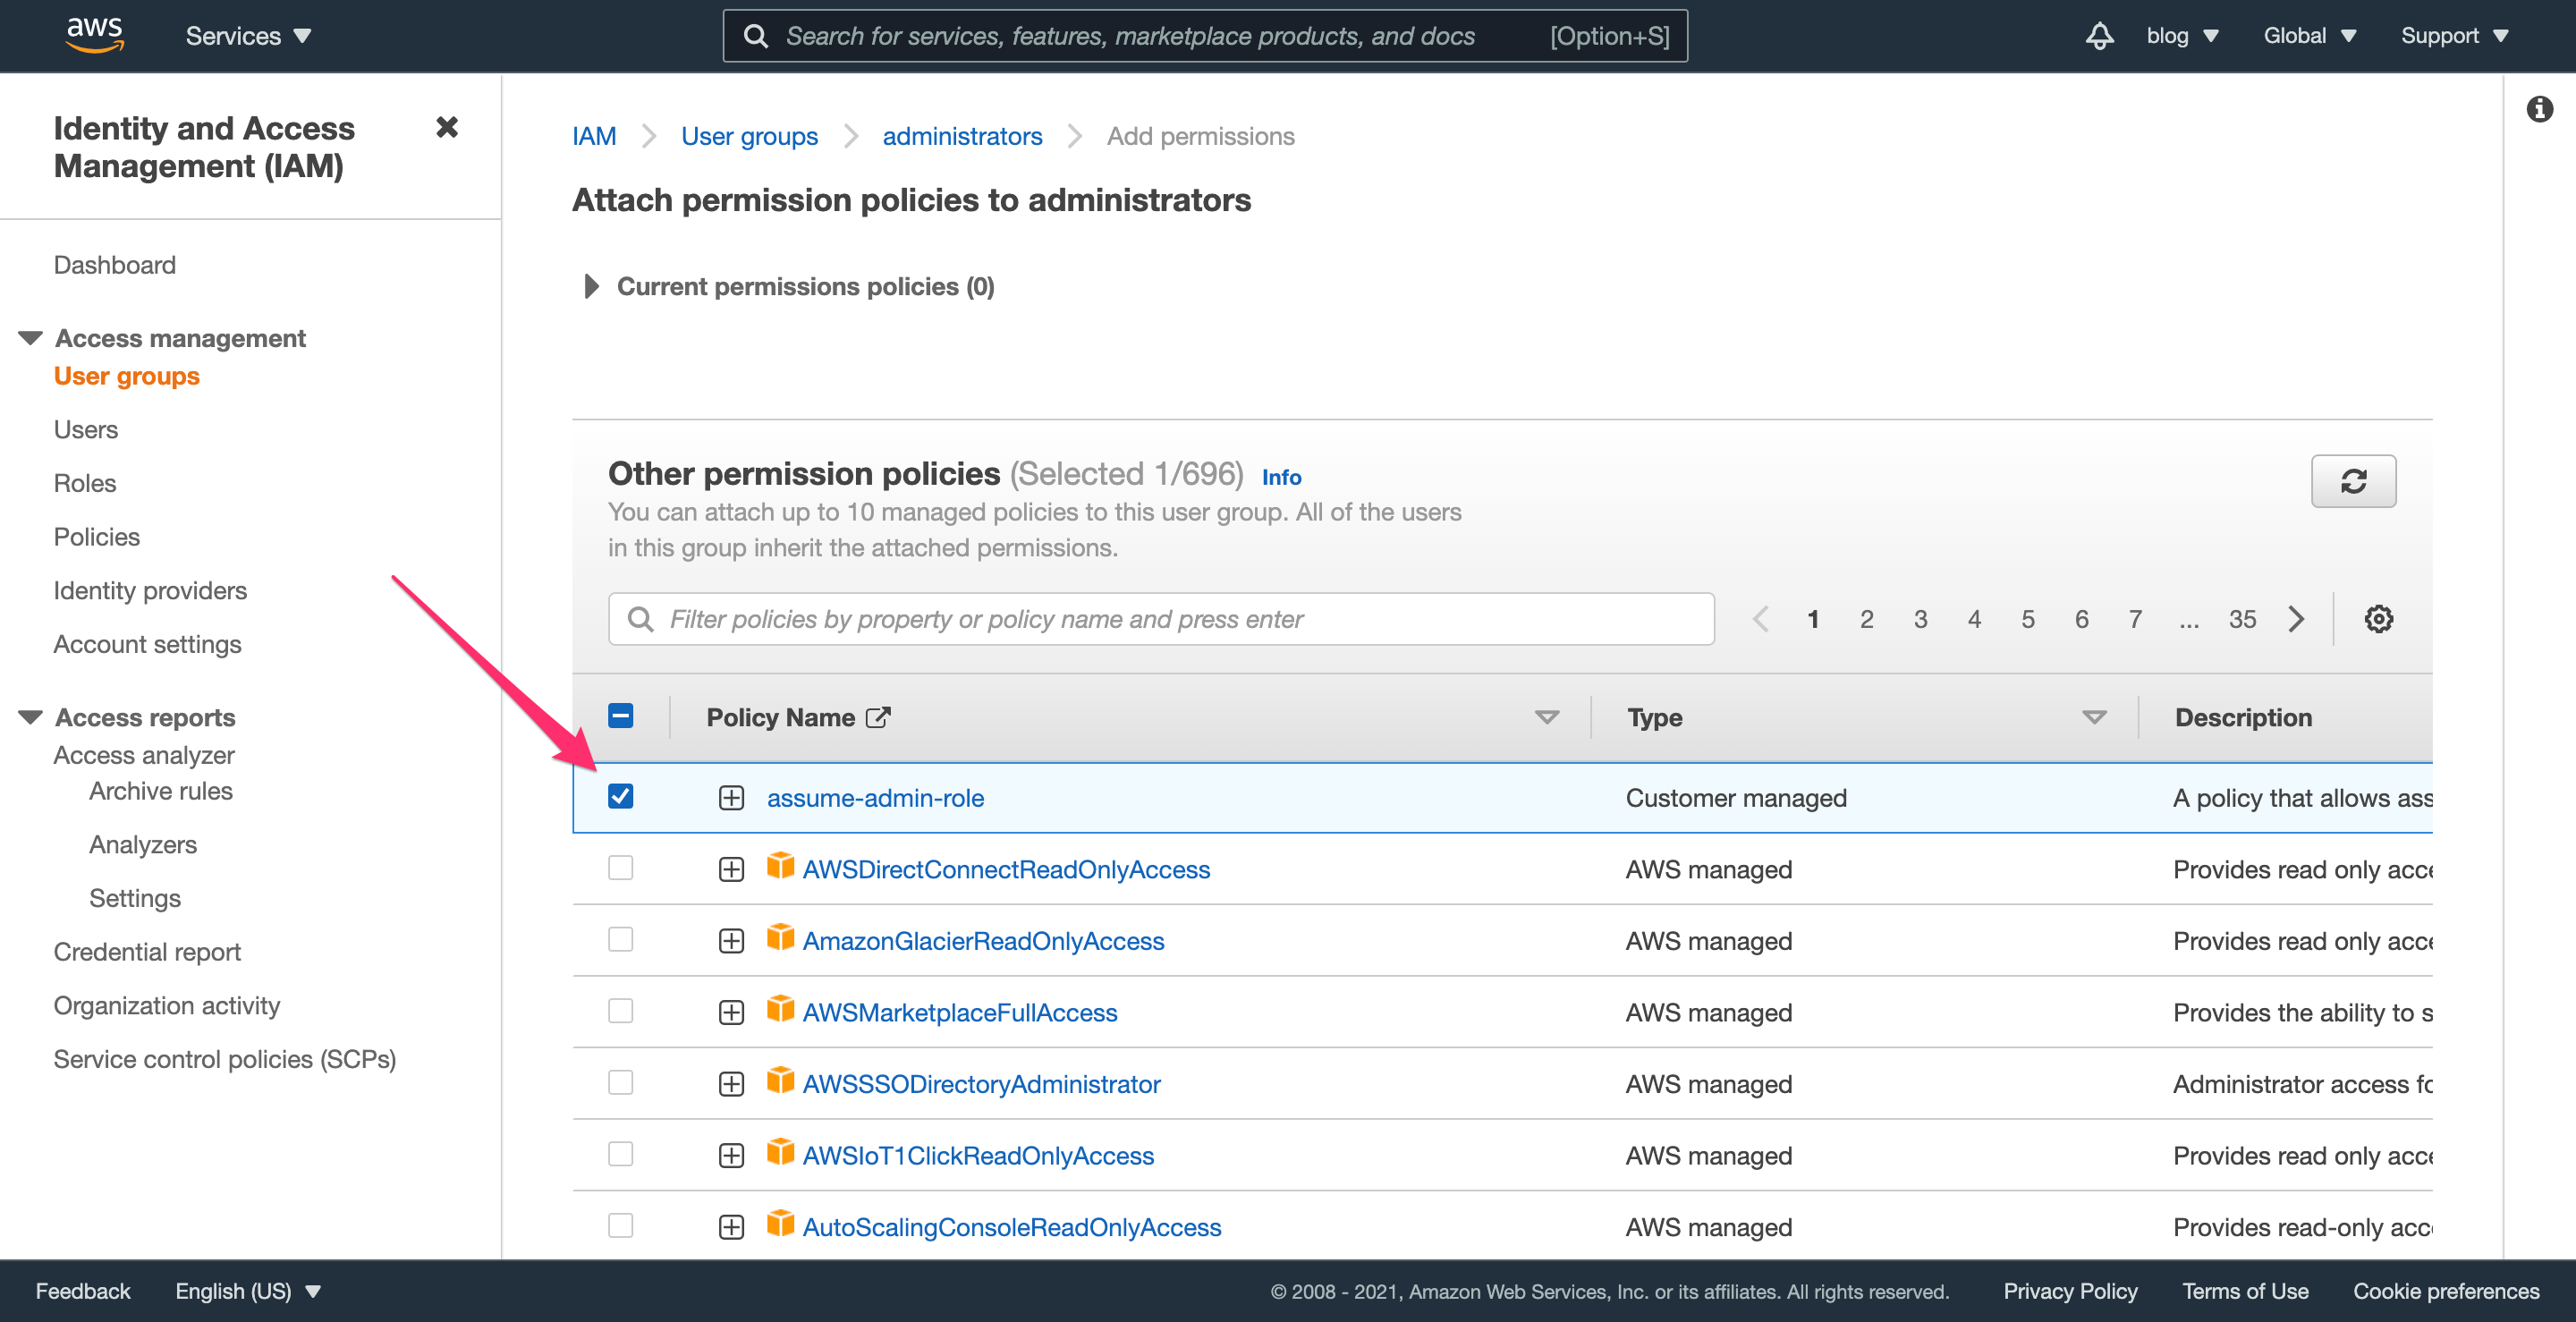
On the next screen, select the role you created; in this example, it’s named assume-admin-role.
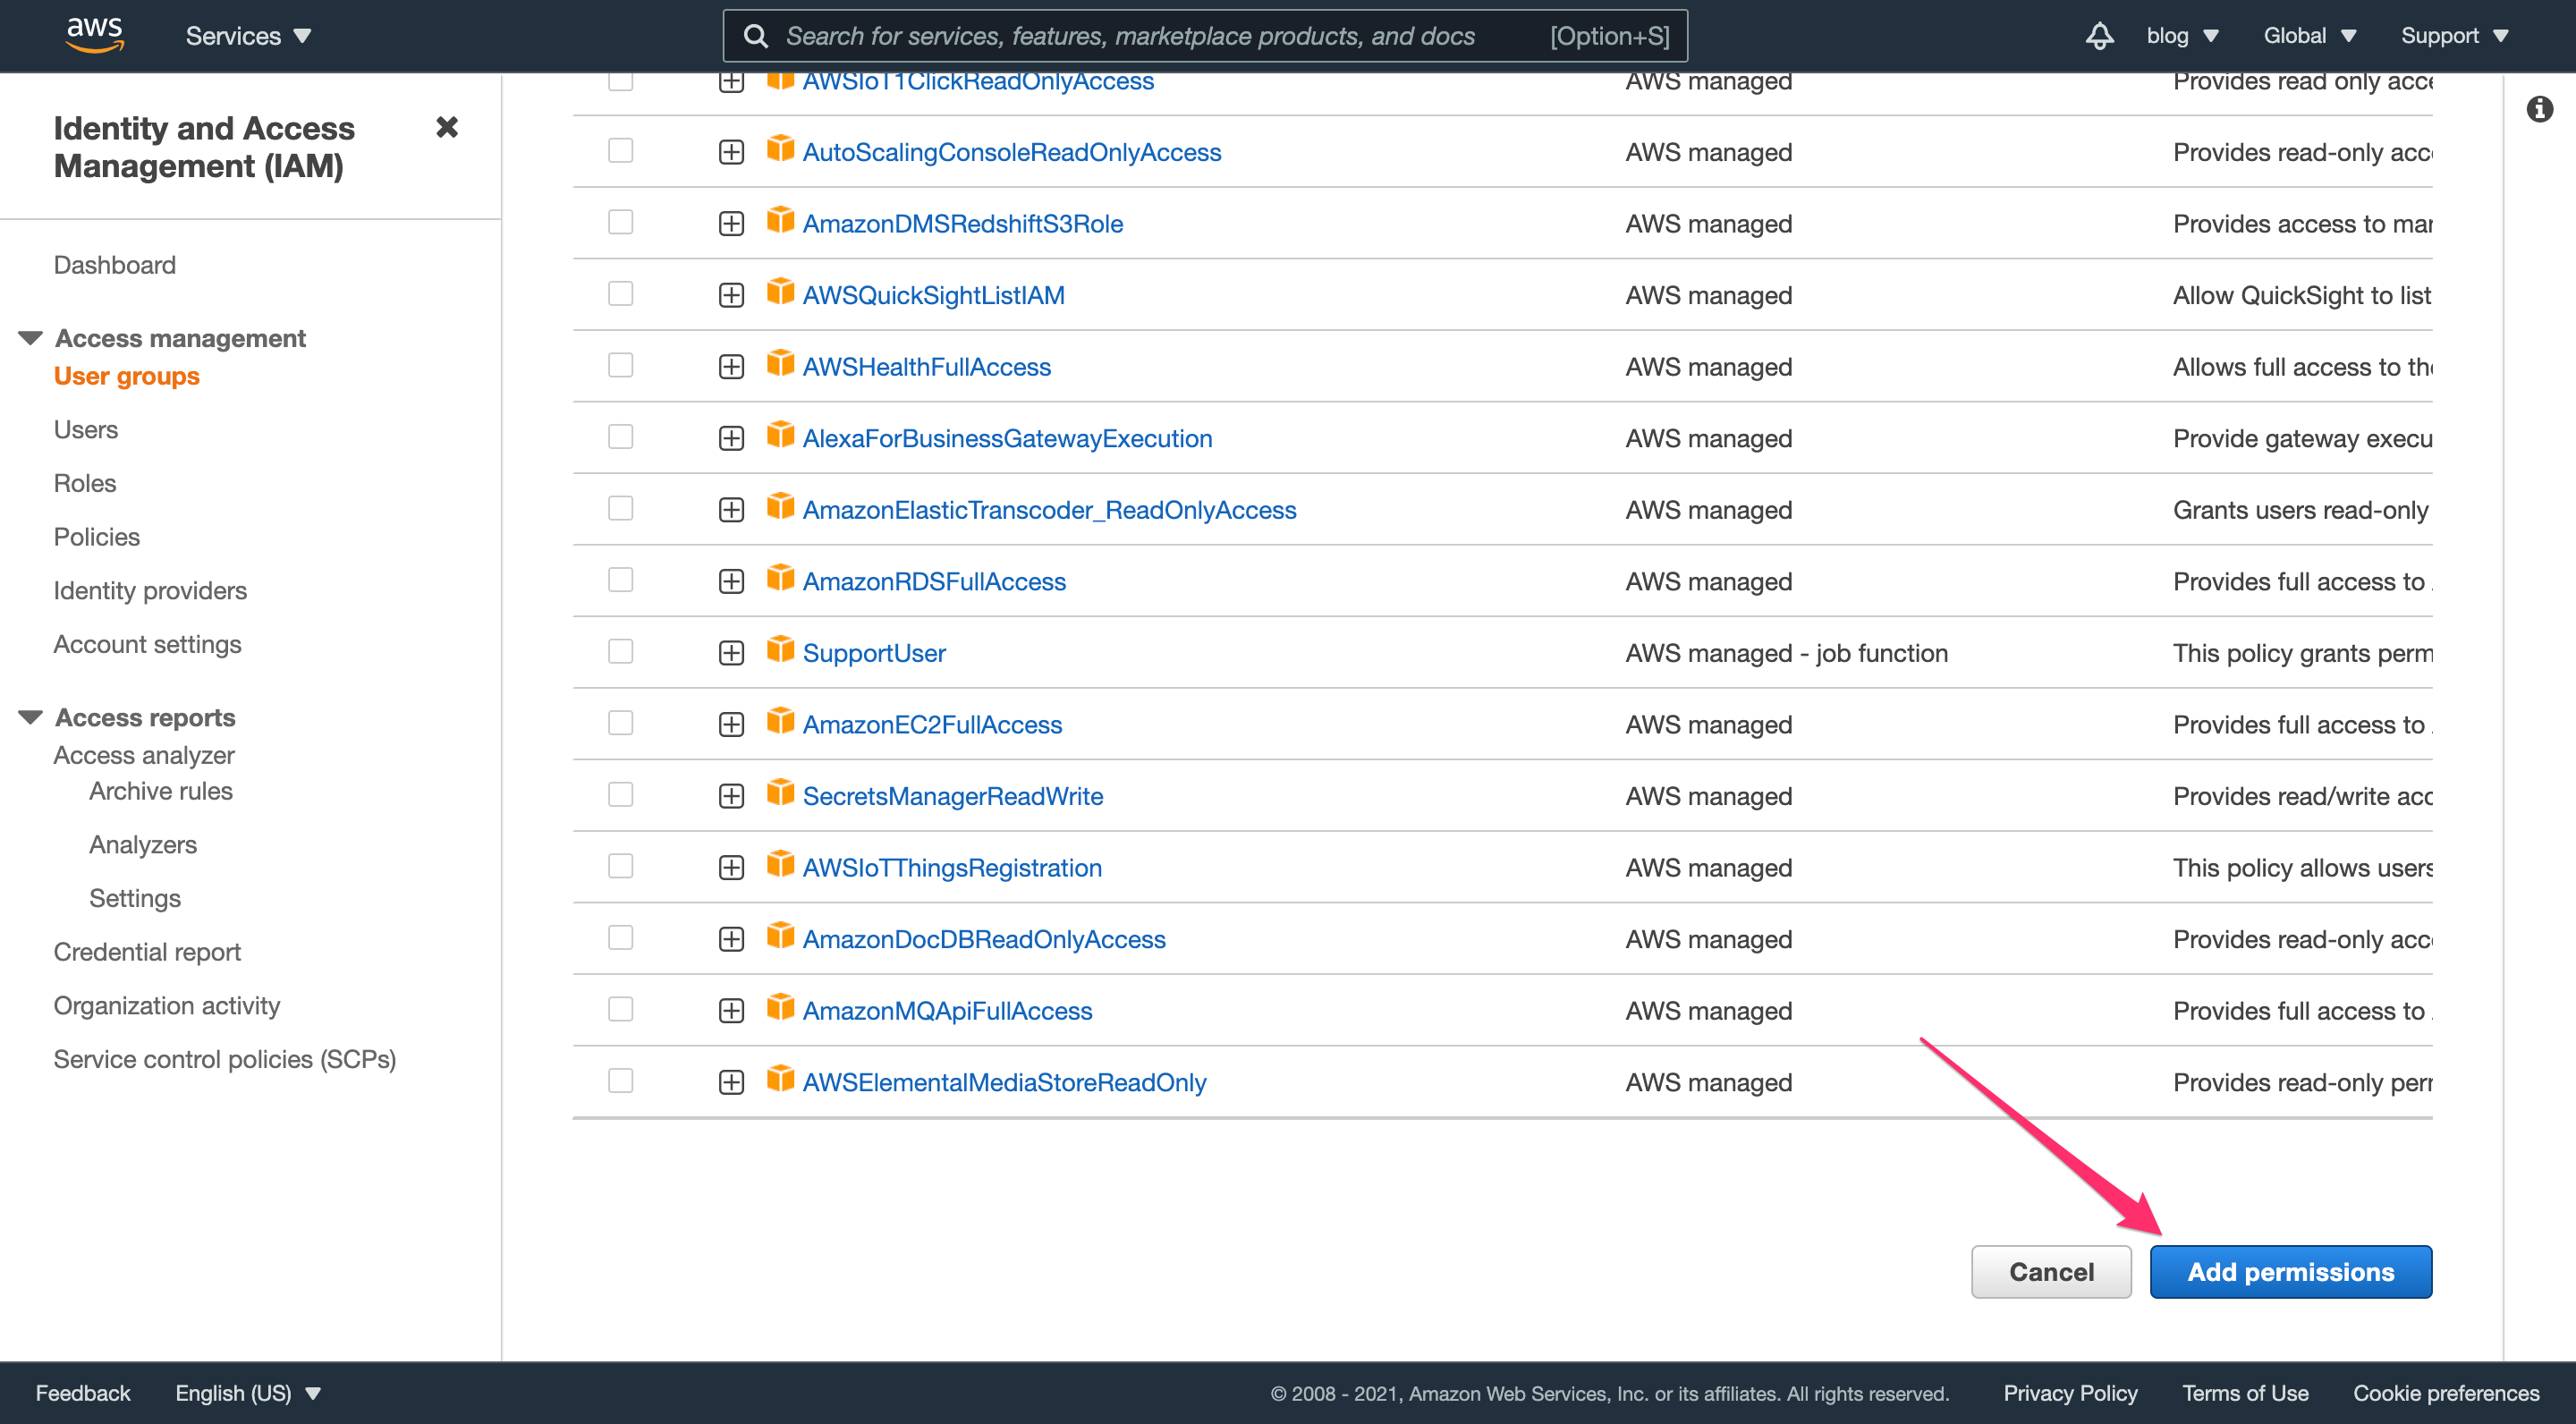
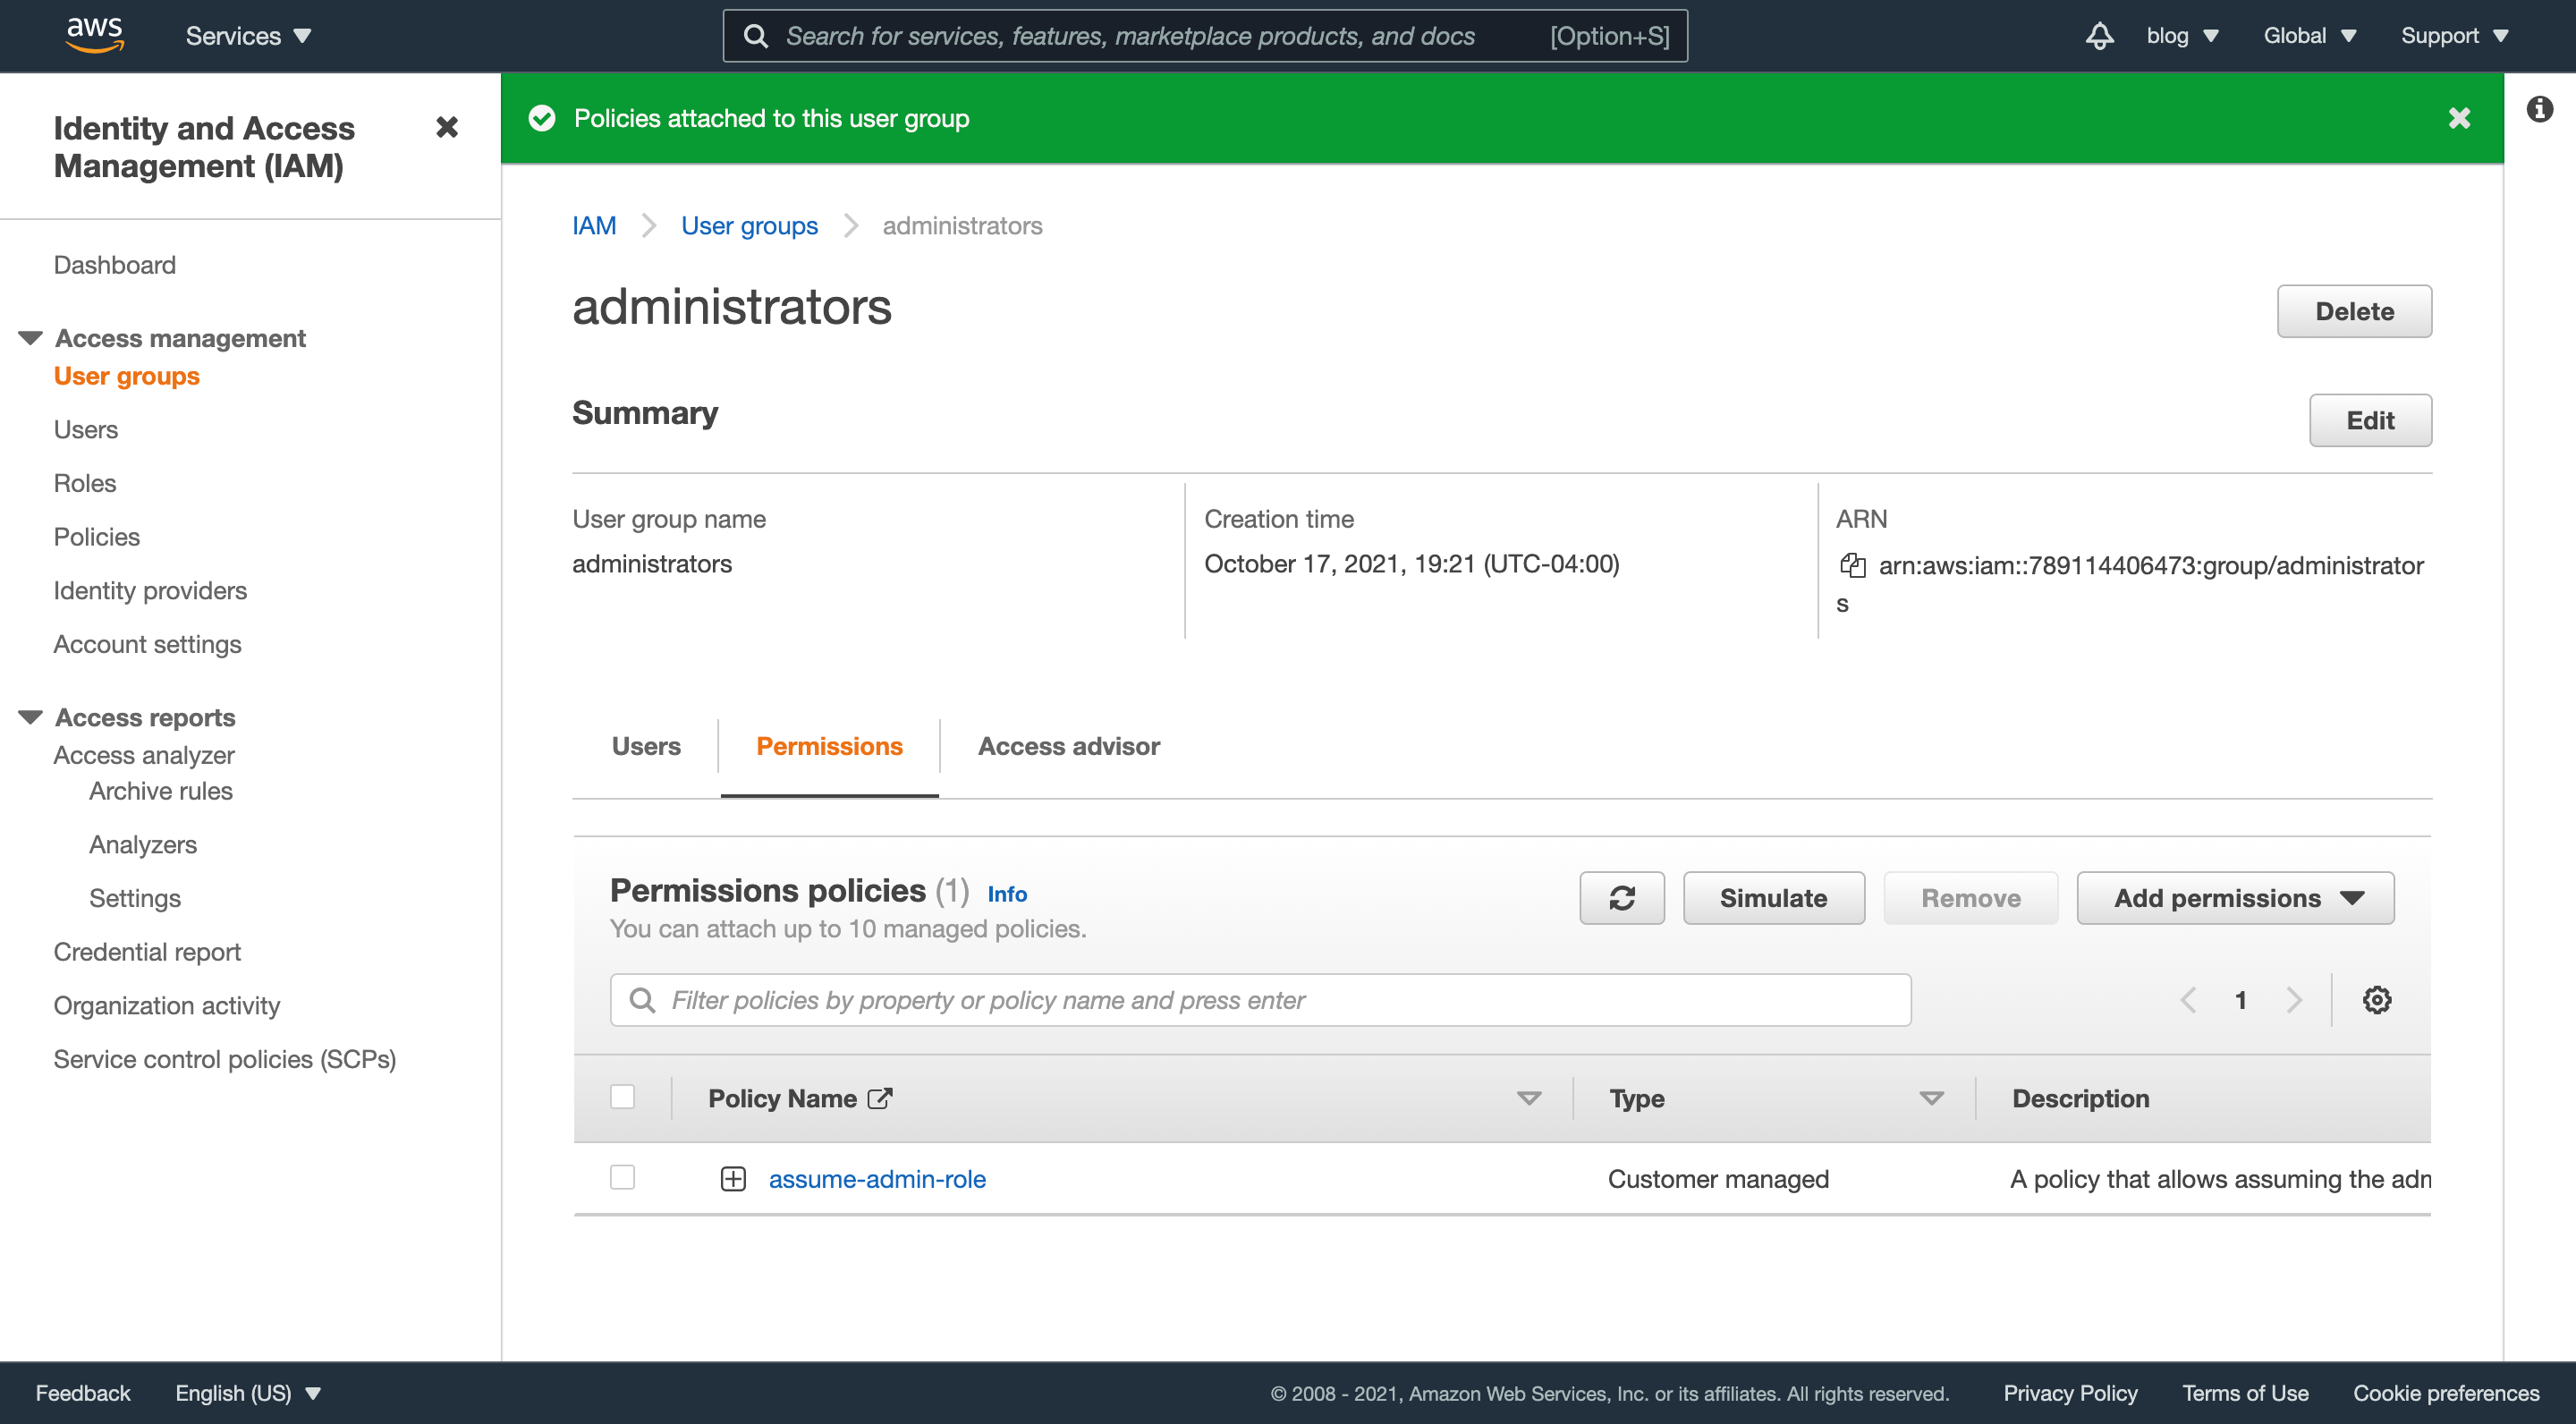
Scroll down and click “Add permissions” to finish adding this policy to the group.
Step 4.7: Assuming the admin-mfa role as a non-root user
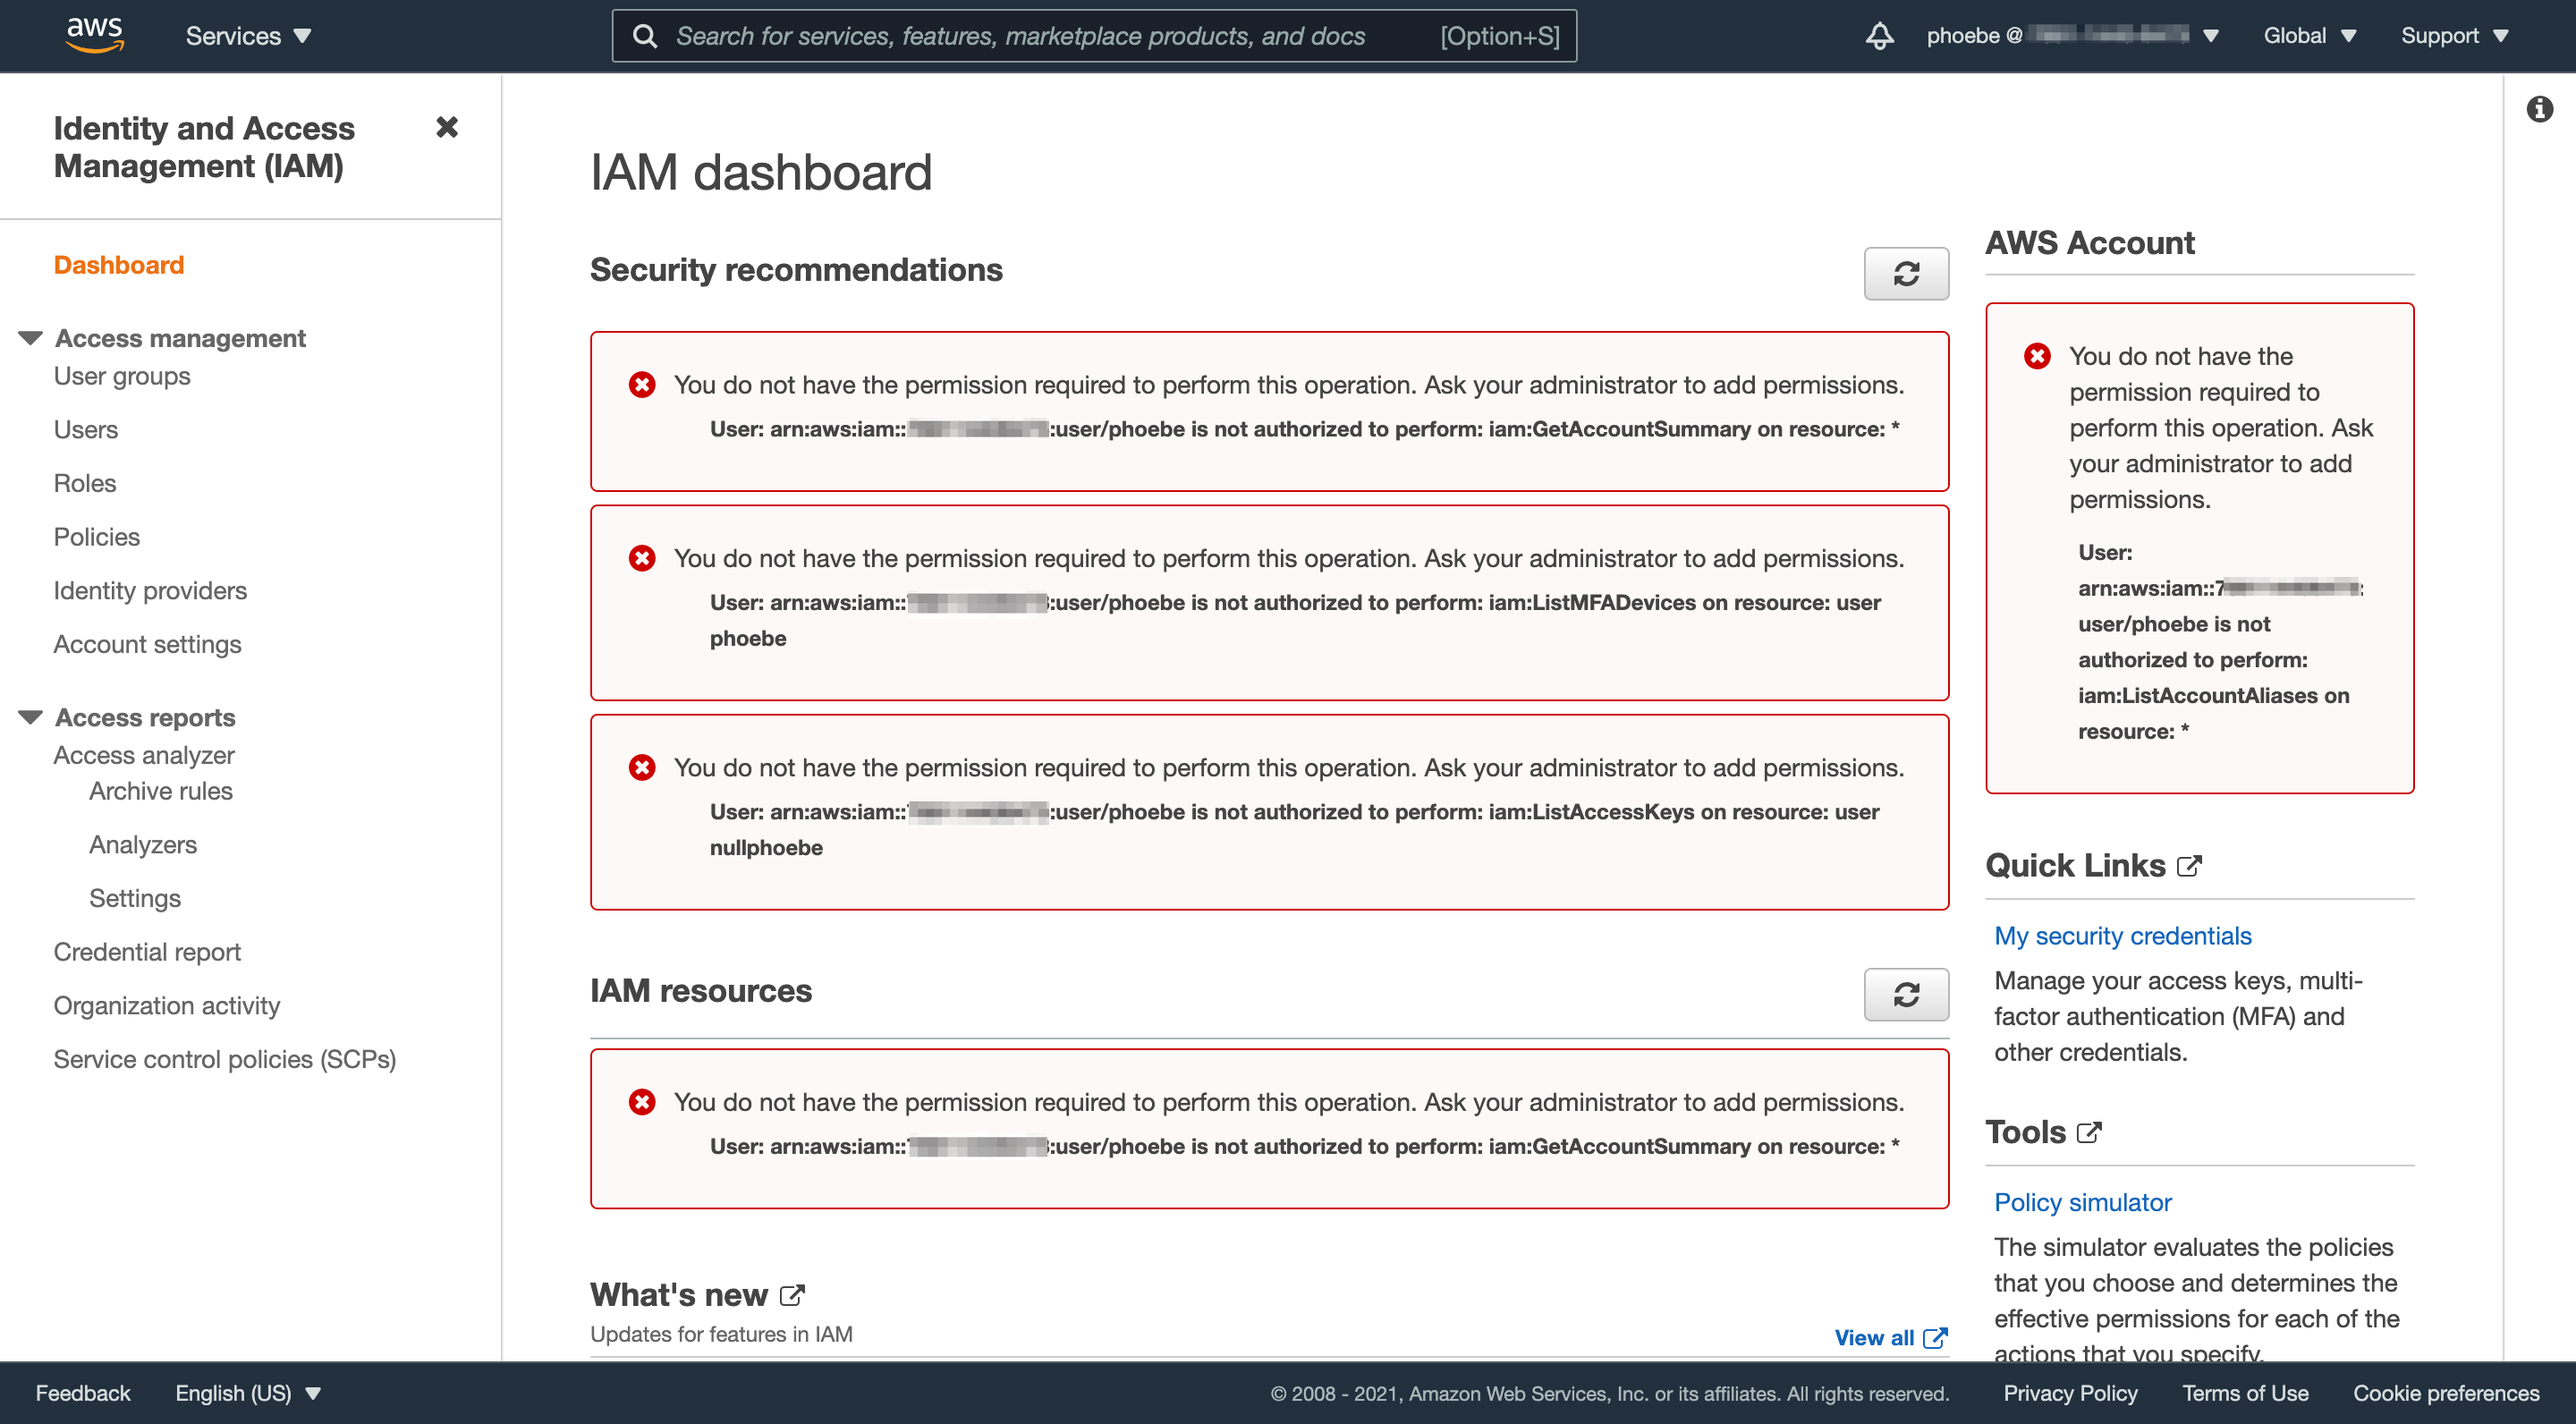
Log out of the root user account and log into the administrator account you created earlier. Navigate to the Identity and Access Management (IAM) section
You’ll see a bunch of red error messages because you no longer have permission to do anything in AWS, other than assume a role called admin-mfa. Other than that, all you can do is log in.
To switch roles, click your username in the upper right to activate the dropdown.
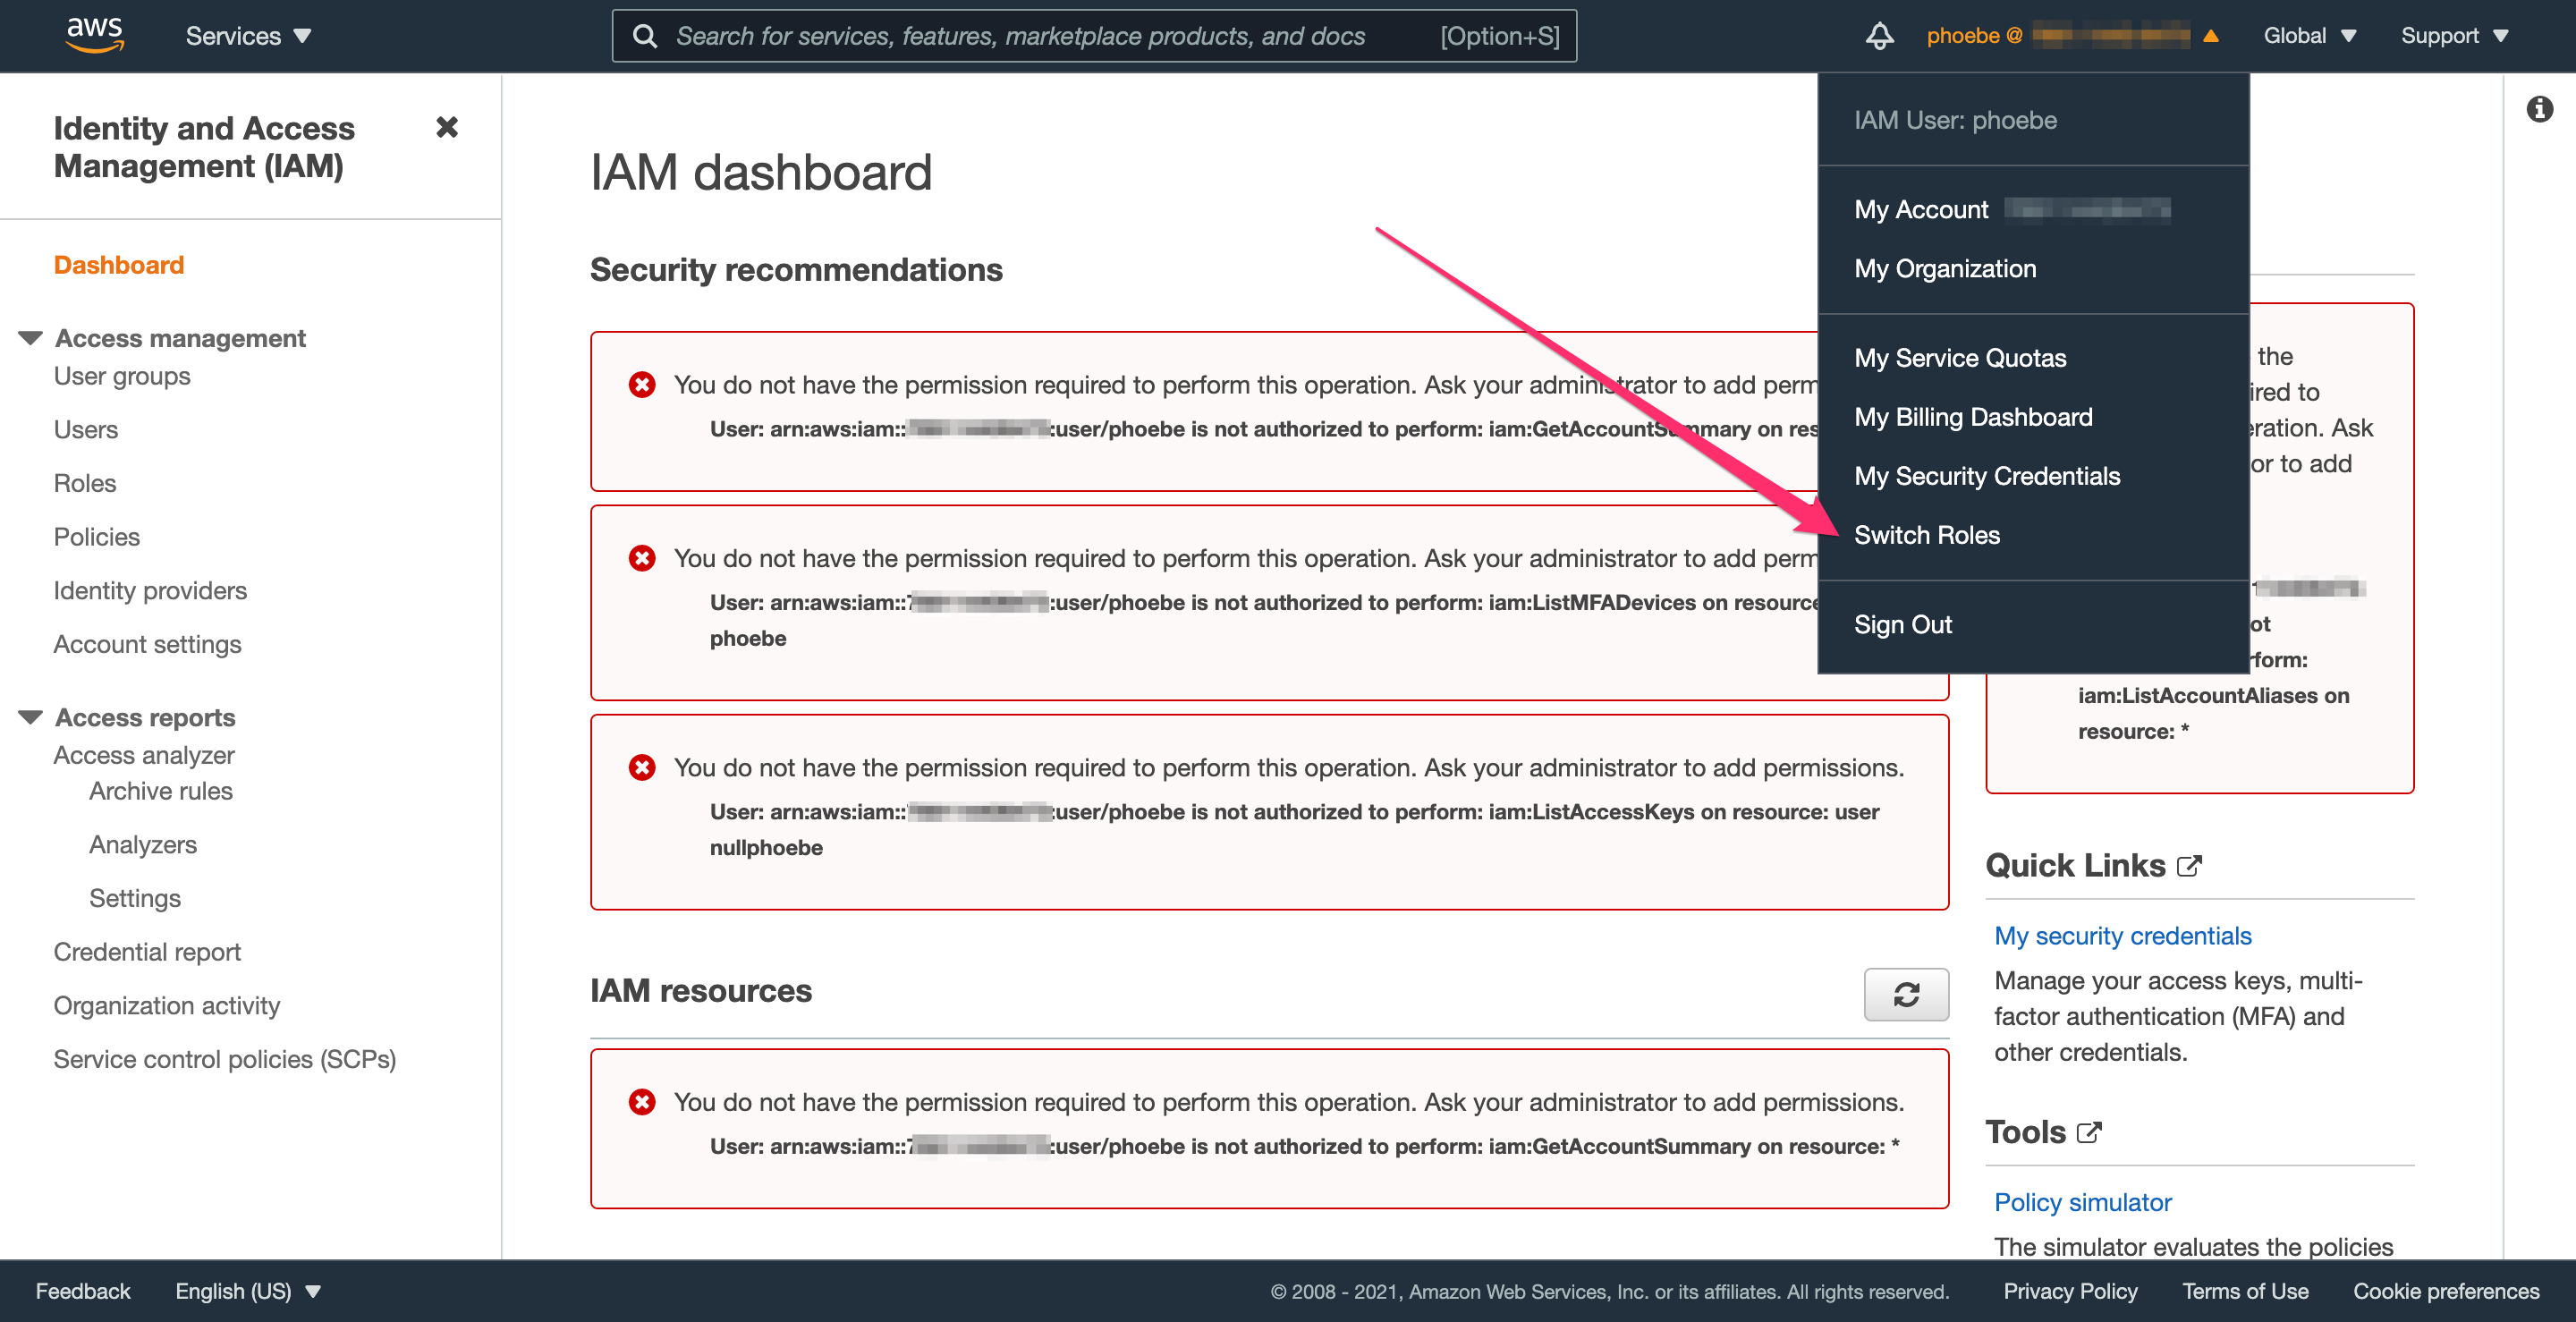
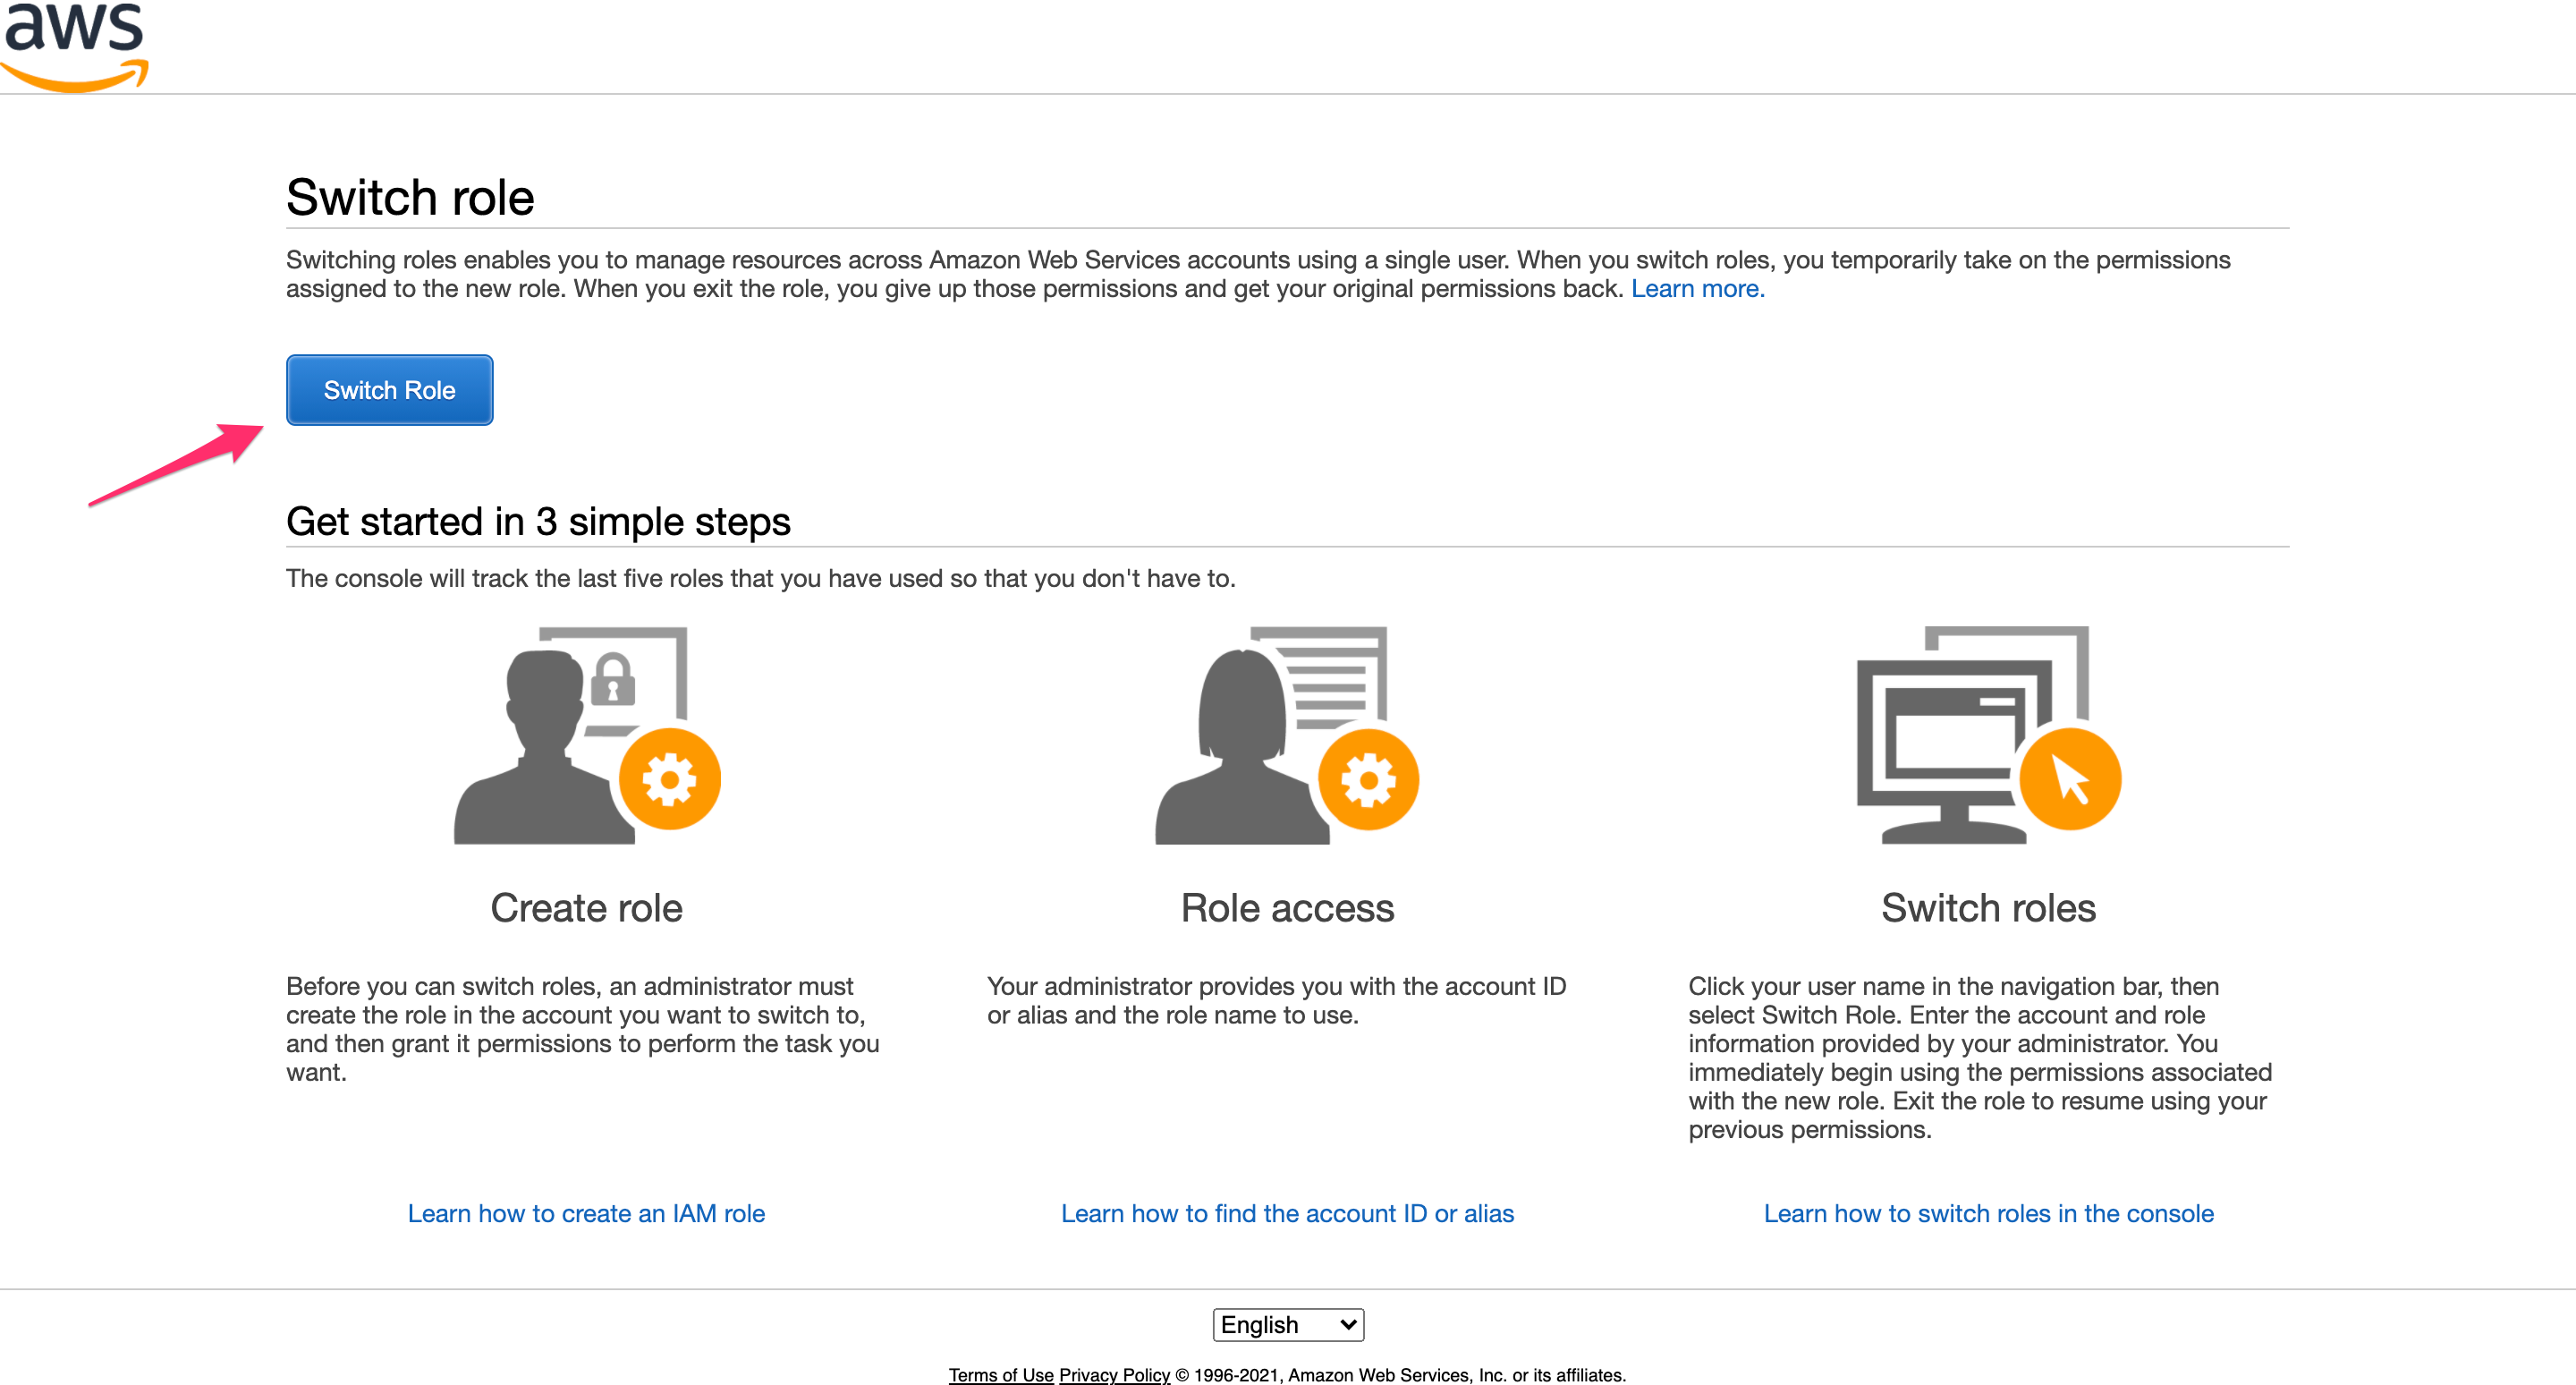
Click “Switch Role”.
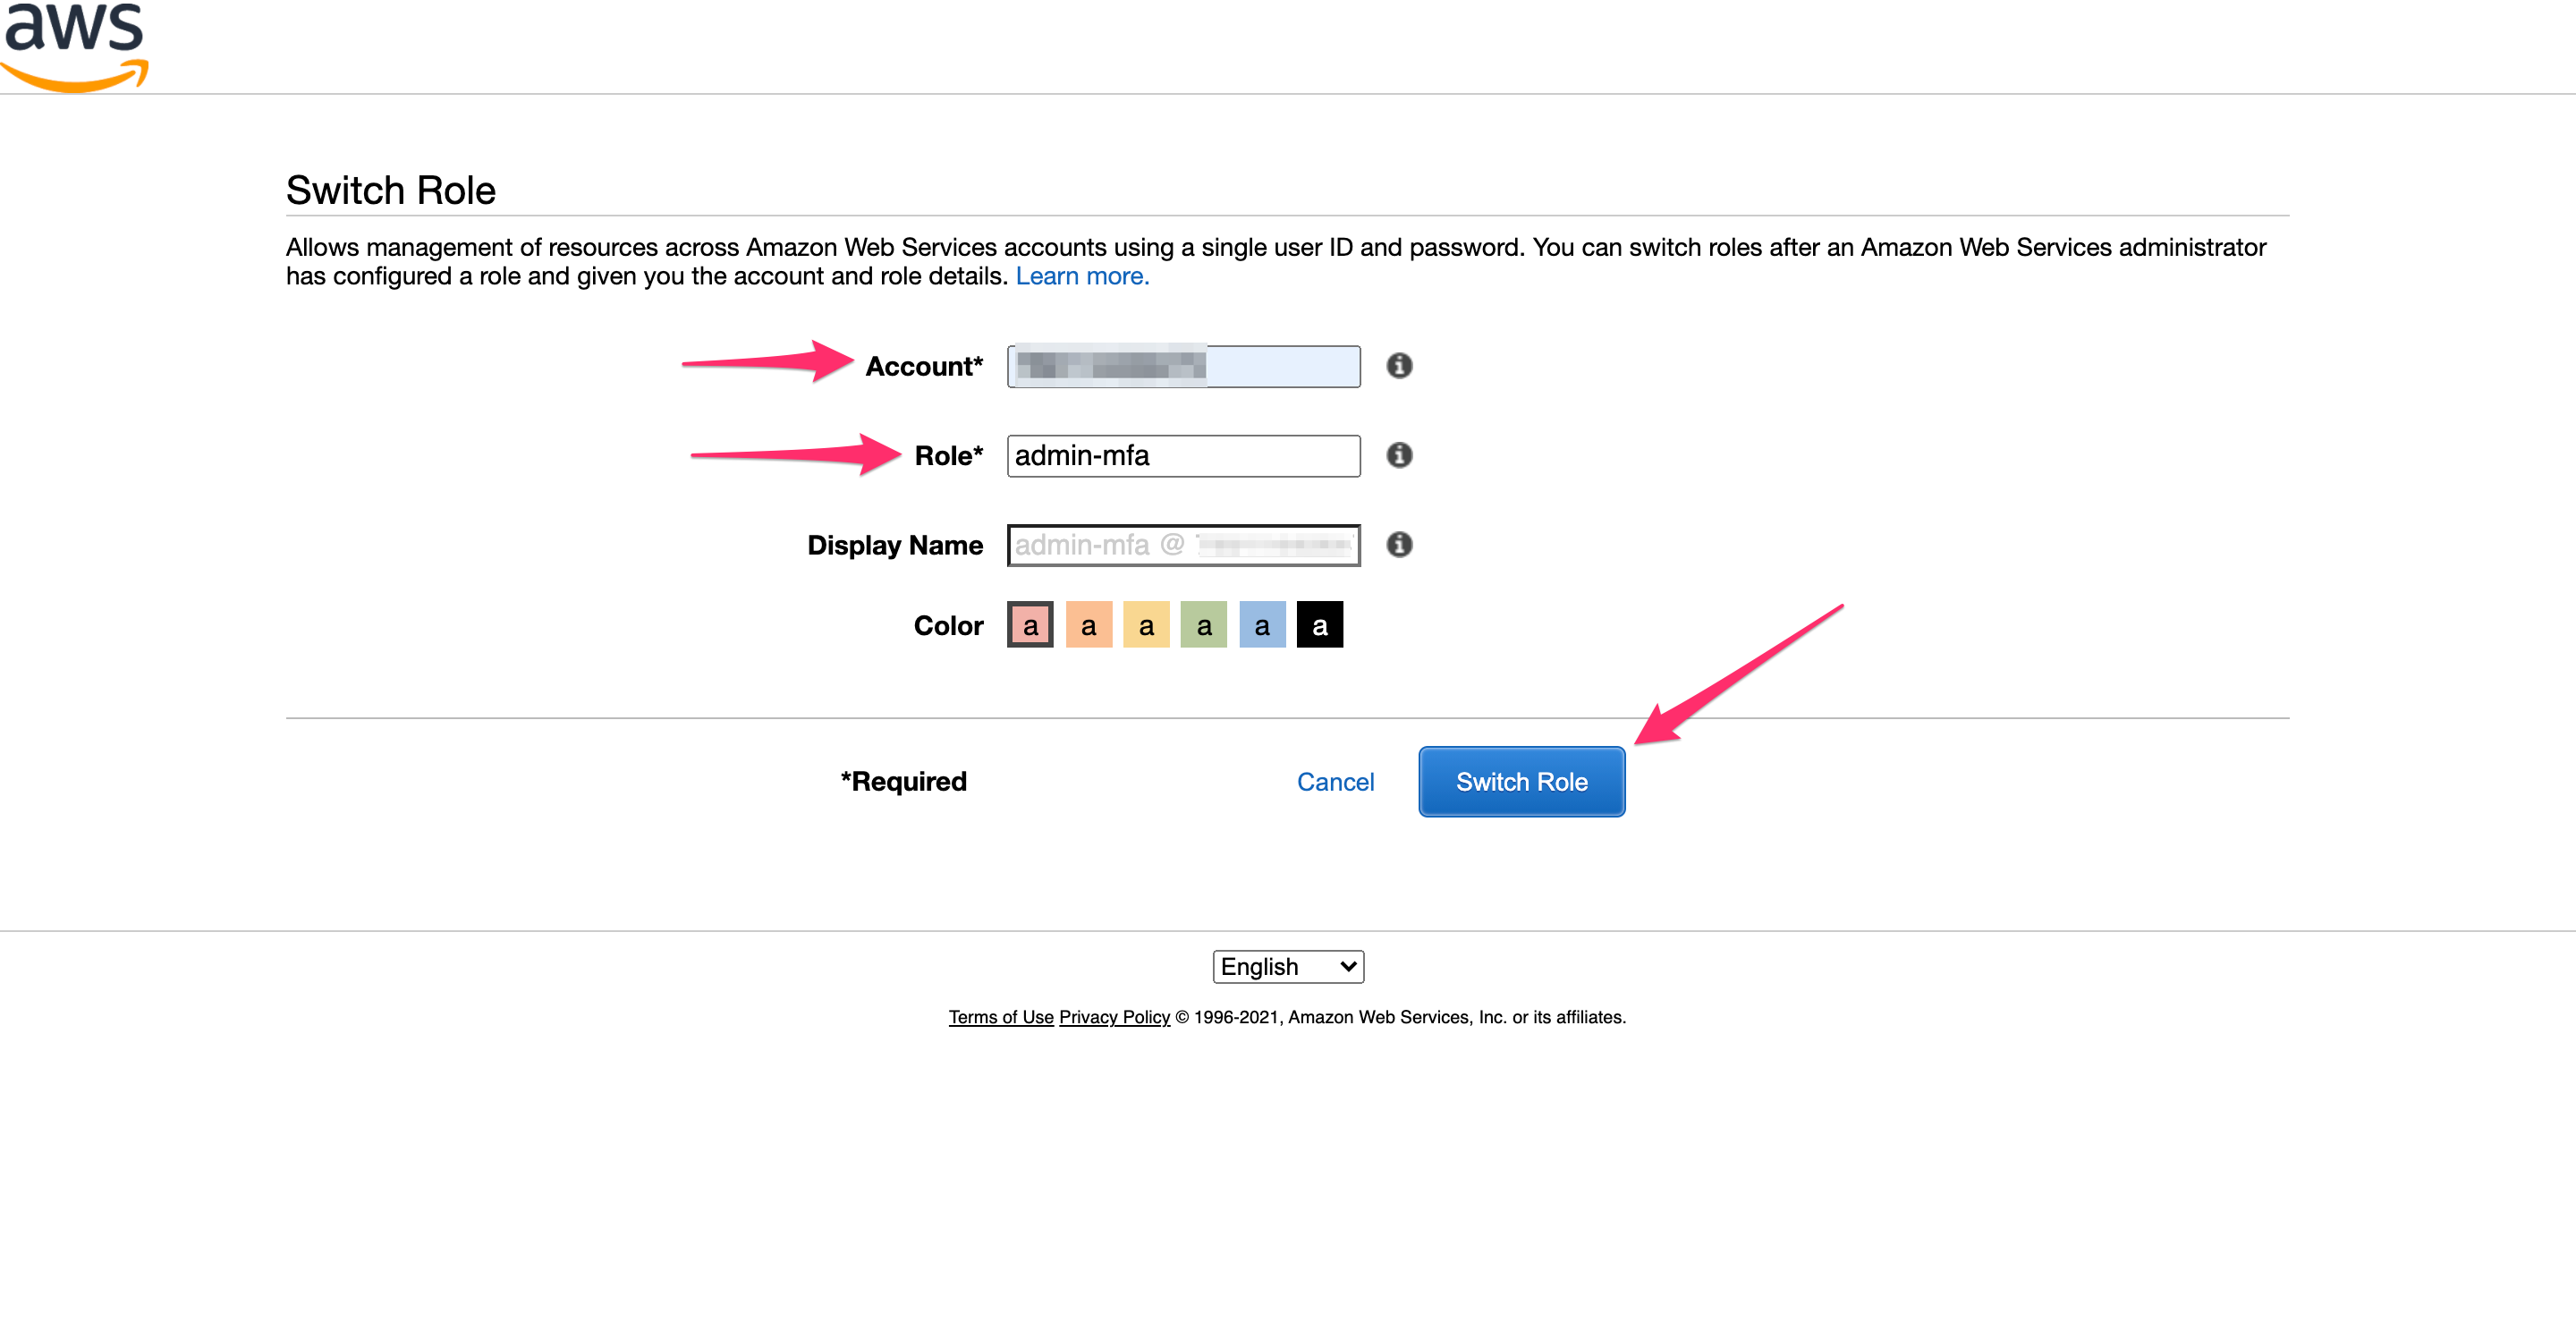
Enter your account id and the role admin-mfa, then click “Switch Role”.
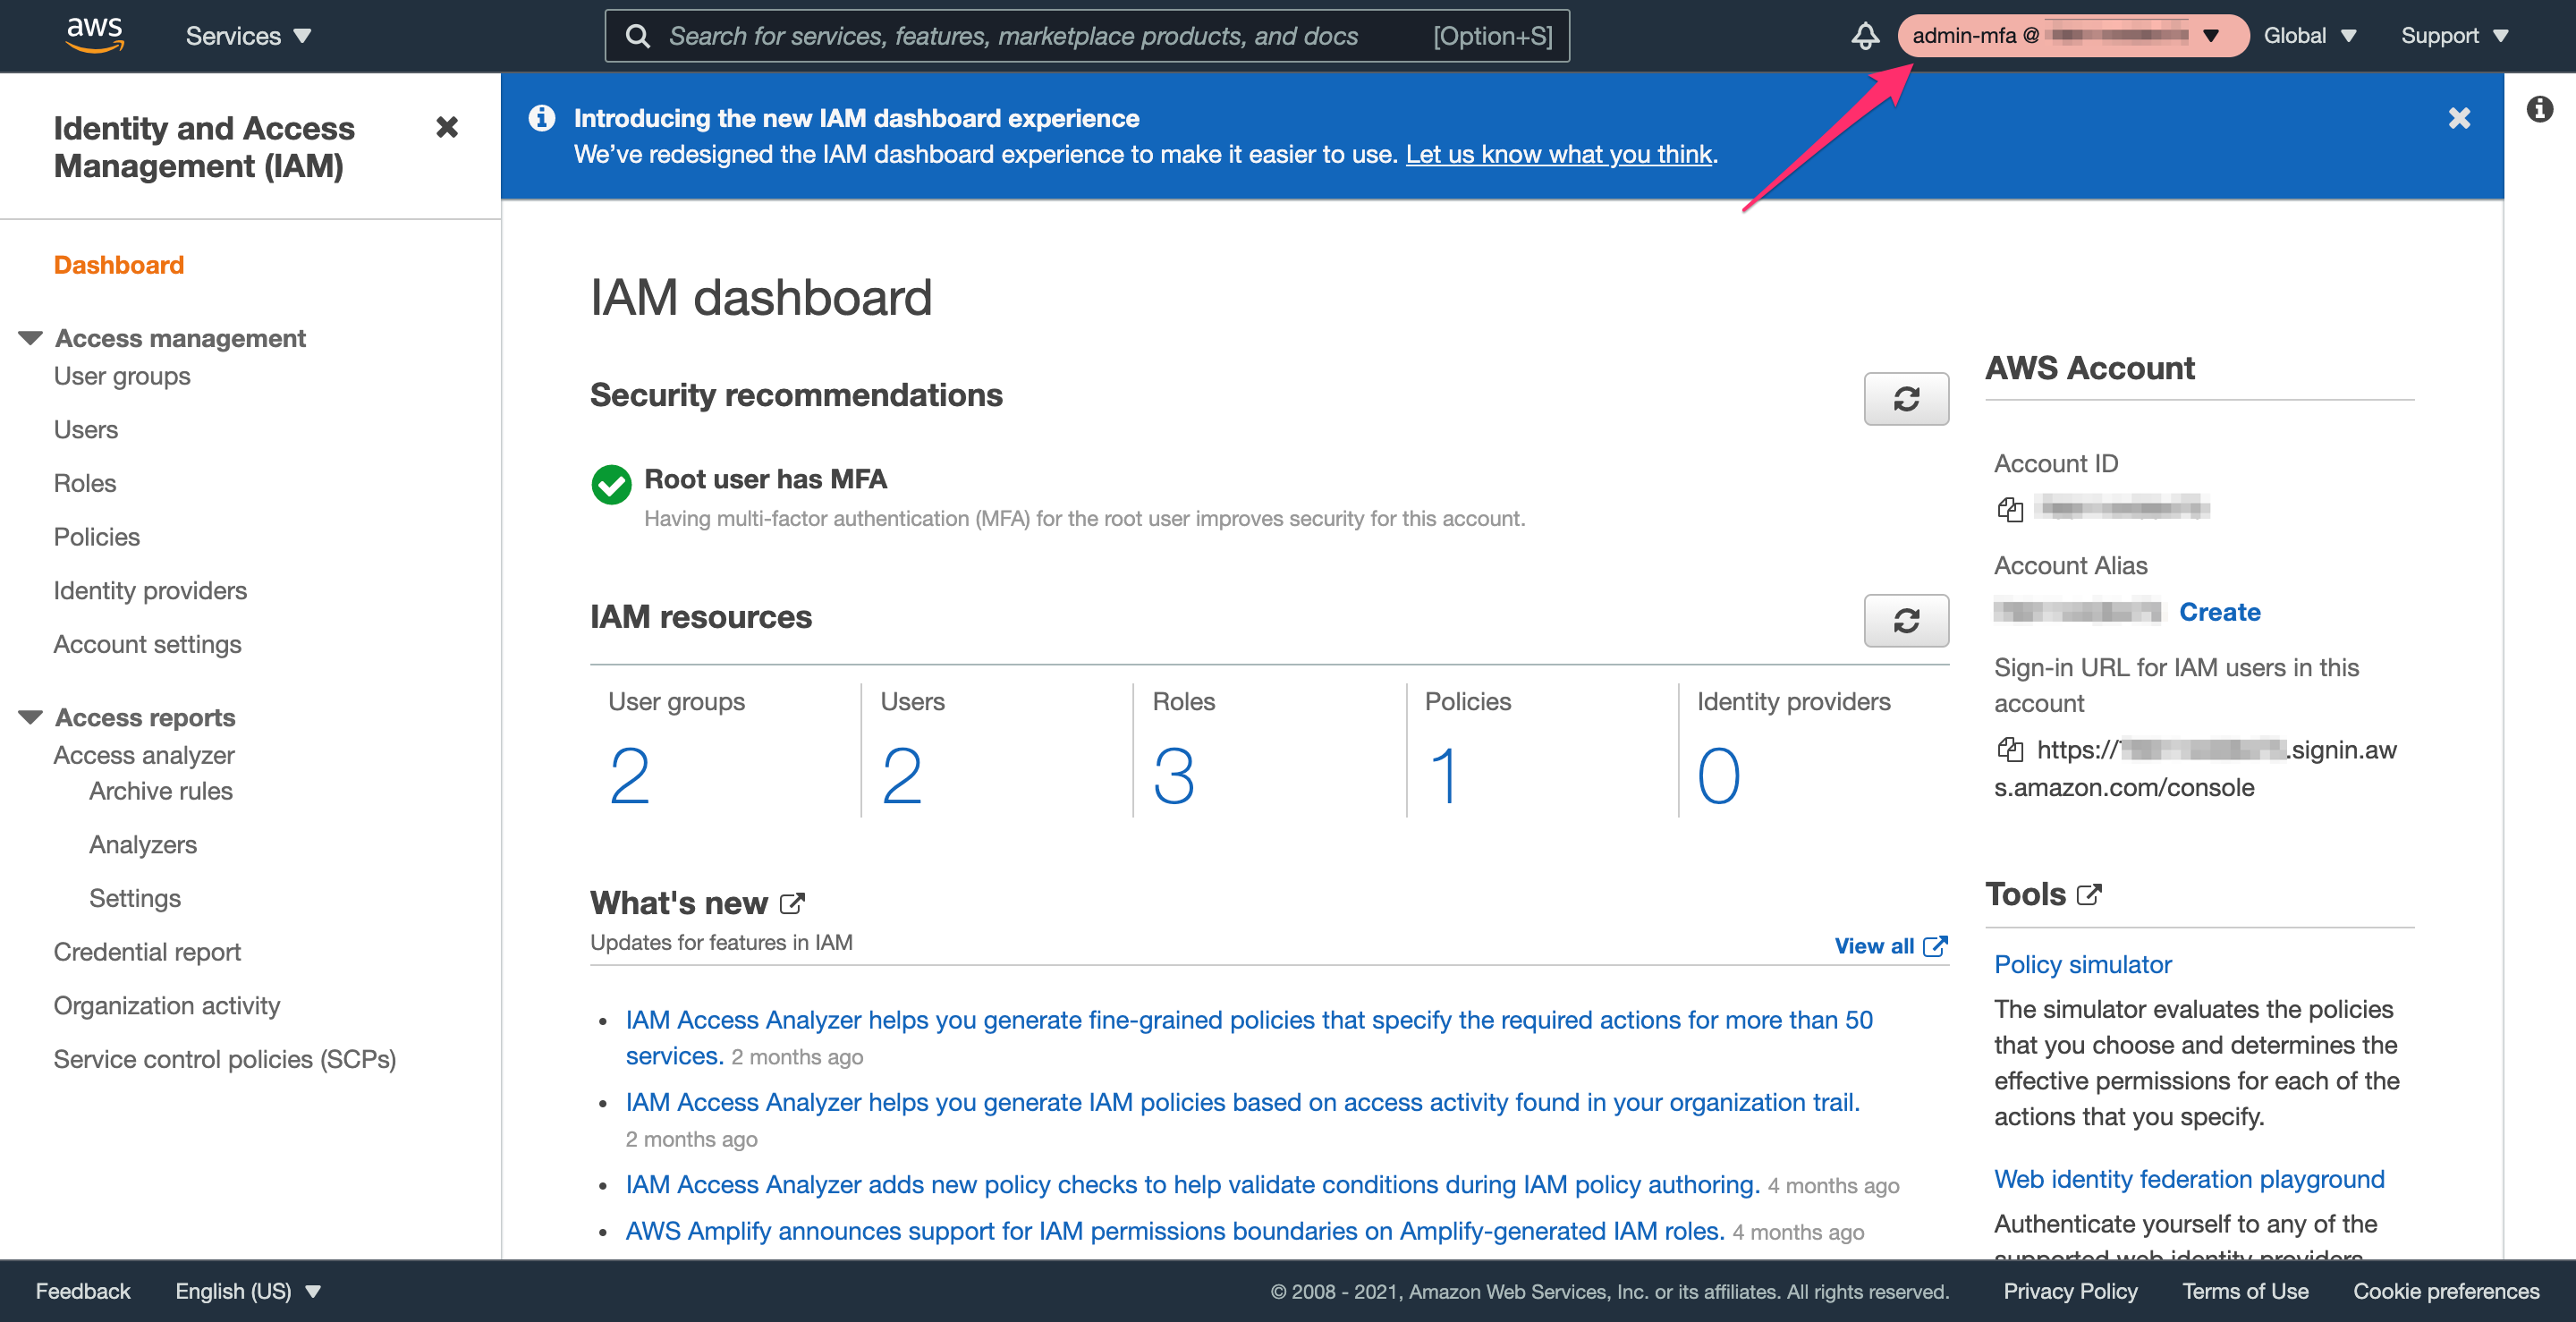
You’ll be redirected to the IAM console, and you’ll no longer see errors and red text boxes. Notice in the upper right that it now says admin-mfa @ <account id> rather than your username, which means that you’ve assumed the admin-mfa role.
Summary
In this guide, you learned how to:
- Create an AWS account with a root user
- Secure the root user with multi-factor authentication
- Create a user group with administrator permissions
- Create a non-root user, secured with MFA
- Create an admin role for users to assume, rather than always having admin permissions
Next Steps
Now that you have a secure AWS account and a safe way to perform administrative tasks, the next step will be deploying infrastructure in the cloud. You can create resources in AWS through the console, but it’s slow and error-prone. As an alternative, you can use the AWS Command Line Interface (CLI) to interact with AWS from the command line instead of the website. Taking that one step further, you can use Terraform to manage your infrastructure as code and deploy it in a safe, reliable, and maintainable way.